Finally I Mastered Crispy Kale

Kale Crisps Success!

A bag of kale, reduced down to 20p, was the last thing I bought before I received a notification from the Covid-app informing me that I had been in close contact with somebody with Covid-19 and I had to self-isolate for the next 8 days. So at 6.11am that morning I sent a message to cancel a run with my friend that morning, emailed my work to let them know and we did some rescheduling gymnastics so that I could work from home. Isn’t it odd that a bag of kale holds this memory for me now.

To be honest, I didn’t mind staying at home. My housemate didn’t have to self-isolate so she could get groceries for me and update me on what was happening in the realm outside of the front door. That is an odd detail, I know. I don’t fully understand the track and trace system we have in England. We figured out that my phone must have picked up something on my 20 minute train journey to work. Commuters who don’t wear their masks properly or socially distance appropriately stress me out. I was happy to temporarily cut out that bit of stress from my life.

I still had leftover pumpkin, lentil and goats cheese salad in the fridge, so I decided that for dinner that night, I’d crisp up kale and add it to the salad. I had only just mastered it the previous week whilst making a roasted squash risotto with crispy kale.

The goats cheese, pumpkin and lentil salad with crispy kale

I have been trying to make crispy kale for about 8 years and failing each time. Somehow, I had it in my head that I had to bake the kale at a low heat and so each time it would just come out soggy and burnt: an odd combination. This was due to the fact that I had first read about crispy kale in a post by Gwyneth Paltrow that also told me how to make oven dried tomatoes and either the recipe is actually wrong or I got confused between the two recipes. Then it was compounded by other recipes which told me to bake at a low temperature for 15-20 minutes. Instead, this roasted squash risotto with crispy kale recipe told me to preheat the oven to 230°c for the baking of the kale. I read that instruction twice to check and it worked.

Top Tip: the secret to crispy kale is a short baking time in a hot oven and dry kale.

Yes, once you’ve chopped and washed the kale, leave it to dry in a colander, or even better a salad spinner, for a while then spot dry it with a clean tea towel. This saves your tea towel from getting completely soaked. That is, unless you happen to have a bag of already prepped and washed kale.

Ingredients for Oven baked crispy kale, adapted from the Cooks Cook recipe

This will feed between 2-4 people.

  • 160g Kale
  • 1tbsp Sunflower/rapeseed or vegetable oil (depends on how much kale you have)
  • Salt and pepper to season, maybe a 1/4 tsp of each.
  • 1/2 tsp – 1tsp Paprika/Cayenne pepper/Chilli flakes or whatever spices you’d like (optional but highly recommended)

Method

  1. Preheat the oven to 220°C/425°F/Gas Mark 7 and prepare two large baking trays.
  2. Prepare the kale. Cut the kale, 2-3cm long. Remove any particularly tough bits of stalk, nearer the bottom of the kale. As you can see from the photos, I don’t really bother that much with removing the stalks because I don’t mind the extra bite. Wash the kale to remove any dirt. Leave it to dry in a colander or alternatively use a salad spinner. Then use a clean tea towel or paper towel to spot dry the kale so that it is as dry as possible.
  3. Add the kale into a large mixing bowl. Sprinkle over the oil, salt, pepper and any optional spices and massage in to make sure that each leaf has been coated. I prefer to do this part in a bowl because I find it gives a more even coat than when I do it on a baking tray. However, if you want to save on washing up, do this step on a baking tray.
  4. Lay out the kale in a single sheet as much as possible. This prevents steaming and sogginess. There will be a bit of overlap, don’t worry.
  5. Bake between 8-10 minutes so that they crisp up and are a mix of darker green and brown. Some leaves will get browner than others. I think that’s okay but if you want a more even crisp, then halfway through the baking time, move the leaves around.
  6. Leave it out on the baking trays to cool a bit before munching on it. It can be eaten on its own, added to a salad or a risotto for extra texture. Enjoy.
First, cut, wash and dry the kale
Coat with oil, sprinkle with salt, pepper and optional spices. This one has paprika. Then lay out on a baking tray

Roasted Brussels Sprouts: a game changer

Roasted brussels sprouts

Here’s a seasonal recipe for you, perhaps not the sweet one that you were hoping for this Christmas from me. If you like brussels sprouts or are somewhat ambivalent about them, do me a favour and give this recipe a go. I had boiled ones the other week at my work cafe as part of a Christmas lunch, and to be honest, I was a bit disappointed by their lack of imagination with this humble vegetable, given that they teach culinary skills.

I’m obsessed with roasted brussels sprouts. I first made them 3 years ago and they were a game changer. Roasting them brings out a nutty flavour somehow that you do not get when boiling or frying them. And texturally I find it really pleasing: soft but not soggy. Another bonus to roasting is that there is no bad smell when you cook them, although at the other end, I can not promise that the gasses will smell any sweeter.

Since being back in the UK, I have discovered that roasting brassica is my favourite way of cooking and eating them. Bold statement, I know. But so far, it holds true.

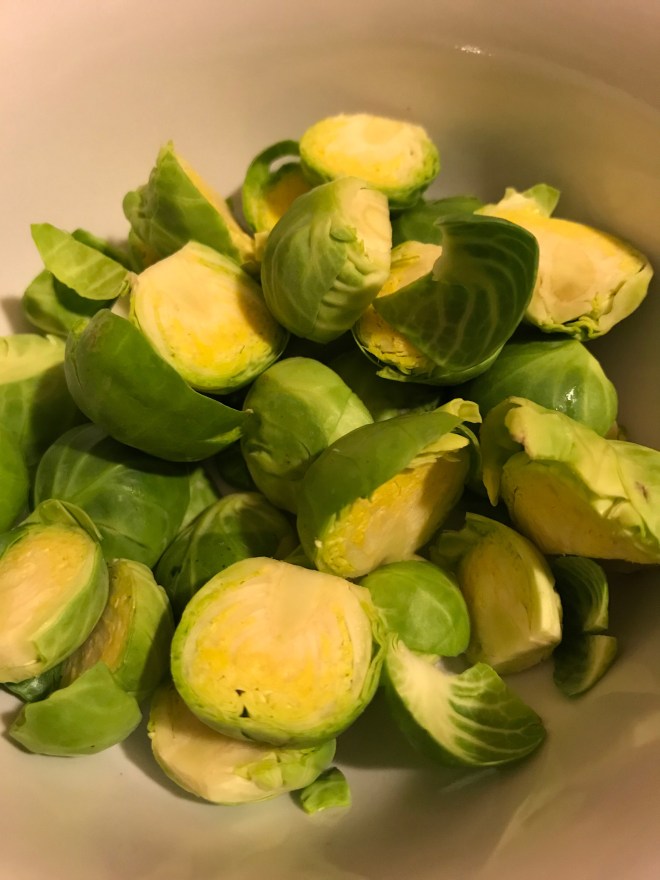
Brussels sprouts prepped with the bottoms sliced off and halved.

I have not given you quantities. Sorry. I have never measured out this recipe and now I’ve become that recipe writer who might say to you annoyingly, add a glug of olive oil and if you’re like me, you’d get peeved with them because how many millilitres is there in a glug of oil? Nevertheless, the only thing I can offer by way of excuse is that I have never measured this out because I always vary the amount of brussels sprouts depending on the number of people. I believe I think that 8 brussels sprouts per person is normal, based on the photo at the top, but then again, I do really love brussels sprouts.

Ingredients for roasted brussels sprouts

  • Brussels sprouts (however many that you’d like)
  • Olive oil (enough to coat the brussels sprouts)
  • Salt (to season)
  • Pepper (to season)
  • Chilli flakes (optional)
  • Juice of a lemon (optional)

Method

  1. Preheat the oven to 180°C/350°F/Gas Mark 4.
  2. Slice the bottoms off and halve them.
  3. Place cut side down on a baking dish.
  4. Sprinkle with olive oil and season with salt, pepper and if you want, chilli flakes.
  5. Bake in the oven for 20-25 minutes. Check halfway and shake them around a bit. If you forget this bit, don’t worry, there will be a bit of charring on some, but that tastes alright too.
  6. For a tangy finish, squeeze a bit of lemon juice over them at the end.

One of my friends recommended adding a drizzle of honey with chilli on them before baking them for additional flavour. That is a new twist that I’ll try this season.

Incidentally, I have also discovered whilst writing up this post that I’ve been spelling brussels sprouts incorrectly all my life, as brussel sprouts. Well, now I know.

What is your favourite way of cooking and eating brussels sprouts?

Lockdown Hair: #growingoutaPixieCut

When are the hairdressers going to be allowed to reopen? What am I going to do about my hair?

I heard this a lot during the 12 week lockdown earlier this year. It appears that managing our hair growth was something all of us bonded over during lockdown. I think that I’m not alone in wanting to have hairdressers classed as essential services that can continue to stay open if we go into tighter restrictions, or dare I say, another national lockdown.

Perfect hairstyle in a tropical climate

By the way, I don’t normally like to post photos of myself on my blog, but I’ve taken the plunge for this post because I couldn’t see a way out of it. Anyway, this is me in my final few weeks as I’m having one of my goodbye *sob sob* lunches with friends. I think I’d recently had a hair cut.

About 4 years into living in Cambodia, I was finally brave enough to get a pixie cut.

It turned out to be perfect for life in a tropical climate, albeit at that point viewed upon as an unusual hairstyle for a female. In Cambodia, there is a custom of shaving one’s head when there has been a terrible tragedy. Normally you’d see the eldest in the family do this when there had been a death in the family. Thus when some of my Khmer friends saw my pixie cut for the first time, they thought that I had received some awful news and was very upset. Not so. There’s an interesting cross-cultural difference titbit for you.

growing out a pixie cut

I was still pretty attached to my pixie cut after I left Cambodia. It was one of the ways I could hold onto a remnant of me in Cambodia. Nonetheless, come May 2020, I asked on Instagram:

‘This is annoying. Maybe it’s time to cut my fringe myself or shall I endure growing it out?’

Most replied: grow it out.

Then in June 2020, I wrote a little ode to my pixie cut, which I’ve revised a little here.

Dear Pixie Cut,

Dear Pixie Cut,
It’s been a long time since we saw a hairdresser.
Now you tuft out at the back,
You get in my face when we run,
We can’t decide what to do about the fringe,
And you tuck beautifully behind my ears.

Is it time for us to part, move on and let you grow out?

Can I hold onto you for one last cut?

Finally it's a bob

In July, I was finally able to book an appointment with the hairdresser. I wrote a haiku.

4 months in lockdown.
#Growingoutapixiecut
Turned into a bob.

Yes, I decided the time had come to say goodbye. And honestly, I was alright with it. Time, eh. There’s no substitute for it being a healer.

By the way, are hashtags in poems allowed? Are they a thing?

Fudgy Chocolate Brownies: infinitely adaptable

Experimenting with peanut butter and salted caramel brownies.

Recently, I was asked in an interview, “what do you contribute to a team?” The first thought that popped into my head was brownies. However, perhaps that wouldn’t be such a professional way to answer the question? So, instead I answered something about how I am a really good team player and the many different skills I’d bring to the team, rather than saying that my contribution is a baked sugar high laden with chocolate. I meant to mention my excellent brownies at the end as an aside, but I forgot.

Immediately once the interview was over and as I reflected on how it went, I wished that I had led with the brownies though because it would have revealed more of my true self. My flatmate and colleague concurred (now assigned to the status of previous flatmate and colleague: that teaching job contract having just ended and we’ve moved out). Though, we then agreed in the next breath that my crack cookies are my best work. So, another time, I’ll be that little bit braver, relax and say, “brownies and cookies.”

The first time that I made these during lockdown was at the beginning of marking many, many student essays whilst living at my sister’s. I’d broken a personal record and spent 5 hours on a paper, checking for plagiarism and looking up citations, and still hadn’t finished it when thoroughly fed up and discouraged, I decided to put it down until the next day. A WOD (workout of the day) with 100 burpees and an evening spent singing, baking these brownies put me in a better mood. I left it out on the side to cool down and develop even more flavour overnight. My sister said that her contribution to my happiness was not diving into them that night. I shared a photo of them on a work group chat and subsequently made friends with a colleague who wanted the recipe.

Pretty Raspberry Brownies
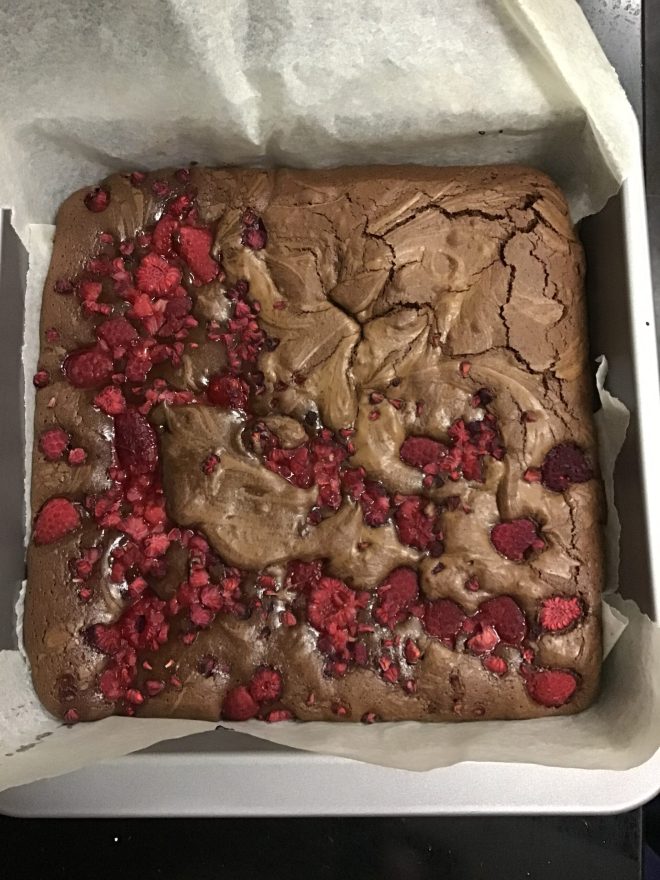
The raspberry burst brownies which fuelled the essay marking

Awkwardly, I didn’t have the recipe at hand to share. It lived in the form of an excel spreadsheet, a hangover from my baking business days. Instead, I sent her a link to my raspberry burst brownies and made a mental note that it was time to publish this recipe.

I created this recipe in Cambodia whilst supplying brownies for a cafe because I wanted to create a brownie with more height and volume that I could adapt with a variety of fillings, such as cheesecake and salted caramel. In addition, my usual go to, very easy brownie recipe which the raspberry burst brownies are adapted from suddenly stopped working for me after I upgraded my oven. They were coming out cakier. Some people prefer their brownie consistency like that but I much prefer them to be fudgier with that delightful cracked top. The timing of it might have been purely a coincidence and have nothing to do with me switching from one of these electric toaster ovens to a standing oven cooker. I’ve shared the only decent photo that I appear to have of my toaster oven for you. If you’ve always lived in the UK, then you may have no concept of what I’m talking about. In most parts of S.E Asia, ovens do not come standard in a furnished kitchen. This is the oven in which I began my baking business and I used it for the first 2 years. It only allowed me to do one tray of cookies, a cake or brownies at a time and by the end it wouldn’t heat above 150°C. When I moved and invested in a new oven, it was a game changer.

My toaster oven that lived on the floor
My toaster oven lived on the floor. I’m piping coconut churros.
my new oven
I moved apartment and my new oven fitted into this space perfectly. This was taken the day the oven was delivered and fitted. If you look carefully you can see I had to buy extra long wiring because the power socket was on the other side of the room.

Anyway, it gave me an excuse to try out a new brownie making method for me that I’d seen Ed Kimber use in this video in which you mix the eggs and sugar for about 10 minutes until they form into a ribbon stage (I’ve explained what ribbon stage is in step 4 of the method) and then add the melted chocolate and butter. Mixing the eggs and sugar for that long, creates volume and structure and I deduced, would help me create that dense fudgy consistency and crinkly top each time. It did. At the bottom of the post, I’ve also included for you, a few photos of the different flavours that I’ve played with and how I’ve adapted them.

I played around with the sugar quantity. Most brownie recipes ask for larger quantities of sugar, but I’ve always liked the challenge of seeing how little sugar I can add to baking and it still taste good. From experience, 150g is too little but anything between 200-230g is perfect. I’ll adapt it depending on the additional flavours I want to add. For example, with salted caramel, I use less because of the added sweetness from the caramel. With raspberry I use more to counteract the tartness of the raspberries.

Brownies components ready to mix together
All the components ready to mix together

I prefer to make these in a stand mixer using the whisk attachment because it is easier to leave the stand mixer running during the egg and sugar whisking part whilst getting on with other tasks, rather than holding an electric hand mixer for 10 minutes.

Top tip 1: if using an electric hand mixer, place a tea towel underneath the bowl to keep it stable and stop it moving around.

Top tip 2: once baked, leave these to cool down completely, cover and place in the fridge overnight. Not only will they taste better as the flavours mature and deepen, but they will also be cold. Cut them with a sharp knife and you’ll get those beautiful clean lines.

So here’s the recipe for the Infinitely Adaptable Fudgy Chocolate Brownies. They’ll make between 12-16 brownies or 20 mini brownie bites.

Ingredients

  • 150g unsalted butter, cut into small cubes
  • 150g dark chocolate (at least 60%), broken up, roughly chopped
  • 3 large eggs
  • 200-230g caster sugar (depending on how sweet you’d like them and the additional flavours you want to add)
  • 100g plain flour
  • 20g cocoa powder
  • 1/2 tsp of salt
  • 1 tsp of vanilla extract
  • 1 tsp of instant coffee granules (optional) – I use it because it helps bring out the chocolate flavour
  • And then whatever flavours* you’d like to add, or not.

Method:

  1. Preheat the oven to 180°C/355°F/Gas Mark 4. Line a deep tin. For this quantity a 20cm square tin or a rectangular 27×20 or 28×18 will work.
  2. Melt the chocolate and butter together and just after it has melted, add in the salt, vanilla extract and the optional instant coffee granules and leave it on the side to cool down. There are various ways you can melt chocolate and butter.
    • The more cautious, ahem proper, approach is to use a bain marie, that is put the butter and dark chocolate in a heatproof bowl that can sit on top of a saucepan with simmering water. Make sure that the bottom of the bowl doesn’t touch the hot water in the saucepan. Slowly melt the chocolate and stir regularly. This way you won’t burn the chocolate.
    • Another easier way is to use the microwave. Put chocolate and butter in a heatproof bowl, place a paper kitchen towel on top of the bowl so that butter won’t pop out as it melts. Melt it in 20 second bursts, stirring each time.
    • My way, is to use a heavy bottomed saucepan. I put the chocolate and butter in it and melt it at a low heat, stirring regularly. I take it off, just as the last few chocolate/butter bits aren’t quite melted because they will melt in the residual heat of the saucepan.
  3. In the meantime, measure out the flour and cocoa powder into a small bowl. Sieve it if there are lots of lumps in the flour and cocoa. Otherwise, use a whisk to loosen and mix them together.
  4. As soon as the chocolate/butter mixture is off the heat, crack the eggs into a medium sized bowl and add the sugar. Use a stand mixer or an electric hand mixer on high speed to start whisking the eggs and sugar until they are at a ribbon stage. Ribbon stage is when the egg and sugar mixture are a pale yellow colour, doubled or even tripled in volume and when you lift the whisk over the mixture, the batter will fall slowly and leave a trail like a ribbon that will hold its shape for a few seconds. It will take about 10 minutes. I still use a timer to make sure I beat them for long enough. Don’t start beating the eggs/sugar until the chocolate/butter has melted because the chocolate/butter mixture needs this time to cool down.
  5. When the eggs and sugar have reached a ribbon stage, reduce the speed to low and add the melted chocolate and butter mixture to the eggs and sugar. Whisk until it all appears to have mixed together. If you are using an electric hand mixer, you may need to turn off the mixer, add the chocolate/butter and then switch it back on again to avoid a mess. I speak from experience, haha.
  6. Now fold in the flour and cocoa powder using a spatula, or a spoon until it is well combined.
  7. Pour into the baking tin.
  8. Bake in the oven for 18-20 minutes. They should be firm to touch at the top but still wobble when you shake it. Leave to cool completely in the tin and if you can bear it, cover them and leave them overnight in the fridge. They will be easier to cut and the flavours will have deepened.

*You can add various flavours to this, or not if you want them plain. I’ve given you a few of suggestions and photos below. Do let me know how else you adapt them.

For raspberry burst brownies 2.0, I add 90g of raspberries. I mix in half before I pour it into the baking tin and then scatter the remaining half where there are spaces.
For raspberry and white chocolate, do the above and add 100g of chopped white chocolate. Mix half the chocolate into the batter with the raspberry and then fill the spaces with the remaining 50g.
Walnut Brownies
For nutty ones, I use 100g of nuts. For this one, I’ve used walnuts. I pick out 12-16 walnut halves to place on top for evenly then roughly chop and mix in the rest to the mixture before I pour into the baking tin and then place the remaining walnut halves on the top.
Salted Caramel and Hazelnut Brownies
For hazelnut and salted caramel. I made these to use up leftover ingredients as I was packing to return to the UK. Use 100g of roughly chopped hazelnuts and 100g of salted caramel. I mixed in half the hazelnuts into the mixture, then after I poured it into the tin, I blobbed salted caramel with a teaspoon evenly and scattered the rest of the hazelnuts over the top.
Swirls of cheesecake in brownies
Swirled cheesecake brownies, but I’ve realised that the salted caramel and the cheesecake ones are a little more complicated, so I’ll post those recipes another day.

What happened next with that interview? How many points have I accumulated? In this current job hunting cycle, I racked up 103 points. Incidentally, I got offered that job, even without the promise of these brownies. So, I’m currently in the throes of transition once again and relocating down to the Midlands.

How to stay motivated whilst job hunting: the points system

Edit 3 days later: almost immediately after I pressed publish, I wanted to amend the title to, Staying Motivated whilst job hunting. My way of acknowledging that this is but one method, amongst many.

“How many points do I get for a pre-interview task?” I asked this question to my flatmate, colleagues and sister yesterday. “1.5”, “10”, “more than for an application”, “I don’t know, you decide” were the varying responses that I received.

I like things to be fun. I find that harder, more difficult tasks and times are more bearable when there is laughter. And job hunting in Covid-19 times is tricky and admittedly, depressing.

When I got back from Cambodia last October, I didn’t want to start looking for work straightaway. My right foot and leg were still causing me significant pain, I was emotionally and physically exhausted and grieving the loss of my life in Phnom Penh. I allowed myself time off to grieve and transition, and promised my mum that I would start job hunting after Christmas.

By that time, I had read Don’t Send a CV, that promised to give me a unique, winning strategy for getting the job I’ve always wanted. The author is American and his advice may be more suitable in a corporate setting or in the US. However, to be honest, I didn’t find the 44 chapters helpful, apart from two things. Firstly, it is always worth making an enquiry and secondly, as job hunting is a slog, he recommended a points system to keep you motivated.

I adapted it to suit me. Points mean prizes and prizes means that it’s a game. Did I mention that I like things to be fun? I also like rewards.

I’ve shared it with a few of colleagues because it helps to keep me motivated. I don’t know about yours, but my industry (English Language Teaching and Higher Education) has been hit hard by Covid-19.

I’m sharing it more widely because it’s not just us, English Language teachers, who are flooding the job market. If this is one way that helps you to keep going, then job done (no pun intended). Whatever it takes to get over the finish line, right?

1 point – finding a job opportunity (or lead as the author put it)
2 points – making an enquiry
3 points – making an application
4 points – interview
5 points – job offer or rejection*

The aim is to get 3-5 points everyday. That’s a realistic goal. I decided that you accumulate points, which you can spend on rewards. Points can rollover too, so if you apply to 7 jobs over 5 days (21 points), you could take two days off job hunting the following week. Remember it’s a marathon, so pacing yourself is important. Try it out for at least 2 weeks and see how you get on.

*Joe and Sarah reminded me that back in the day, I’d devised a simpler points system for job hunting which I’d shared with Sarah to encourage her. Rejections generated points: it helps those, like me, who may be put off putting in an application because of a dislike or fear of anticipated future rejection and failure.

I used it in my January job hunting cycle. I accumulated a total of 61 points, which I redeemed on cinema trips. I got my current job, which is just about to end. Let’s not discuss short-term contracts in academia right now.

This time, two weeks into job hunting, my current tally is 57 points. I don’t want to go to the cinema to redeem my points this time; I’d rather go on holiday. Between my friends and I, we’ve agreed that it is 50 points for a UK-based holiday and 100 points to go abroad.

So, how many points do you think I should get for a pre-interview task?

In the end, I decided that a pre-interview task is worth 4 points because it’s normally part of the interview. I’m wondering whether in these peculiar times, universities and perhaps other companies, are using it now as part of the process of shortlisting candidates, as they are being inundated with applications.

A recent early dawn photo from my room. I lose sleep when I’m stressed. Job hunting during these times is stressful.

Dear Mosquito

I am a mosquito magnet.

From my first week in Cambodia until the end, they were all over me. I used to joke that people around me didn’t need to worry about putting on mosquito repellant because the mosquitoes would feast on me first.

My bites would swell up so much that in my first month I was on anti-histamines to try to convince my body not to get so excited about them. People kept telling me that it would get better after 6 weeks. The mosquitoes would stop making a bee line for me. Nope. It took many years of constantly being bitten before my body decided that a small bump was a sufficient reaction. Then when I got dengue, I decided that I’d had enough of living with mosquitoes. But that is a story for another time.

Other mosquito poems have been published on this blog, testifying to my special relationship with them. Haha.

However, the time date on the holiday photos tell me that it was 18 months into my time in Cambodia, on holiday in Kep, that I started writing this – my original mosquito poem – and Mosquito, a haiku. I tested it out on the group at breakfast. They laughed a lot. We laughed a lot and then I slapped my arm because I’d just been bitten! I’ve tried finishing this poem a few times since but it just didn’t seem to work. This week, wanting to spend an evening, not marking student work, I finally got it out, pulled together the various versions, got some feedback on it from some of the members of the original audience. Et voilà.

Dear Mosquito

Dear Mosquito,
Regarding the note you left last night,
Notes, in fact.
Which I found
indelibly written in red.
Presumably to underline your point,
as a mark of your love.

Inflamed with lust,
Laced with a wee dram of poison,
As if to say, if I can’t have you
then no-one will.

It’s just that,
And, I don’t want to hurt your feelings,
I mean no disrespect.
But wouldn’t you agree that we appear to be quite unsuited to each other?
I don’t react well to you.
My defences go into overdrive.

Besides you’re not the first suitor
of your ilk, who has been pursuing me.

Let me explain.
Was it your great, great, great aunt
who chanced upon me?  Hmmmmmm…
Untouched, uninitiated in this
mating ritual.
A slap here, a sting there.

Did word somehow get out that I was
Prime and ready,
Sweet and easy pickings?

One after another,
persisting with their whining salutations
and affectionate greetings.
Arousing me after each visit.
You’d each leave.
Drunk on my blood.
I thought, this is my destiny.

We played tennis together.
It was electric.
You won, love/40.

I’ve clapped my hands for you.
Waited up in the wee hours of the morning to find you.
I’ve rubbed on lotions,
anointed myself with oil to
repel you.

Mosquito, explain.
What is it that you find so irresistible about me?
My bare skin?
My blood type?
My sweet scent?

Well, you leave me no choice
But to say that I have grown tired of your voice.
Wised up to your morning kisses.
The suffocating silences.
The nightly visitations.
Your methods of seduction
don’t beguile me any more.

Mosquito. 
No more.
I’m through.

Some of you have queried what I mean by playing tennis with a mosquito. Here is an example of an electric bat/racket to slay mosquitoes.

How to make Scrabble Shortbread: improvising a birthday special shortbread in lockdown

Scrabble Shortbread Tiles
Scrabble Shortbread tiles

It was my sister’s birthday recently and I asked her if she’d like a cake or baked goodie. She answered, “shortbread, if that’s possible!!” I laughed when I read the message. It didn’t surprise me. She had declared previously that shortbread was her favourite item from everything that I had baked whilst living with them, during lockdown for 3 months. The week before, I had moved out into university accommodation when lockdown measures had eased allowing me to social bubble with them.

However, how was I going to go about making it a birthday special shortbread with limited baking equipment and none of my usual baking and decorating tools?

  • Make a cake structure out of shortbread biscuit? Maybe, but I wanted to make something more personal.
  • Stamp out happy birthday with cookie cutters? I didn’t have any alphabet cookie cutters and didn’t know any shops within walking distance that would stock them. I couldn’t ask her to drive me to a shop because, well that would ruin the surprise.

So, I let the thought percolate for a night and then I hit on the idea to create shortbread scrabble tiles, spelling out Happy Birthday Ee-Reh. My sister really likes playing scrabble so this would be special and personal to her. Importantly, I figured out how I’d be able to make them by improvising with what I had in the kitchen already. So yesterday I spent a happy Saturday morning improvising baking tools and creating these shortbread scrabble tiles, whilst working out how to do my laundry in the on-campus laundrettes.

Here’s how I made the scrabble tiles, if you’d like to make them.

I searched the internet for an image of scrabble tiles and counted out how many letters I needed for my birthday message to my sister. I used my go to Fiona Cairns shortbread recipe. This blog post has a more detailed methodology, and worth reading if you’ve not made shortbread before. This time, in the absence of salted butter in my fridge, I substituted it with unsalted butter and added salt. I also accidentally softened half the butter in the microwave for 10 seconds too long, so it was a liquid goo. But it was okay because when I added the rest of the still cold butter chunks, it started to harden and sort of get to the right temperature and consistency. I used cornflour because it is more readily available in UK supermarkets than rice flour but either is fine. I resisted the urge to use a ruler (didn’t have one, haha) or measuring tape (which I do have) and eyeballed the shaping and cutting. It’s homebaking, you know, not the GBBO.

Equipment you’ll need

  • Medium sized mixing bowl
  • Clingfilm – baking paper will also work
  • Chopping board
  • Tea spoon
  • Hand mixer
  • sharp knife
  • metal or wooden improvised carving tool – I used the end of the beater. I kept thinking that a metal chopstick would have been great.
  • Metal baking tray and baking paper
My improvised cookie decorating tools

Ingredients

  • 250g unsalted butter, softened and cubed
  • 100g golden caster sugar, plus some more for sprinkling post-baking
  • 1tsp table salt – about 5g
  • 250g of plain flour
  • 125g of cornflour

Method

1. Cream together the butter, salt and the sugar together first. I use a hand mixer because it’s faster and easier.

2. In another bowl, measure out the flour and cornflour. Mix it with a whisk. Unless you’ve got weevils or clumps, that is all the ‘sifting’ you need to do. Mix into the butter and sugar in three batches to stop the flour flying out of the bowl until it starts to come together. Then gently knead the dough for about 5 minutes, until it is smooth.

3. Get a piece of clingfilm or baking paper. Place half the mixture evenly in a long oblong shape on the clingfilm. Fold the clingfilm over to cover the dough and use your hands to massage it into a more recognisable rectangular oblong log. I tried to make each side 3.5cm, which is the length of my thumb. I was eye-balling it. Try to give it corners so when you cut it, it will look like a square. Twist the edges of the clingfilm and pop it into the fridge for at least 30 minutes. This will make the dough easier to cut. Do the same with the other half of the dough.

The shaped oblong rectangular logs

4. In the meantime, write the message on a piece of paper, count the number of scrabble letter tiles that you’ll need and check the internet for the font and numerical value of each letter tile. Also wash up the beaters.

5. Preheat the oven to 170°C/340°F/gas mark 3. Line a metal baking sheet with baking paper.

6. Take one of the logs out of the fridge and place it on a chopping board. Unwrap and cut off the rounded edges. Slice each log into 1cm thick squares. I eyeballed it. Rotate the log every 4-5 slices to ensure that they keep an even square shape.

7. Take one square and transfer it onto the lined baking tray. I used the end of the hand mixer beater to carve out the letter and the end of a tea spoon to make the numbers, holding the square with my other hand to keep it still. Carve about 5mm deep. Every so often, I would use a sharp knife to remove the shortbread ‘debris’ and if it was a letter like a B or an E, I would pad some of the ‘debris’ gently in between the carved furrows to strengthen the shape of the letter, hoping that it wouldn’t disappear as it baked. Curved round 3’s proved impossible for me.

8. Bake in the middle of the pre-heated oven for 14-16 minutes. It should be a lightly golden colour on top and little browner on the bottom. DON’T pick one up when fresh out the oven to check if the bottoms are browned because it will break!* Wait until they have cooled down and are stronger. Instead trust the oven and sprinkle a little caster sugar on top immediately when they come out of the oven. If any of the pieces have baked into each other, separate them with a sharp knife.

*I needed 19 letters, but as I picked up the ‘I’ to do exactly what I told you not to do, it broke in half. So I got my second log out and decided to carve out some more letters so that my sister’s family could spell out each of their names, if they wanted to. Sometimes, this is how the creativity juices unfold.

And that’s it. Tada!

I was so excited to show her what I’d made for her. I asked my 3 year old nephew to say which letters he saw as I ‘wrote out’ her birthday shortbread.

P.S I asked my sister for a lift so that the shortbread biscuits wouldn’t break into crumbs whilst walking the hour over to her house.

P.P.S She really liked them, and so did the rest of her family.

Peace, a haiku, a run and a prayer during Covid-19 disruption

I joined a creatives group in the new year while I was in Aberdeen.  Caralyn, the same one who encouraged me to blog again, talked me into going along with her and frogmarched me to introduce me to the group leader.  This was very much necessary because the shy introvert in me was reluctant to make any new friends.

I should backtrack a wee bit to provide some context. My first month following my return from Cambodia was bewildering. I didn’t know what was going to happen next or where I was going to be, other than I was back living at my mum’s and it had been the right time to end my Cambodia life. I was exhausted from my life being flipped upside down. That October felt particularly cold and I kept looking aghast at people dressed in shorts when it was below 6 degrees celsius. As I pulled on my four layers and searched for some thermal clothing, I started to experience regular moments when I felt like I couldn’t breathe properly, and I’d be scared to fall asleep in case my body forgot how to breath while I slept. This is me, who has never suffered from anxiety.

My struggle with the cold.

Two things really helped. Firstly, I got help. I engaged a coach to help me go through this transition. Someone I didn’t know who had gone through major changes moving from one country to another. She gave me a structure to the transition. When things got hard in month 3, she reassured me that months 3 and 4 normally held the most tension as friends asked what you had decided to do, when you had decided nothing because those decisions still felt overwhelming, like the circumstances were too fluid to make any concrete decisions. Secondly, a friend reassured me that my panic was a common reaction to major disruptive changes. He agreed with my recognition that this season was a ‘winter’, so to take it easy, do very little “productively”, to remember to take deep breaths and do a little exercise. It helped to normalise my situation and after that first month, I could breathe a little easier.

By January, I was quite happily in the rhythms of my ‘splendid isolation’ or ‘my winter’ in the North East of Scotland. The name inspired by Britain’s 19th century foreign policy of splendid isolation and all the Brexit chatter. After the turbulence of the last few years, the peace and stillness was exactly what I needed. In all honesty this is what I had nicknamed this season of my life weeks before self-isolating and social distancing were to become a thing. The flip side of my choices was that I had reverted to being a shy turtle. Eyes peering out over my scarf and hat. Checking out who the safe people were to talk to before deciding that I’d rather be talking to trees.

Some of the trees I would talk to

I was also intimidated by the thought that this creatives group would be made up of all art school/’I studied design/drama/writing at university’ type people.  However, in actual fact, yes some of the group are like that but the group is made up of a variety of people with different craft/art/food/creative writing/photography/design interests and passions.  I surprised myself by enjoying their company and the discussions. The following weeks, I went back and started making new friends.

When I moved to another city for a new job three weeks ago, I didn’t expect to be able to continue to be part of them. However, because of the Covid-19 lockdown measures, we moved to meeting online.  Each week we focus on something different.  This week, the focus was on peace.

I found myself meditating on this song by Mosaic MSC every time I went outside for my daily walk/run.  It begins, peace, bring it all to peace.  Apt, right?  I would pray for family, friends and people I knew who were ill or in the vulnerable group, or in difficult/stressful/anxious situations to know God’s peace.  An hour before we were due to meet online, I suddenly worried that my meditative peace prayers wouldn’t count as a creative output.  Thus, I quickly cobbled together this haiku on peace as my contribution instead.

Peace

Piece by piece, step by
Step. What was overwhelming
Becomes breathable

It began as a thought, ‘what if I did a play on words with peace/piece’.  (There are a couple of quilters in my creatives group.) For me, it evokes memories of marathon training, running up hills, the times I began a couch to 5k programme after time out because of injury. Then there is the sleepless 48 hours when I had a dengue fever rash that covered my entire body and as I cried alone in pain and frustration I kept reminding myself that this too will pass.

I had to learn a lot about pain, rest, asking for help, sabbaticals and self-care during my Cambodia years but especially so in the last two years. One picture that has really comforted me this year has been of God’s hands holding me in this dark vacuum as I feel like I’m falling. He has got me. You might not be religious, but I’m sharing that picture in case it offers you some comfort.

One more thing. When all the things that you rely on to keep you happy are stripped away, if you can, do one thing each day FOR YOU that you enjoy, whether it’s quilting, DIY, reading a book, burning onions, binge-watching a TV series, talking to the guinea pigs.  That’s self-care.  Do the things you have to do too.  And remember.  This too will pass.

I still burn onions

Many, many years ago, before I moved out to Cambodia, when cooking was a still a delight, I half-jokingly set myself a target.  When I could master not burning onions and garlic whilst cooking, I would apply for the TV show Masterchef.

Well, I still burn onions.  A couple of weeks ago, I cooked Bon Appetit’s mushroom carbonara for my mum.  It was my third time making this recipe.  When I asked her what she thought of it, she, ever truthful, asked me, “Was it burnt?”  I related this story to some friends last night and they were taken aback.  “How can you still be burning onions?”  And not only them.  My Cambodian friends couldn’t understand how I could cook onions and garlic to an acrid black.  To them it was elementary: it’s about heat control.  Clearly I’m still a novice at it.  In my 6 years in Cambodia, I may have learned how to pound Cambodian curry pastes, bake the softest Texan cinnamon rolls, work with pastry at 32°c but I still burn onions.

When I recently moved back to the UK from Cambodia, there was only one thing really that I wanted to do.  That was to learn how to cook again.

I write recent but I moved back mid October and now its mid March, so it’s been 5 months.  Still, it feels recent to me.  Committing to living back in the UK again has been hard.  It’s not because I don’t like being in the UK: I’ve written about how I welcomed its bracing winds when I’ve escaped hot season in Cambodia and how I missed my family.  Rather, it’s because I thoroughly loved living my life in ‘the Penh’, as we, expats, affectionately nicknamed Phnom Penh.  I miss my friends, my apartment, my teaching job, my baking business, my running group, my CrossFit gym…  Notice how I preface them all with ‘my’.  I owned it.  They were pieces of a bigger jigsaw that was ME in Cambodia.  Now in the midst of transition, walking on this unsteady bridge of one life left and the other yet to start, I miss the security of it.  However, I’ve gone off on a tangent and I won’t write about why I left just yet.  I’d rather share with you the reason why I’m back blogging again.

So back to burning onions and the only thing I really wanted to do when I came back was to learn to cook again.  A friend of mine, Caralyn, suggested that I start writing on my blog again.  I had been rewatching BBC’s Sherlock and in that first episode, John Watson is encouraged by his therapist to write a blog.  She promises that it will help.  I read elsewhere that it can indeed help for reflecting and thinking about what happened, and what lies ahead.  So the plan is that I’ll tell you about bits of life and recipes that I didn’t have time to share with you when I lived in Cambodia.  Because, as it turns out, teaching full-time, volunteering at a local Cambodian church and running a little baking business on the side clocks a lot of hours!  As I do so, I’m hoping that this exercise in remembering will help me to record snapshots of life in Cambodia, but also the transition to being back in the UK.   Besides, I know I enjoy this kind of writing – posts about food and poetry about everyday life, like mosquitoes!

Evidence of my burnt mushroom carbonara dinner offering

The second time I made the mushroom carbonara, I scrambled the eggs. I didn’t burn the mushrooms but I forgot to add the onions.


Delia’s Pancakes for Shrove Tuesday

Whenever Pancake Day comes around, I remember my friend Sarah of the chocolate macarons and the white chocolate, cardamon and rosewater cake. We cooked and hosted many a pancake evening for friends, church small group, and parties. She’d make the pancake batter. I would cook the pancakes. We were the pancake dream team.  So you’d understand why, for years, I had no need for a pancake recipe.  This was compounded because Sarah never used measurements. “You just mix flour, milk and eggs until it’s just the right consistency.”

Then when I moved to Cambodia five years ago, French Esther was the resident pancake/crepe queen.  She followed a recipe of sorts and shared it with me once. I wrote it on the tiles of my kitchen, but when I moved the recipe was wiped away.

Just so that we’re clear.  I’m talking about English pancakes here.  Not the fluffy North American variety or the Scottish drop scone cousin, Scotch pancakes.  On Shrove Tuesday, I’m a fan of the traditional thin, light, slightly crispy, English pancake, drizzled with lemon juice and sprinkled with brown sugar.

Pancakes with lime juice and palm sugar: a Cambodian twist.

Then, last year, after decades of cooking pancakes, suddenly I realised that I did not know how to make the pancake batter and the traditionalist in me wasn’t going to intuitively make them as the others had.  So, I looked up Delia and we had pancakes.

Except I chose to use my bamix mixer to make them.  Why not?  If you have a food processor, it’s much quicker to put all the ingredients into one and process it until you have a smooth batter.  It takes a bit longer if you want to do it by hand, using a whisk.  I’ve included the instructions, having followed both methods.

In Delia’s original recipe she adds 2 tablespoons of melted butter to the batter.  I’ve looked up why one should add butter to the pancake batter. (Sarah nor Esther ever did.)  Felicity Cloake tried it and says it gives a better tasting pancake but in the end decided to cook the pancakes in the melted butter rather than adding it to the batter.  I have a theory that it’s to use up/add more fat, as Shrove Tuesday is the day to use up fat before the start of Lent.  Rather than add butter to the batter, I prefer to use whole milk to add richness.  And controversially, perhaps, I eschew cooking the pancakes in any fat.  I like to use a small good non-stick frying pan, set it on a moderate heat, swirl in just enough of my batter so that it covers the frying pan and gently cook my pancakes on it until there are bubbles forming on the bottom and it comes away easily from the pan.  Flip it over, anyway that you like, cook it on the other side for another minute or two and you’ll have good, thin, crispy English style pancakes.  I find by cooking it like this, I rarely have that dud first pancake that has to be thrown away.

Then all you have left to do is choose your favourite toppings, et voila.  Munch away.

Here are the pancakes, adapted from Delia, this will make about 14-16 pancakes.

Ingredients

  • 110g plain flour
  • pinch of salt
  • 2 large eggs
  • 275ml whole milk

Method

  1. Put all the ingredients into a food processor or a blender.  Blitz up until smooth.  Alternatively to make them with a whisk, put the flour and salt in a medium sized bowl.  Add in the eggs, as you whisk them in the flour, slowly add the milk until you get a smooth mixture, the consistency of cream.  It’s ready to use immediately, or you can leave it to rest in the fridge for at least 30 minutes.  This also means that you could make the mixture beforehand so that it’s ready for a pancake party.
  2. Using a small non-stick frying pan, use a moderate to high heat and pour just enough batter into the pan, swirling it around so that it covers the pan.  (I’ve linked this to a video but it takes some time to load up.) Gently cook the pancake until small bubbles form on the bottom and it comes away easily from the pan.  Flip it over, anyway that you like, cook it on the other side for another minute or two and serve.
  3. If you want to get started on pancakes before your eating companions arrive, then keep them warm in the oven.  I stack them on a plate and cover with foil before putting them in a warm oven, which is set at a low temperature.

See the bubbles forming, at this stage it’s just about ready to flip over