The brown butter chocolate chunk cookies aka Crack Cookies

Tonight as I was wondering which recipe to share with you (it was between apple crumble and poached eggs), I remembered that I’d been baking a lot of cookies recently and posting photos of them on Instagram. It’s time, isn’t it. The time has finally come to share my crack cookie recipe that I’ve been promising for a while.

Top tip: Keeping cookie dough balls in the freezer are an investment in your future self’s happiness.

There are variations of that sentence around the internet and social media. That’s my paraphrase above. It is one of the reasons why I love making these cookies. This recipe will make enough so that you can store some away (like squirrels do with their nuts in preparation for winter) for a moment when you really want to eat a cookie, or bake something but have no energy for it. That was me two nights ago. I arrived home from work physically and emotionally exhausted, wanting to be fed and then to sit down with a home baked biscuit to watch episode 2 of the Great British Bake Off – Biscuit week. Fortunately I live with a family who will let me do all those things and I had frozen cookie dough balls stashed away in the freezer.

a sauce pan with butter browning and foam
As the butter melts, it foams as the water evaporates.

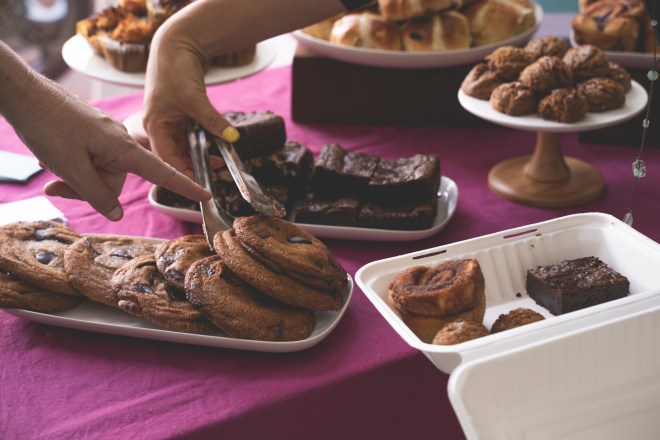
I went through a phase when I was obsessively recipe testing chocolate chip cookies in Phnom Penh to perfect that American style cookie of soft and gooey on the inside, with crispy edges. This was a pretty happy time for those around me. Being around so many more internationals opened up a whole other world of baked goods, their expectations of them and their tastebuds. I enjoyed the challenge of trying to recreate those baked goods that they were nostalgically craving that I had never tasted before. And then of course selling them.

Photo credit to @pipcree who took this photo at one of my final pop-ups in PP.

I learned stuff as I researched which I’ll share with you because that’s what this blog is about:

  • THE MOST IMPORTANT part is to REST the dough so that the baking magic can happen. Firstly, it allows the flour to absorb the fats and the liquids and thus create that puffy, crispy texture. Secondly, the sugars get a chance to chill out and mellow out resulting in richer flavour. In some baking chemistry magic by resting them, they will taste sweet but not overly sugary. It’s a minimum 2 hour wait if you’re impatient, but preferably overnight.
  • I often use a stand mixer to make this but the joy of this recipe is that as all the butter is melted, it is easy to do in a large bowl and a spatula/large mixing spoon.
  • Allow the brown butter to cool down. Sometimes I don’t and it results in a more delicate, tender cookie.
  • Remember with a cookie recipe, you don’t want to cream the butter and sugar together. We just want to mix them sufficiently, not beat air into them.
  • Mix up different types of chocolate to create a more complex chocolate profile, that’s why I use dark and milk chocolate. I read somewhere (I’m sure it was on Serious Eats but I can’t find the link) that if you use one type of chocolate then your taste buds get used to and stop tasting it. However, if you vary different makes or types of chocolate, your tastebuds will continue to taste them.
  • My recipe testing pales in comparison to Serious Eats. I am still learning.
  • Brown butter creates a rich, nutty flavour which I really enjoy.

Why do I call them crack cookies? That’s the nickname that my friend Grace gave them and it caught on. These cookies are really more-ish, sweetly addictive, soft but slightly crispy and satisfyingly not overly sweet. The brown butter gives a slightly nutty flavour, without any nuts, and the two types of chocolate means that each mouthful is a flavour party. I made two batches of these cookies for the soft opening of her store, Ginger and Grace. For some reason, they didn’t make it onto the tables but her friends discovered them later that evening and ate through an entire batch of them. I guess that cemented their reputation as crack cookies.

Now I tell people that these brown butter, chocolate chunk cookies are my best work.

The cookie recipe comes from Ambitious Kitchen. I haven’t made any major changes to it, except I like to weigh everything so obviously here I’ve converted it into grams. There’s a very similar recipe on Joy the Baker. The differences are that Monique browns ALL the butter, uses dark brown sugar, uses two different types of chocolate, adds in a tablespoon of greek yoghurt and doesn’t use nuts. Joy uses light brown sugar but adds in 1 tsp molasses, adds pecans and uses dark chocolate only. I prefer the Ambitious Kitchen version.

Making a double batch of cookies

Ingredients for Brown Butter Chocolate Chunk Cookies very slightly adapted from Ambitious Kitchen

  • 227g butter
  • 100g white granulated sugar
  • 200g dark brown sugar
  • 1 large egg and 1 egg yolk
  • 1 tbsp natural yoghurt or greek yoghurt
  • 2 tsp vanilla extract
  • 280g plain flour
  • 1 tsp bicarbonate of soda
  • 1/2 tsp table salt
  • 140g dark chocolate cut into small chunks, or the chocolate chips, or round discs*
  • 140g milk chocolate cut into small chunks, or the chocolate chips, or round discs

*for prettier looking cookies: if using round discs of chocolate, keep around 21 discs aside to firmly place on the cookies after they have baked. The chocolate will temper as they melt and thus have a nice shine making them prettier to eat.

Method

  1. First brown the butter. Add all the butter to a medium-sized saucepan and place over medium heat. It will start to froth and cackle. That is the water evaporating. Continue and stir the sides and scrape the bottom a few times so that it doesn’t burn. When it is ‘as quiet as a ninja’ (quote from Stella Parks) it is ready. Take it off the heat and either pour the butter in a bowl to cool down, not forgetting to scrape the browned bits from the sides and bottom. Or as I often do, fill up the sink with cold water and carefully place the hot pan in there to cool down.
  2. Add both the sugars into a large mixing bowl and the cooled brown butter and mix for a minute or two until they are combined. I use the paddle beater (K-beater on the Kenwood). Don’t discard the egg white. Store it in the freezer for a cocktail or macaron/meringue baking on a later date.
  3. Now add in the vanilla extract, yoghurt and the large egg and egg yolk and mix again for a minute. It will look and smell like toffee.
  4. In a separate bowl, measure out the flour, bicarbonate of soda and salt and whisk to mix. Then add this to the butter/sugar/egg mixture and mix slowly so that the flour doesn’t fly up.
  5. When it looks like the flour has just about combined then add in the chocolate chunks and mix again.
  6. At this stage, I prefer to measure out into 2 tablespoons of cookie dough (I like to use a medium ice cream scoop) and roll them into balls and place them on a lined baking tray so that the cookie dough can chill out in the fridge for at least 2 hours before baking them. Sometimes, I will cover them and leave them overnight in the fridge to bake the following morning. More often, I will cover them and put them in the freezer overnight and then store the frozen cookie dough balls in a bag.
  7. When you’re ready to bake them, pre-heat the oven to 170°C/350°F/Gas mark 4 and line a baking sheet/tray with baking paper. Space them out so that there are 5 cms between each dough ball as they will spread. Sprinkle the cookies with a bit of table salt. If baking from chilled, bake for 11-13 minutes. If baking from frozen, bake for 14-16 minutes. The dough will spread out and go a golden brown colour. The middle will be gooey so when you take it out, it is important to leave them to cool and harden for 15 minutes on the baking sheet. Otherwise it will split into many pieces and chocolate goo will cover your fingers. That doesn’t sound too bad, does it. Haha.

You’re welcome and enjoy.

My favourite way of portioning out the cookie dough is with a medium sized icecream scoop.
In the absence of a scoop, weighing scales works. Preparing them for their overnight stay in the fridge hotel.

You can vary the flavour and texture. I added 140g dark chocolate and 140g chopped pecans to the cookies at the top of the post. You could substitute the pecans for walnuts or hazelnuts if you like. Play around with it and let me know how you get on.

Dark Chocolate Cashew Almond Butter Cookies

I meant to publish this recipe a few months ago, but I didn’t have the photos ready.  I still don’t have the perfect photo sequence for how to make these cookies.  But it’s the middle of the Open and these cookies were thought up between a few crossfitters so better like this than never, right?  Besides, what better timing than the middle of the CrossFit Open Games to tell you how I got started on CrossFit and baking paleo cookies.

The ingredients for the cookies minus the bicarbonate of soda

I started CrossFit in February last year.  I had been given a tough teaching schedule at my school and they weren’t letting me push back on it.  As I despaired, I felt God say to me, “Han-Na, you’re stronger than you think you are.” Since I often experience God in physical activities, I decided to also translate that into trying out CrossFit to see how strong I was.  This was after months of pushing back on my coaches because I was very happy in the Bootcamp classes and not interested in getting stronger.

Pretty soon, it was clear to my coaches, that I had the potential to lift heavy weights.   I, on the other hand, intimidated by lifting anything vaguely heavy and the technicalities of the lifts, really did not enjoy the barbell work for the first few months.  Not long ago, one of them encouraged me, as I was going for my 1 rep front squat max, that I had the ideal physique of a squatter.  I’m not entirely sure what he means by that, do you?  Still, I managed 72kg that day, which I was delighted with.

Then one day, one of my coaches asked me when I was going to bake some paleo cookies for her.  I told her that Christina (of Joyfully Nutty) and I had just been talking about how to use cashew almond nut butter in baked goods and so why not try them in a cookie.

So, thank you Minna and the CrossFit community for pushing us into trying to make these paleo cookies.

I use the Dazed and Cashewed, cashew almond nut butter from Joyfully Nutty.  You could make these with a cashew nut butter or an almond nut butter, it comes down to preference.  I went off the back of Julie Wampler’s recipe from Table for Two, and experimented with reducing and changing the sugar to make it suitably paleo.  I was also baffled as to whether palm sugar is paleo or not.  It would appear that the paleo community embrace coconut sugar but differ on palm sugar.  The little personal research that I’ve done suggests that palm sugar is produced in the same way as coconut sugar, and therefore is paleo.

Then I discovered this delightful nugget.  With the addition of different spices, I could halve the sugar or omit the sugar completely and they would still result in tasty ‘sweet’ morsels, that are soft yet chewy.  Curious, I tried a sugar free version, which admittedly, is more delicate and will thus crumble more easily, but because there’s a lot of dark chocolate, you hardly notice that the sugar is gone.

Top tip: by adding spices, you can reduce or omit the sugar.

I believe that you could make these vegan by replacing the egg with flaxseed or chia seed but I’ve yet to try it.

Baking these is a cinch (read the method below), which is another reason why I like them.  You want to satisfy that cookie craving but don’t have to wait 24 hours to rest the cookie dough.  From start to finish, you could be sitting down with a cookie (or twelve) in 30 minutes, or less.

So here is the Dark Chocolate Cashew Almond Butter Cookies, adapted from Table for Two.

Makes between 12-14 cookies

  • 1 large egg
  • 60g palm sugar (*optional)
  • 1/4 tsp salt
  • 1/2 tsp cinnamon
  • 1/2 tsp turmeric
  • 250g cashew almond nut butter
  • 1tsp bicarbonate of soda
  • 100g dark chocolate*, broken into chunks. Or you could use dark chocolate chips. I use small round discs of chocolate.
  • *use one that is at least 65%.

Method

  1. Preheat the oven to 180ºC/350ºF or gas mark 4.  Line a large baking tray (or two depending on size) with baking paper.
  2. Whisk the egg, sugar, salt, cinnamon and turmeric together in a small mixing bowl.
  3. Add in the cashew almond nut butter and the bicarbonate of soda and mix until it is all combined.
  4. Stir in the dark chocolate.
  5. Place generous tablespoon dollops (sort of ping pong ball sized) of the cookies on the baking tray.  I use a 1½tbsp cookie scoop for the sake of ease now.
  6. Bake in the middle rack of the oven for 12-15 mins, or 10-12 mins in a fan oven.
  7. They will have puffed up a bit and be lightly golden brown in colour.  As they cool they will collapse slightly into themselves.  At this point, I like to place a chocolate disc on top of each cookie because I like how it looks.  Allow them to cool completely on the baking tray and then store them in an airtight container.
  8. In Cambodia’s humid climate, they’ll keep outside the fridge for about 3-4 days.  I normally store them in the fridge and they’ll happily chill out there for 2 weeks.  Or they freeze well.  But you know, they’re pretty tasty straight out of the freezer too.

The verdict?  You’d never know that this was a gluten free, dairy free cookie.  Soft  in texture and rich in flavour.  I get orders for these, with sugar, without sugar, without chocolate… hehe.  So you know that they’re customisable.  I like them as a pre-workout snack.  I also like them because it’s such an easy recipe.

Chinese Peanut Cookies

Chinese Peanut Cookies

I’ve discovered that peanuts lose weight.  No kidding.  I’ve been roasting and peeling kilos of peanuts for this recipe and this is my unintended learning outcome.  Seriously, somehow in the process of them getting hot in the oven and unzipping their jackets, followed by a gentle coax to peel it off them a bit later, they are lighter than when I first had them.

I know.  When I describe it thus, it’s SO obvious.  Of course, those papery skins weigh something.  But who would have thought that peanut skins weigh so much!  300g of raw shelled peanuts = 254g skinned and roasted peanuts.

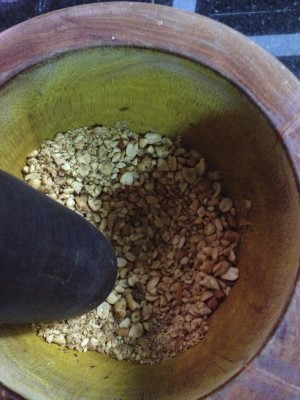
grinding up the peanuts

Given the plentitude of peanuts in Cambodia, and that I fell in love with these small morsels of rich, peanutty, salty, sweetness the moment I bit into my first one, I’ve been testing one chinese peanut cookie recipe after another, ever since I arrived here.  That was 5 months ago.  In fact, I’ve begun to wonder whether my friends are sick of me testing it out on them, but too polite to tell me.  ‘Try this cookie and this one.  Can you tell me if you can taste the difference between them?’  But, truth be told, every recipe I tried was either a tad too sweet or just didn’t recreate that cookie-crumbling-then-melting-in-your-mouth sensation.

So, I experimented with sugars and flours and ended up with this recipe.  I replaced the icing sugar with caster sugar to remove the rather cloying sweetness of the cookie and introduced cornflour to the mix.  (I use cornflour in my shortbread recipe to create a crumbly texture.)  Then I discovered that if you don’t eat the cookies for at least 2 days, the cookies soften and thus melt in your mouth regardless of whether you added cornflour to it.  Unfortunately, they don’t tend to hang around long enough for that to happen.

more peanut cookies

They’re coming with me to my friend Amy’s last-of-the-15-days-of-Chinese-New-Year party on Friday.  At first, I thought that this was a solely Chinese celebration, until I asked my mum. Nope, apparently in Korea they also have a special meal to mark the 15th day, the day of the full moon.

In Amy’s invite she asked:

‘The festive food Chinese people eat during this time all have symbolic meaning… so please bring a dish (fish / chicken / peanuts / cake / oranges / noodles / pineapple).”

Well, I googled ‘peanut chinese meaning’ and found this interesting site Food Symbolism during Chinese New Year. Peanuts symbolise health, long life, multiplication in wealth and good fortune etc etc.  So, it’s clear.  This Friday will be an auspicious occasion to debut my version of Chinese Peanut Cookies.

Peanut cookies lining up for the oven

I’ve adapted this Peanut Cookie recipe from Kitchen Tigress

Ingredients for 40 cookies

  • 200g peanuts, roasted and peeled & a handful (50g or so) to decorate the cookies
  • 150g plain flour
  • 50g cornflour
  • 150g caster sugar
  • 1/2 tsp salt
  • 130ml groundnut oil (also known as peanut oil in some countries).  If you don’t have this then vegetable or sunflower oil also works
  • 1 egg, beaten

Method

1. Preheat the oven to 180°C/350°F/Gas Mark 4.   Line 2 baking trays with baking paper.

2. Roast and skin the peanuts.  If you already have roasted peanuts, rinse off any salt on them and dry them.

3. Grind the peanuts into a fine-ish powder in a food processor*.  They’ll clump together towards the end as the oil is released.  Don’t worry about it.  When you’re done just break up the clumps with your fingers and when you add in the sugar.  *Initially, I didn’t have a food processor (now I use my Bamix) so I pounded them into a powder with a pestle and mortar.

4. In a separate measure out the cornflour, flour and salt.  Sieve it before adding it to the peanut and sugar mix to ensure a lighter texture.

5. Pour in the oil and mix together with your hands until it comes together away from the edges of the bowl.

6. Take a tablespoonful of the mixture, roll it into a ball and flatten it lightly on the baking tray.  If it helps, each ball weighed between 15-20g when I weighed mine out.  Carefully position a peanut half on the top of the peanut balls and brush the tops generously with beaten egg.  The beaten egg gives them a beautiful shine and colour.

7. Bake in the oven for 12-15 minutes until golden brown.

8. Allow them to cool for 2 minutes on the baking tray and then transfer them to a cooling rack to cool completely.

It is seriously tempting to eat these while they are still hot, so watch that you don’t burn your mouth when you do.  Enjoy and Happy Chinese/Korean New Year!

Claire’s cookie: Raspberry, White Chocolate and Oat Cookies

Raspberry, White Chocolate, Oat Cookies

Over Christmas and New Year, I visited my friend Claire in New Zealand.  It was my first trip to a first-world country, since I’d moved to Cambodia.  And boy, could you tell!  If you know the story of country mouse (moi) visiting town mouse (Claire).  Well, that says it all really…  The first night that I got there and I was snuggling into my bed under my duvet after a hot shower, I was beaming.

I also enjoyed:

1. Larking about with Jen and Claire.

Fish and Chips at the famous Mangonui Fish Shop with Claire and Jen

2. Drinking in the greenery, mountains and sheep!!!

Reminds me of Scotland. Mount Maunganui - 10 minute cycle from Claire's house.
Reminding me of Scotland. Mount Maunganui – 10 minute cycle from Claire’s house.

3. Claire’s hospitality.

Claire baking the cookies in NZ
Claire baking the cookies

One evening we were having quite a frank discussion together with her housemates about what can hold us back from doing things or giving it a go.  I’m not referring to procrastinating doing the ironing or filing away the bank statements.  You know what I mean: shying away from ‘that’ conversation, not putting your hand up to ask the conference speaker a question, refusing to speak a foreign language.  So, what is it for you?  Is it the fear of losing, the dislike of being in the limelight, the discomfort of your brain cells having to work so hard, the embarrassment of looking like a fool?   We all owned up to at least one of those things.

Ingredients for raspberry, white chocolate and oat cookies

Then Claire very matter-of-factly put out there, that one of the things that helps her to just give things a go, is that she gets a kick from doing something but not doing it well.  She gave her own example that she’ll never be a pro-surfer but nevertheless, she keeps surfing and enjoys it a lot.   Is she slightly kooky for owning such an attitude?  Or is that one of the secrets of relishing life and taking hold of opportunities when they present themselves?  I leave that to you to mull over.

Frozen raspberries

Undoubtedly, her philosophy contributes partly to her willingly trying new ingredients, techniques and recipes.  But let me just say – there is nothing not good about her food.  In fact, her chocolate cookie recipe got me published in a magazine.  She inspired me with how she’s embraced the Kiwi food culture whilst she’s been there.  The Paleo diet, the almond milk…

And Jo Seagar.  I’d never heard about Jo before but she’s a big star in the Kiwi culinary world.  Claire and her housemates love her recipes, and I’ve taken note of her name now.  Claire adapted this cookie recipe from one of Jo’s recipes and now it’s known as ‘Claire’s cookies’ by her friends.  Perhaps because she makes them a lot, and they are incredibly deliciously and more-ish.

white chocolate shards

I know because she made them when we got back from our camping trip in Russell. Her housemates and I pretty much gobbled up the whole batch in one sitting. (I hasten to add that she did halve the recipe.)  Even so, she was amazed that they went so quickly.  Seriously?  They go down so well with a cup of tea.

Claire’s genius was replacing the glacé cherries in the original recipe with raspberries.  White chocolate can be sickly-sweet sometimes.  The sharp, sweetness of the raspberry cuts through this and complements the white chocolate beautifully.  The oats provide texture and bite.

Stir in the dry ingredients

When I made these cookies back home, I made the mistake of stirring in the raspberries too vigorously, breaking up the raspberries so that the mixture turned pink.  Pretty, but not tasty.  The flavour of the raspberries dissipated and they weren’t nearly as nice as I’d remembered them to be.  The two photos below illustrate the difference.  The photo on the left was my first batch of cookies and I broke up the raspberries too much.  The second batch (photo on the right) was much better.  Take note, gently mixing in the raspberries is the secret to the having bursts of raspberry in your mouth.

Raspberry, White Chocolate and Oat cookies attempt 1Raspberry, White Chocolate, Oat Cookies attempt no. 2

I also found out that in Phnom Penh a) frozen raspberries are difficult to source and b) cost $22 per kilo from Thai Huot!  So, when you make these in a temperate climate where raspberries grow naturally, remember $22 and just how lucky you are.

Raspberry, White Chocolate and Oat Cookies adapted from It’s easier than you Think by Jo Seagar

Makes 30 large cookies or 40 slightly smaller-medium sized cookies

Ingredients

  • 250g butter
  • 175g sugar – Claire uses ordinary white granulated sugar and they turn out amazing. I used a combination of white and light brown sugar and they were also good. Moral of the story – use whatever sugar combination that tickles your tastebuds.
  • 3 tbsp sweetened condensed milk
  • 1/2 tsp vanilla extract
  • 140g oats (jumbo oats are even better, but I only had normal rolled oats)
  • 225g plain flour
  • 1 tsp baking powder
  • 250g white chocolate chopped
  • 150g raspberries, fresh or frozen

Method

1. Preheat the oven to 170°c/325°F/Gas Mark 3. Line baking trays.

2. Beat the butter, sugar and condensed milk together until the mixture is pale and smooth.

3. Stir in the vanilla, rolled oats, flour and baking powder until the dry mixture has just combined with the wet mixture above.

4. Gently mix in the white chocolate and the raspberries.  Be careful not to break up the raspberries too much.

5. Place a tablespoonful of mixture on the baking trays and press flat with a wet fork.  They will spread out slightly so leave a couple of fingers width between each tablespoonful of mixture.

6. Bake in the oven for 20-25 mins until golden brown. Allow to cool for 2-3 mins on the trays and then transfer to a wire rack to cool completely.  Apparently they will keep in an airtight container for 10 days to 2 weeks.  They lasted less than 5 days in mine.

 Mmmm... bringing back memories of kiwiland

Peanut and Rosemary Cookies

I am, in fact, quite excited that it’s snowing outside. It has given me that wee impetus to press publish on this recipe, which has been lurking around in my drafts folder for a while.

peanut and rosemary cookies


On an aside: say aloud with me, ‘lurking around for awhile’. Doesn’t it conjure up that horrible childhood fear of a shadowy bogeyman patiently waiting to catch you in the middle of a long, dark corridor? Mind you, saying the whole of that first sentence out loud now brings up a ridiculous image of a recipe like a white vapour, snaking out of a metal filing cabinet. It’s not quite the way that I’d planned to introduce this recipe to you.

rosemaryrosemary 2

peanutspeanut and rosemary cookies

So, back to the recurring theme of this post. Essentially, it’s about ideas remaining dormant and not being actualised because of whatever reason.

You see, I’d been wanting to bake these peanut and rosemary cookies ever since one of my colleagues passed me a newspaper clipping with this recipe on it. That was about 18 months ago. The timing of this recipe landing on my desk was perfect because I had just been thinking about combining rosemary or thyme with a sweet dessert for a wee while. But I just didn’t get round to it, or I forgot. Maybe some student emergency came up before I fully committed to baking the recipe, or something! You get the idea. The recipe continued to lurk in between the covers of other recipe books.

When summer came around, my tastebuds changed and my mind started exploring the idea of combining lemons and black pepper. So, one afternoon I invented a lemon, fig, nut and black pepper cookie recipe, which Val promptly decided were her favourite cookies.

When the nights started drawing in and the temperatures dropped, my tastebuds hankered after a more pungent flavour. I pulled out this recipe, sent myself off to go to the shops to buy some salted peanuts and snipped off some fresh rosemary. It’s as simple as that really. I think, that most of you, will have the other ingredients as standard store cupboard items already. The other joy of this recipe, I discovered, is that you can pretty much make this in one bowl, mix it within 5 minutes and be biting into your first batch within 20 minutes of starting out on the recipe. I don’t know many other cookie recipes out there that can beat that!

chopped rosemarypeanut and rosemary cookie dough balls

And boy, did I enjoy eating them.

peanut and rosemary cookies

These are fast becoming my favourite cookies: I baked them twice within 5 days. Elegant, fragrant, crunchy and very more-ish. If you want an alternative sweet grown up sweet this season, or you’d like to do something different with your leftover bag of salted peanuts which you offer to your guests, then I’d recommend this recipe to you. I know that rosemary and salted peanuts cookies sound odd but I have to congratulate Dan Lepard on this fine flavour combination.

peanut and rosemary cookie ingredients

Dan Lepards’ Peanut and Rosemary Cookies.

Ingredients

  • 100ml sunflower oil
  • 200g golden caster sugar
  • 1tsp honey
  • 2tsp very finely chopped rosemary – I used one very long sprig
  • ½ tsp ground cinnamon
  • 1 egg
  • 150g salted peanuts
  • 200g plain flour
  • ½ tsp bicarbonate of soda

Method

1. Preheat the oven to 180°C/350°F/Gas Mark 4 and line two baking trays with baking or greaseproof paper. I tried out the pizza stone for one batch but found that the baking trays did a better job than the stone.

2. Mix the oil, sugar, honey, rosemary and cinnamon in a bowl until it is like a paste. I use a metal spoon for this,

stage 1 of mixing the ingredientsmixing ingredients stage 2

3. Add in the peanuts and egg and mix well.

4. Finally stir in the flour and bicarb of soda. Naturally you start mixing this in with the metal spoon, but soon, it becomes clear that it’ll be much easier to get hands-on stuck in with your hands and finish mixing in the flour.

mixing ingredients stage 3mixing ingredients final stage

5. Press together 30g balls of dough. That’s ping pong sized balls, for those of you who don’t really want to measure out them out. Lay them out on the baking tray, spaced 5-6cm apart because they spread a lot. Last time I made them, the peanuts rebelled a bit and didn’t want to stay on the cookie dough. Tell them who’s boss and push them on.

6. Bake them in the oven for 12-14 minutes, depending on how chewy you like them. I aim to take them out when they’re a golden colour, rather than bronzed all over. The bronzed ones are fine warmed up, but otherwise they get a bit hard when they cool. Lift the baking paper with the cookies, off the baking tray and let them cool on a wire rack for a minute, then carefully peel them off to the wire rack.

They make 24 cookies, so I bake these in batches.

If you find them a bit too salty, Dan suggests that washing the salt off the peanuts first. Personally, I like salty sweetness. To top it off, I’ve got a kitchen fragrant of rosemary.

Claire’s Chunky Chocolate Cookies

Chunky Chocolate Cookies

What’s my favourite chocolate cookie recipe so far? The recipe that came from a calendar of chocolate recipes and my then-housemate Claire baked, back in the day when I wasn’t very good at trying out new recipes. And, wow. Didn’t they smell gorgeous and taste incredible… with that wonderful chewiness that cookies should have, and a bit toffee-ish flavour (that’s the brown sugar talking)!! Lekker, lekker, lekker!

Without wanting to sound too much like a cookie monster, I decided to have a go baking them because I wanted to eat MORE! It turned out to be a really simple recipe (hurrah); a bit too simplified perhaps? I made quite a few basic mistakes when making these.

For instance, I discovered that cookies splay out in the oven, so if you don’t space them out enough, they can all meld into one big rectangular cookie, which you have to cut apart.

Next, I found out that if you don’t use baking paper, it’s hard to get the baked cookies off the baking sheet.

Then, there’s minutes in baking them so that they’re soft and chewy and them being rock hard. Err on the side of chewy caution, my friend and use a timer!

Finally, this is less of a mistake but a definite learning point. It was an eye-opener for me to realise how much sugar goes into making cookies. I kind of thought of them as a ‘healthy’ snack before then, but 500g of sugar doesn’t quite fit that category. Hmmm…. So, let’s say that you wanted to cut down the sugar a bit, then I’d try reducing the amount of white sugar you put in. I’ve not tried this yet, but I’d experiment with between using half or two thirds of white sugar. I’m not entirely certain how that will affect the chemistry and flavour. However, I would definitely not scrimp on the brown sugar because it’s the brown sugar that produces that more-ish nuttiness to the cookie’s flavour. That first time, I even asked Claire whether she’d put toffee in the cookies.

chocolate cookie dough

So, I’ve amended the method section so that you can build on my experience. Also, at the bottom of this post, I’ve listed some of different combinations that I’ve created by adapting this recipe.

This makes about 55 regular sized cookies (by regular, I mean 10-15 cm). Claire advised me later that she often halves the recipe so that there’s not an eruption of cookies. You can freeze them, if you have space in your freezer. I have rolled my spare cookie dough into ball shapes and frozen them in a ziploc bag. Later, all I’ll need to do is put the cookie dough balls out on some baking paper and sheet to defrost for an hour at room temperature, then pop them in the oven. A wonderful, ‘instant’ treat to have up your sleeve!

Ingredients

  • 250g soft dark brown sugar
  • 250g white sugar
  • 280g butter, softened
  • 2 eggs, beaten
  • 300g chocolate, roughly chopped into chunks (you can use dark, milk, white and in any combination)
  • 1tsp vanilla extract
  • 1/2 tsp bicarbonate of soda
  • 1/2 tsp salt
  • 500g plain flour
chunky chocolate cookies 1

Method
1. Pre-heat the oven to 180C/350F/Gas Mark 4. Prepare 2 baking sheets/trays with baking paper or greaseproof paper.
1. Mix butter with sugar until creamy and fluffy, with an electric mixer. If you don’t have one, then use a wooden spoon and beat hard!
2. Add the eggs, chocolate chips and vanilla essence and mix well. Add the bicarbonate of soda and salt to the flour and add to the other ingredients. Sitr to form a thick cookie dough.
3. Take ping-pong ball size amounts of the mixture, roll it into a ball and place spaced apart on the baking sheet/tray. Bake for 10-12 minutes in the oven. The cookies should be slightly golden brown. Let them rest for a few minutes and then gently place on a rack to cool.

chocolate chunk cookies 2
The top ones have been baked for 5 minutes too long and are too hard, whilst the bottom rather anaemic looking ones have been baked perfectly so that they’re chewy but with a bit of crunch.

Ideas for different flavours?
I’ve adapted the recipe a few times and substituted the 300g chocolate for:

  • 100g dried cranberries, 100g roughly chopped macadamia nuts & 100g roughly chopped white chocolate chunks
  • zest of 2 lemons & 300g dark chocolate chunks
  • 100g roughly chopped brazil nuts & 200g dark or milk chocolate chunks

Kids love the lemon and dark chocolate one – or at least the kids I’ve baked with when babysitting them.

Chewy Cornflake, Pecan and Chocolate Chunk Cookies: baking across the pond

cornflake cookies

I finally got to bake an american recipe, using american measurements in America. I know that, for some, that doesn’t sound remarkable; it was personally rather enlightening on a typical US baking environment and experience. I hope that any americans reading this don’t mind me saying that.

Let me fill you in quickly on the back story. This all came about when Chang-Bum op-pa*, a friend of the family, invited my mum and I to spend New Year with them in Southern California. My mum and his parents go way back; I think that the last time I had met our host was when I was the age of his youngest son, aged 9. I remember going to Loch Ness with him and his sister. (*Chang-Bum is his name but op-pa is how I address him. Op-pa translates into older brother in Korean in case you’re wondering)

I offered to bake them Fiona Cairn’s amazing shortbread for them, as a taste of Scotland, and it is a great recipe.

cornflake cookie helpers

Well, it isn’t that they turned me down. It’s more like they redirected my offer. Chang-Bum op-pa had already read my food blog. So, his question was, “Would I like to bake a cookie/biscuit*/scone* recipe with his family instead? It would be the first time for them and they are mad for cookies/scones/biscuits.” (*US and UK versions of biscuit and scones are different.)

“Absolutely!”

Alarm bells ring when I am given a negative to the question, “Is there a set of weighing scales?” That’s when I’m pushed out my comfort zone and my education into american baking culture really starts.

So, I search online specifically for an american recipe, and in doing so, introduce my friend’s wife to Smitten Kitchen’s reliable collection of recipes. The next part is a trip to a grocery store, where we put all purpose flour and butter measured in sticks into our cart. But my biggest culture shock moment is whilst gazing flummoxed at the spices rack. There are no jars of mixed spice! I’m a bit shocked. (Question: why don’t they sell mixed spice in american grocery stores?) I apologise to any Americans who have hunted for mixed spice on account of my recipes and been given a blank look from a grocery assistant. And at that moment, I appreciate why some american recipes are so particular on their spice measurements. E.g. ¼tsp of ground cloves; ¼tsp ginger; ½tsp cinnamon…

After that culture shock, the actual baking of the cookies seemed fairly unremarkable. I understand why american recipes list the number of sticks of butter, because that is how they are sold. Besides, sticks of butter are exactly what we needed in the absence of weighing scales. Having said that, now that I’m writing this back in the UK, I’ve converted the recipe to grams and ounces.

The original recipe is for an oatmeal, pecan and chocolate cookie. The cornflakes were a subsitute for the oatmeal that had gone off. I like to think that I was truly original and no-one had ever thought to put cornflakes in cookies before. Then a few days later I read the side of the cornflake packet: a recipe for cornflake and cranberry cookies. Perhaps, I was being innovative rather than original then, but I still think fondly of my ingenuity.

This recipe made between regular sized 36-46 cookies. We baked them ALL. I haven’t tested this yet, but if you wanted to, I guess you could bake the amount you wanted and freeze the rest. Freeze them, unbaked, in a baking tray and then once frozen, you can store them in a container. To bake from frozen: lay them out on a baking tray and let them defrost for an hour or so before want to you bake them. Once I try it out, I’ll re-edit this post with how it worked.

Ingredients

  • 110g/4oz butter
  • 100g/3½oz granulated sugar
  • 150g/5½oz light soft brown sugar
  • 1tsp salt
  • 1tsp vanilla extract
  • 2 large eggs, beaten
  • 225g/8oz plain flour
  • 1tsp bicarbonate of soda
  • 1tsp mixed spice
  • 120g/4oz crushed cornflakes or 90g/3oz oats
  • 250g/8oz pecans, chopped (rough or fine depending on your preference)
  • 2tsps orange zest
  • 300g/12oz dark chocolate chopped into chunks or use chocolate chips, if you prefer

Method

1. Preheat the oven to 180C/350F/Gas Mark 4. This recipe makes LOTS of cookies so line various baking trays with baking paper.

2. Measure out the flour, bicarbonate soda, mixed spice and salt in one bowl and sift together.

3. In a big bowl, cream the butter until it is light and fluffy. It’s much quicker when done with an electric mixer (about 4-5 mins), which my hosts didn’t own unfortunately. So, I had to use arm power and it took much longer, but good for toning the arms.

4. Add the orange zest, vanilla extract, white and brown sugars and cream together with the butter until they are thoroughly mixed.

5. Now mix the eggs into the butter/sugar mixture, one at a time.

6. Add the flour mixture in two batches, ensuring that the first batch is well-combined with the butter/sugar mixture before adding the second. The reason for doing it like this is that it is easier on you to beat out any lumps of flour in the dough.

7. Now, obviously if you had to use a wooden spoon/spatula all this time because there wasn’t an electric mixer then you don’t have to switch over. But if not, with a wooden spoon/spatula, mix in the chopped pecans, chopped chocolates. Finally add in the crushed cornflakes or oats and mix well.

cookie doughbaked cornflake cookies

8. Using a tablespoon to measure it out, dollop out the cookie dough onto the baking tray, making sure that each of the tablespoon sized dollops are evenly spaced out. The high fat content in them means that they will spread out while baking, so don’t worry – they will flatten out!

9. Bake them in the oven for 12-14 minutes. Take them out when they are golden brown in colour and still soft in the middle. They will harden more in the cooling process. Let them cool for 2 minutes on the baking tray and then let them cool on a wire rack. If you’re limited on space, you’ll be itching to get the next batch onto the baking tray and in the oven as soon as possible.

And yes, since I was in America, I can confirm that they are perfect when they are still warm, with a glass of milk and the house has that wonderful smell of freshly baked cookies. Deb (from Smitten Kitchen) rates these as the perfect balance between chewy and crispy and that the combination of the spice and orange zest give it a grown up feel. I agree. Adapt it with milk chocolate, if you prefer. Next time, I think that I’ll try baking it with oatmeal or muesli, just to see how it turns out.

cookies and milkchewy cornflakes, pecan and chocolate cookies

On reflection, nowadays, I get the impression that kitchens on both sides of the Atlantic, make allowances for each other cultures. Most UK kitchens have US style cups, and lots of recipe books will give a glossary list of US and UK terms. Having majoredspecialised in cultural history, I find this all rather fascinating. (self-conscious note on my choice of vocabulary. A relic of my sojourn in the States.) Nevertheless, having grown up in the UK, I personally consider it normal to:

  • weigh out ounces and grams vs cups;
  • use plain and self-raising flour vs all-purpose flour style;
  • differentiate types of sugars, such as caster, granulated, demerara… vs white, brown or molasses;
  • and buy a jar of mixed spice in the supermarket!

But I am partial to the cookies and milk combo.

%d bloggers like this: