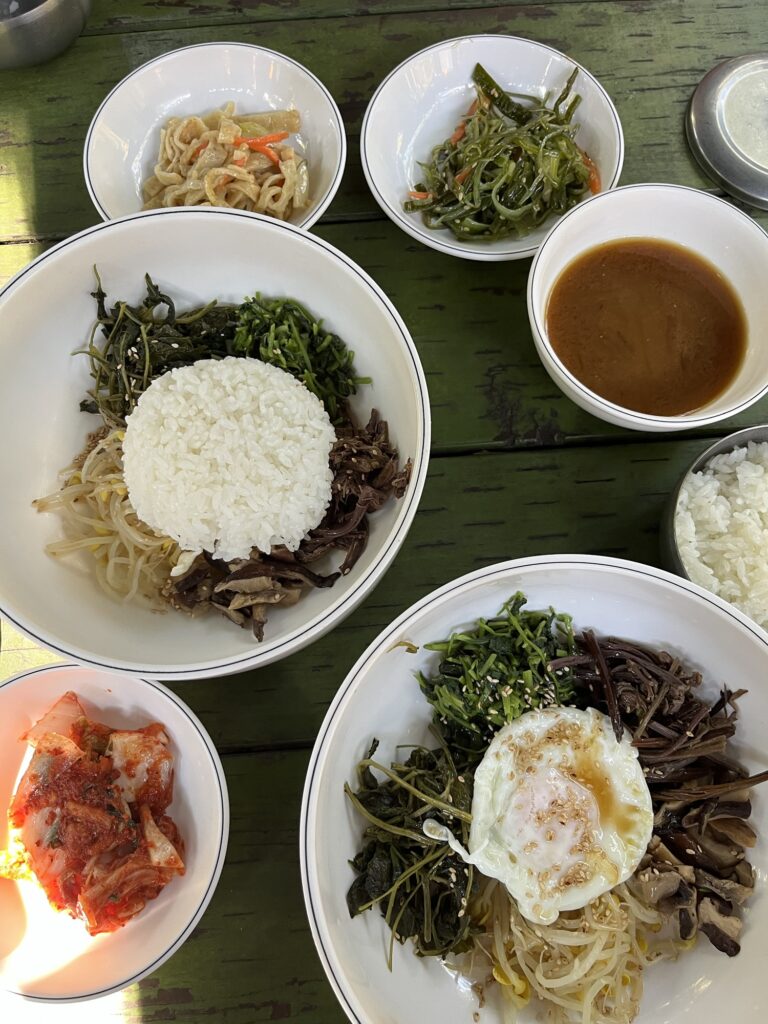
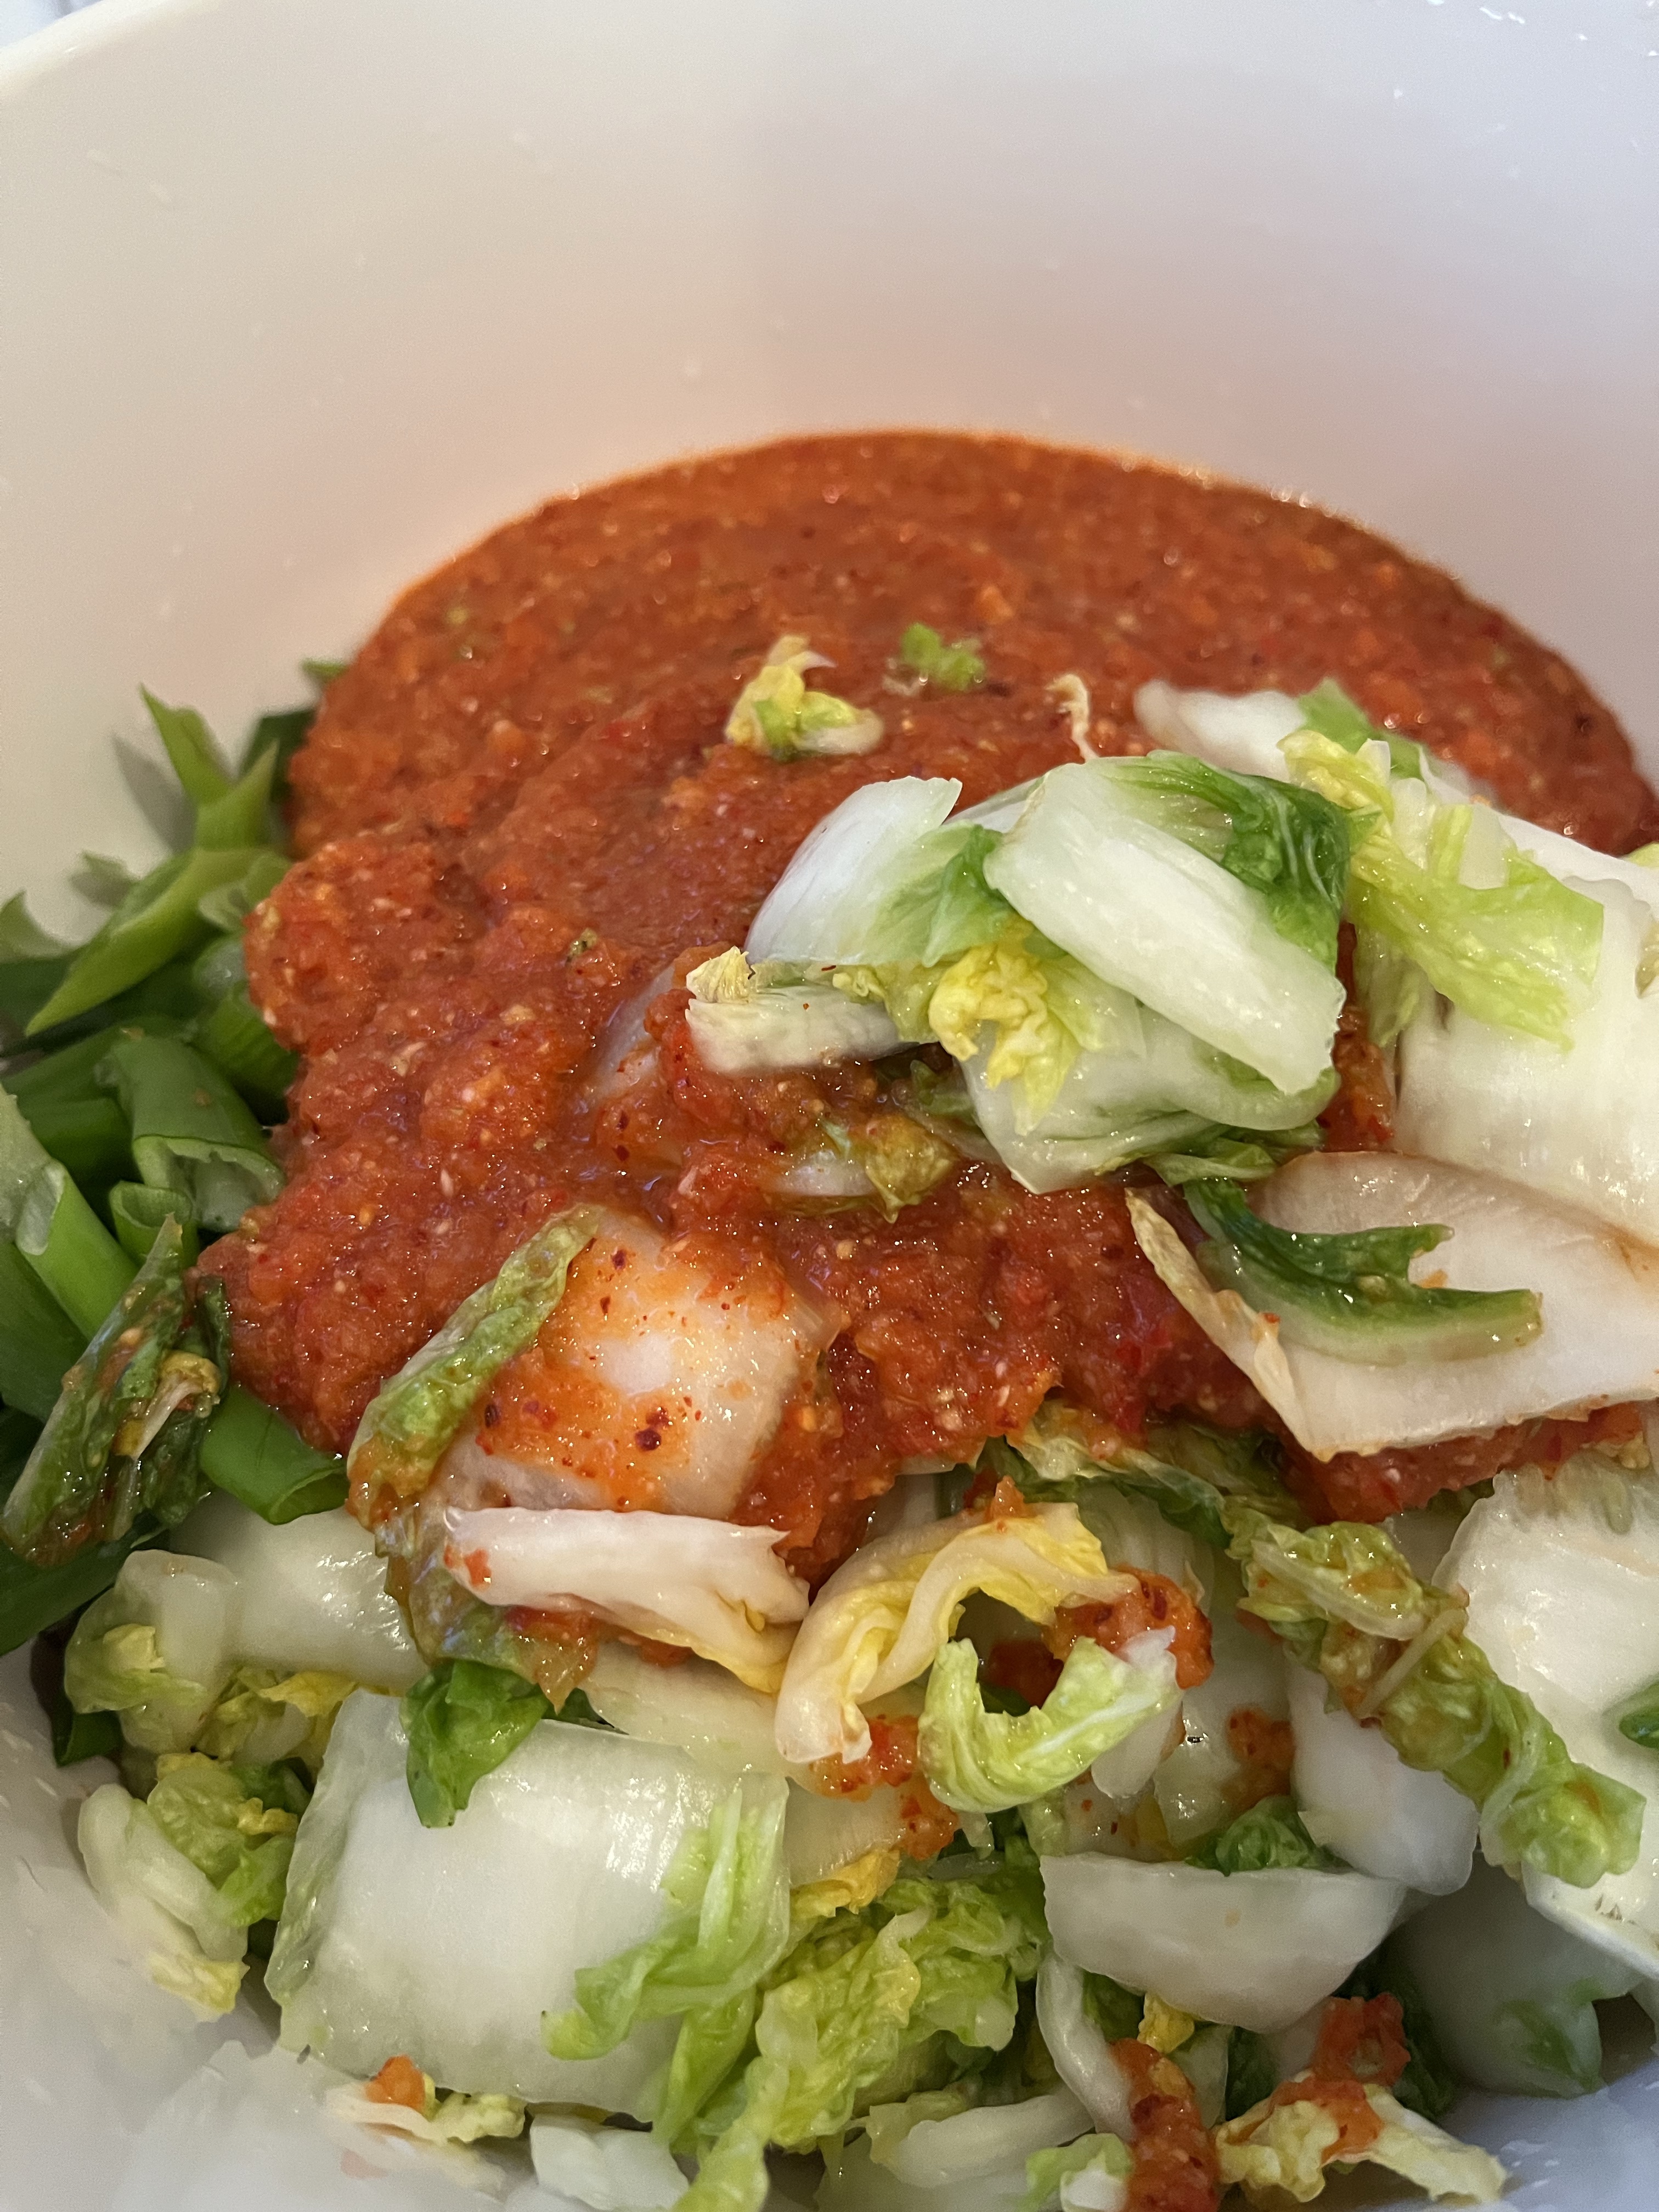
Bibimbap, or 비빔밥 in the Korean, is one of my favourite foods. It translates literally as ‘mixed rice’ from 비빔 bibim = mixed and 밥 bap = rice. Traditionally, it comes in a bowl containing rice, a colourful variety of fried or blanched vegetables (which are often 반찬 banchan, Korean side dishes), plus a protein and topped off with a fried egg. You add the sesame seed oil and gochujang, the Korean red chilli paste, to taste and then mix it all up. Bibimbap is infinitely variable, seasonal and nutritious. My favourite is wild mountain greens bibimbap or 산채비빔밥 sanchae bibimbap. Particularly tasty whilst on a mountain hike, but I’ll eat it anywhere.
산채비빔밥 Sanchae bibimbap
I don’t often have 반찬 in the fridge, so this version uses a mixture of raw and pickled vegetables. It means that I can make it quickly and the raw vegetables add a bit of crunch. I vary the vegetables and the protein depending on what’s in season, what I have in the house and what I’m craving. It’s my current lunchtime go-to in this ‘is-it- warm,-is-it-cold,-but-it’s-definitely-greyer’ season, when I want to eat something warm and colourful.
To serve this, each person needs a good sized bowl that has high sides so that food doesn’t spill out when mixing it up. I’m not fussy about the aesthetics of how it looks when it is assembled in the bowl. You’re at home, not a restaurant, so I think it’s okay to assemble as each ingredient is prepped. However, just to be clear, for anyone who is new to bibimbap, this dish is assembled and served in individual bowls, so that each person can spice it up according to taste. It isn’t mixed up in one big bowl and portioned out. Oh no no!
Ingredients for bibimbap:
a portion of cooked rice per person
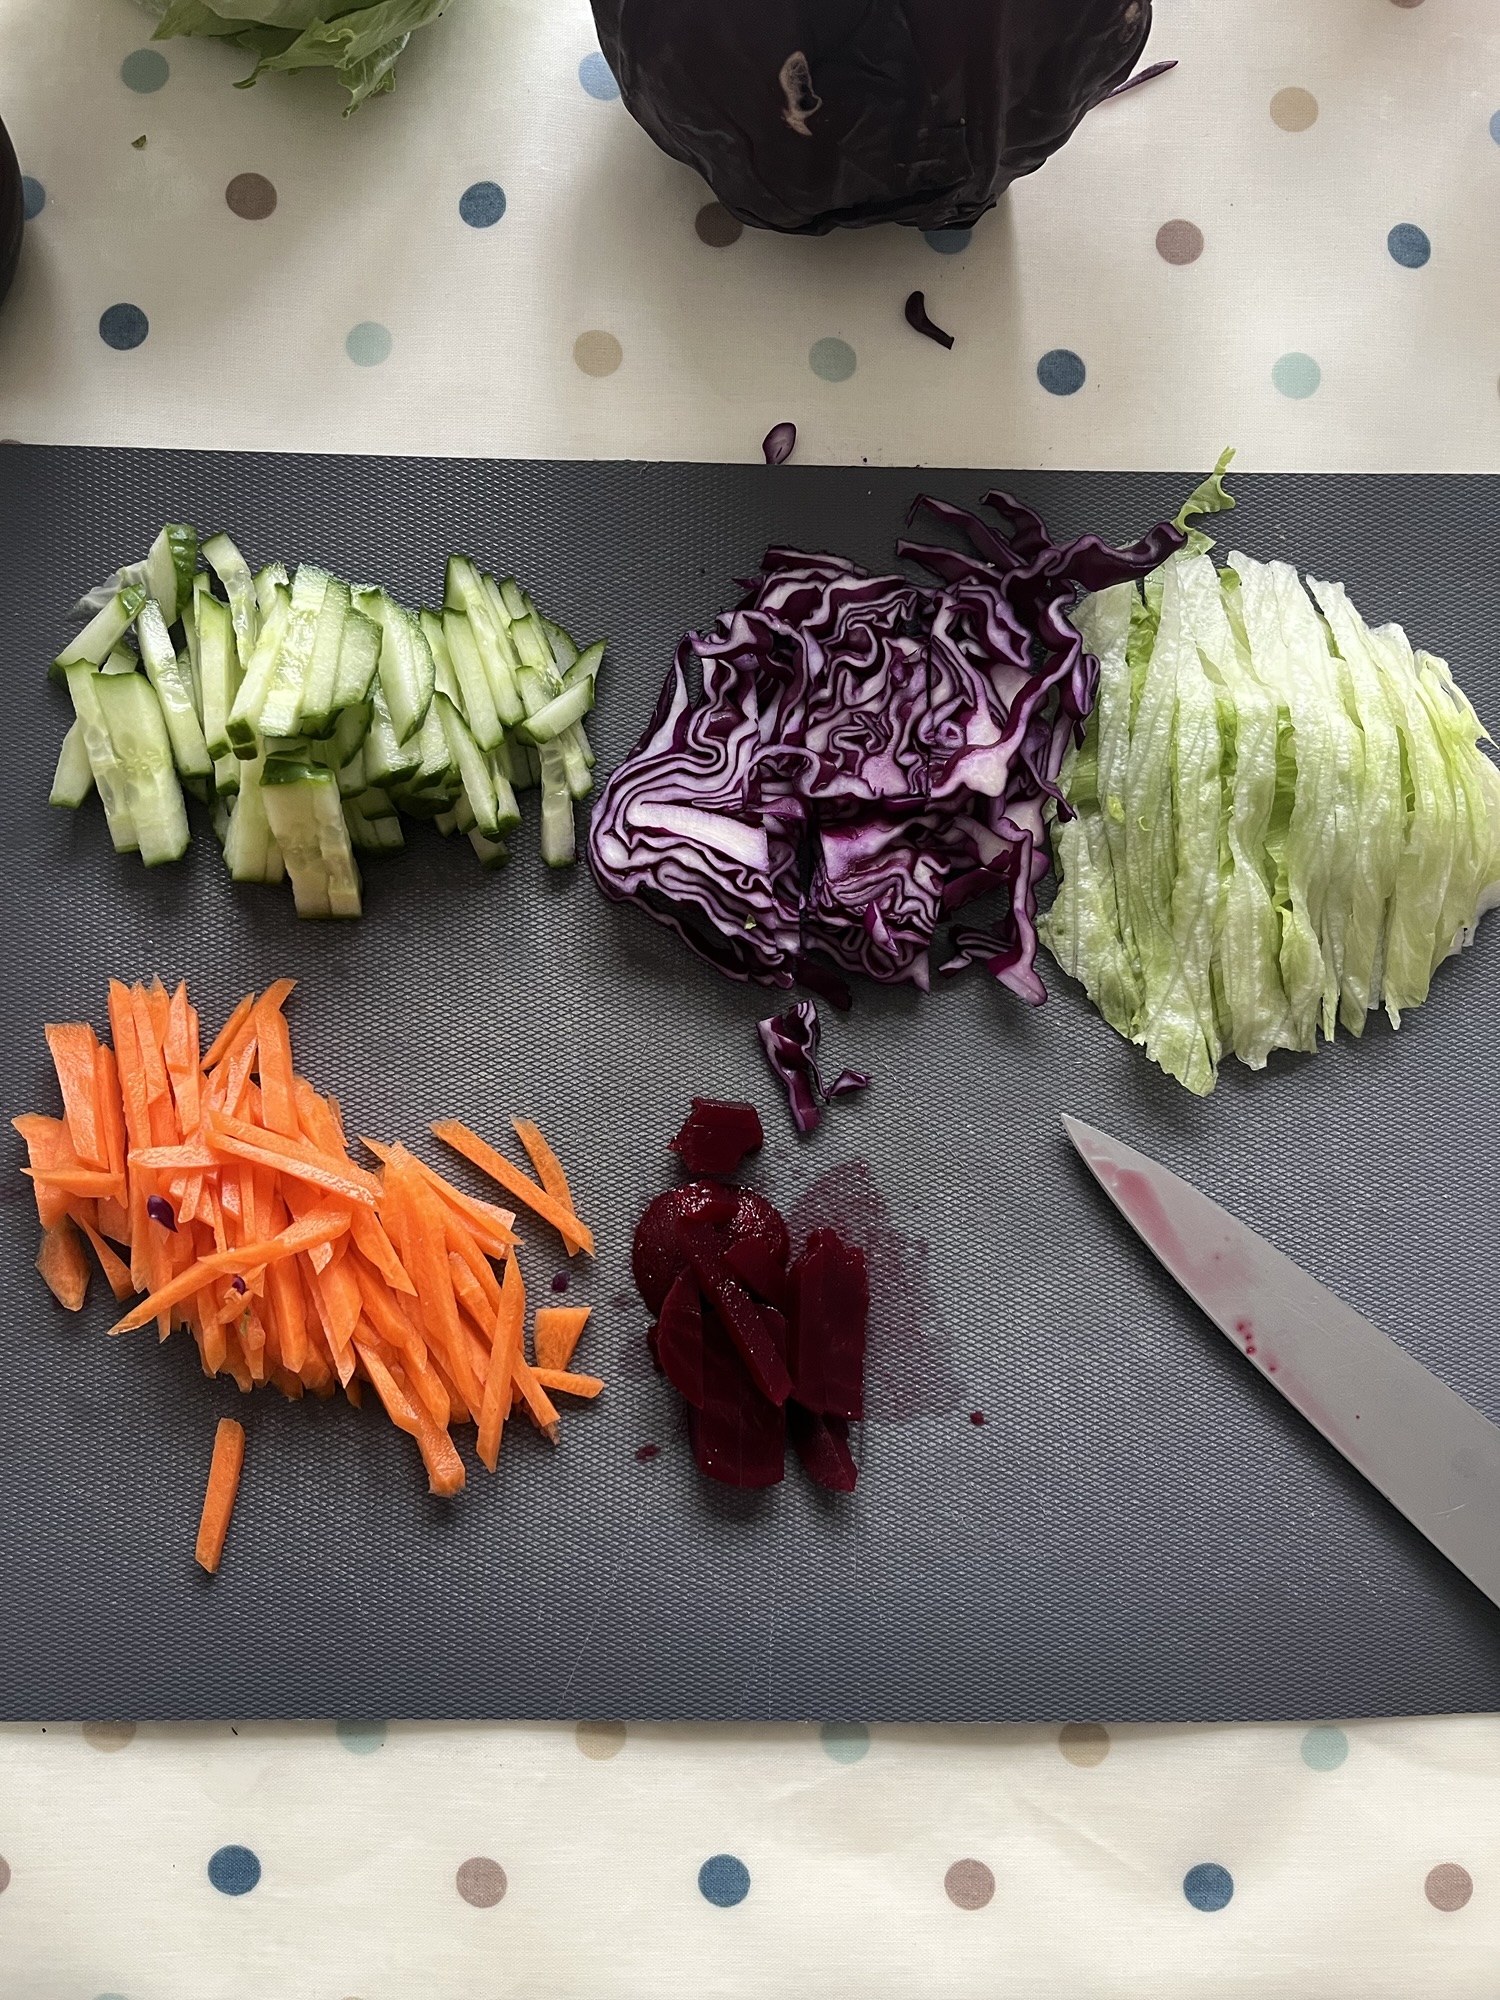
lettuce, finely sliced. I normally use an iceberg lettuce for it’s crunch. You could substitute this for white cabbage, or use both.
cucumber, julienned
red lettuce, finely sliced
carrot, julienned
mushroom, finely sliced
one pickled gherkin or a couple slices of beetroot, julienned per person
one fried egg per person
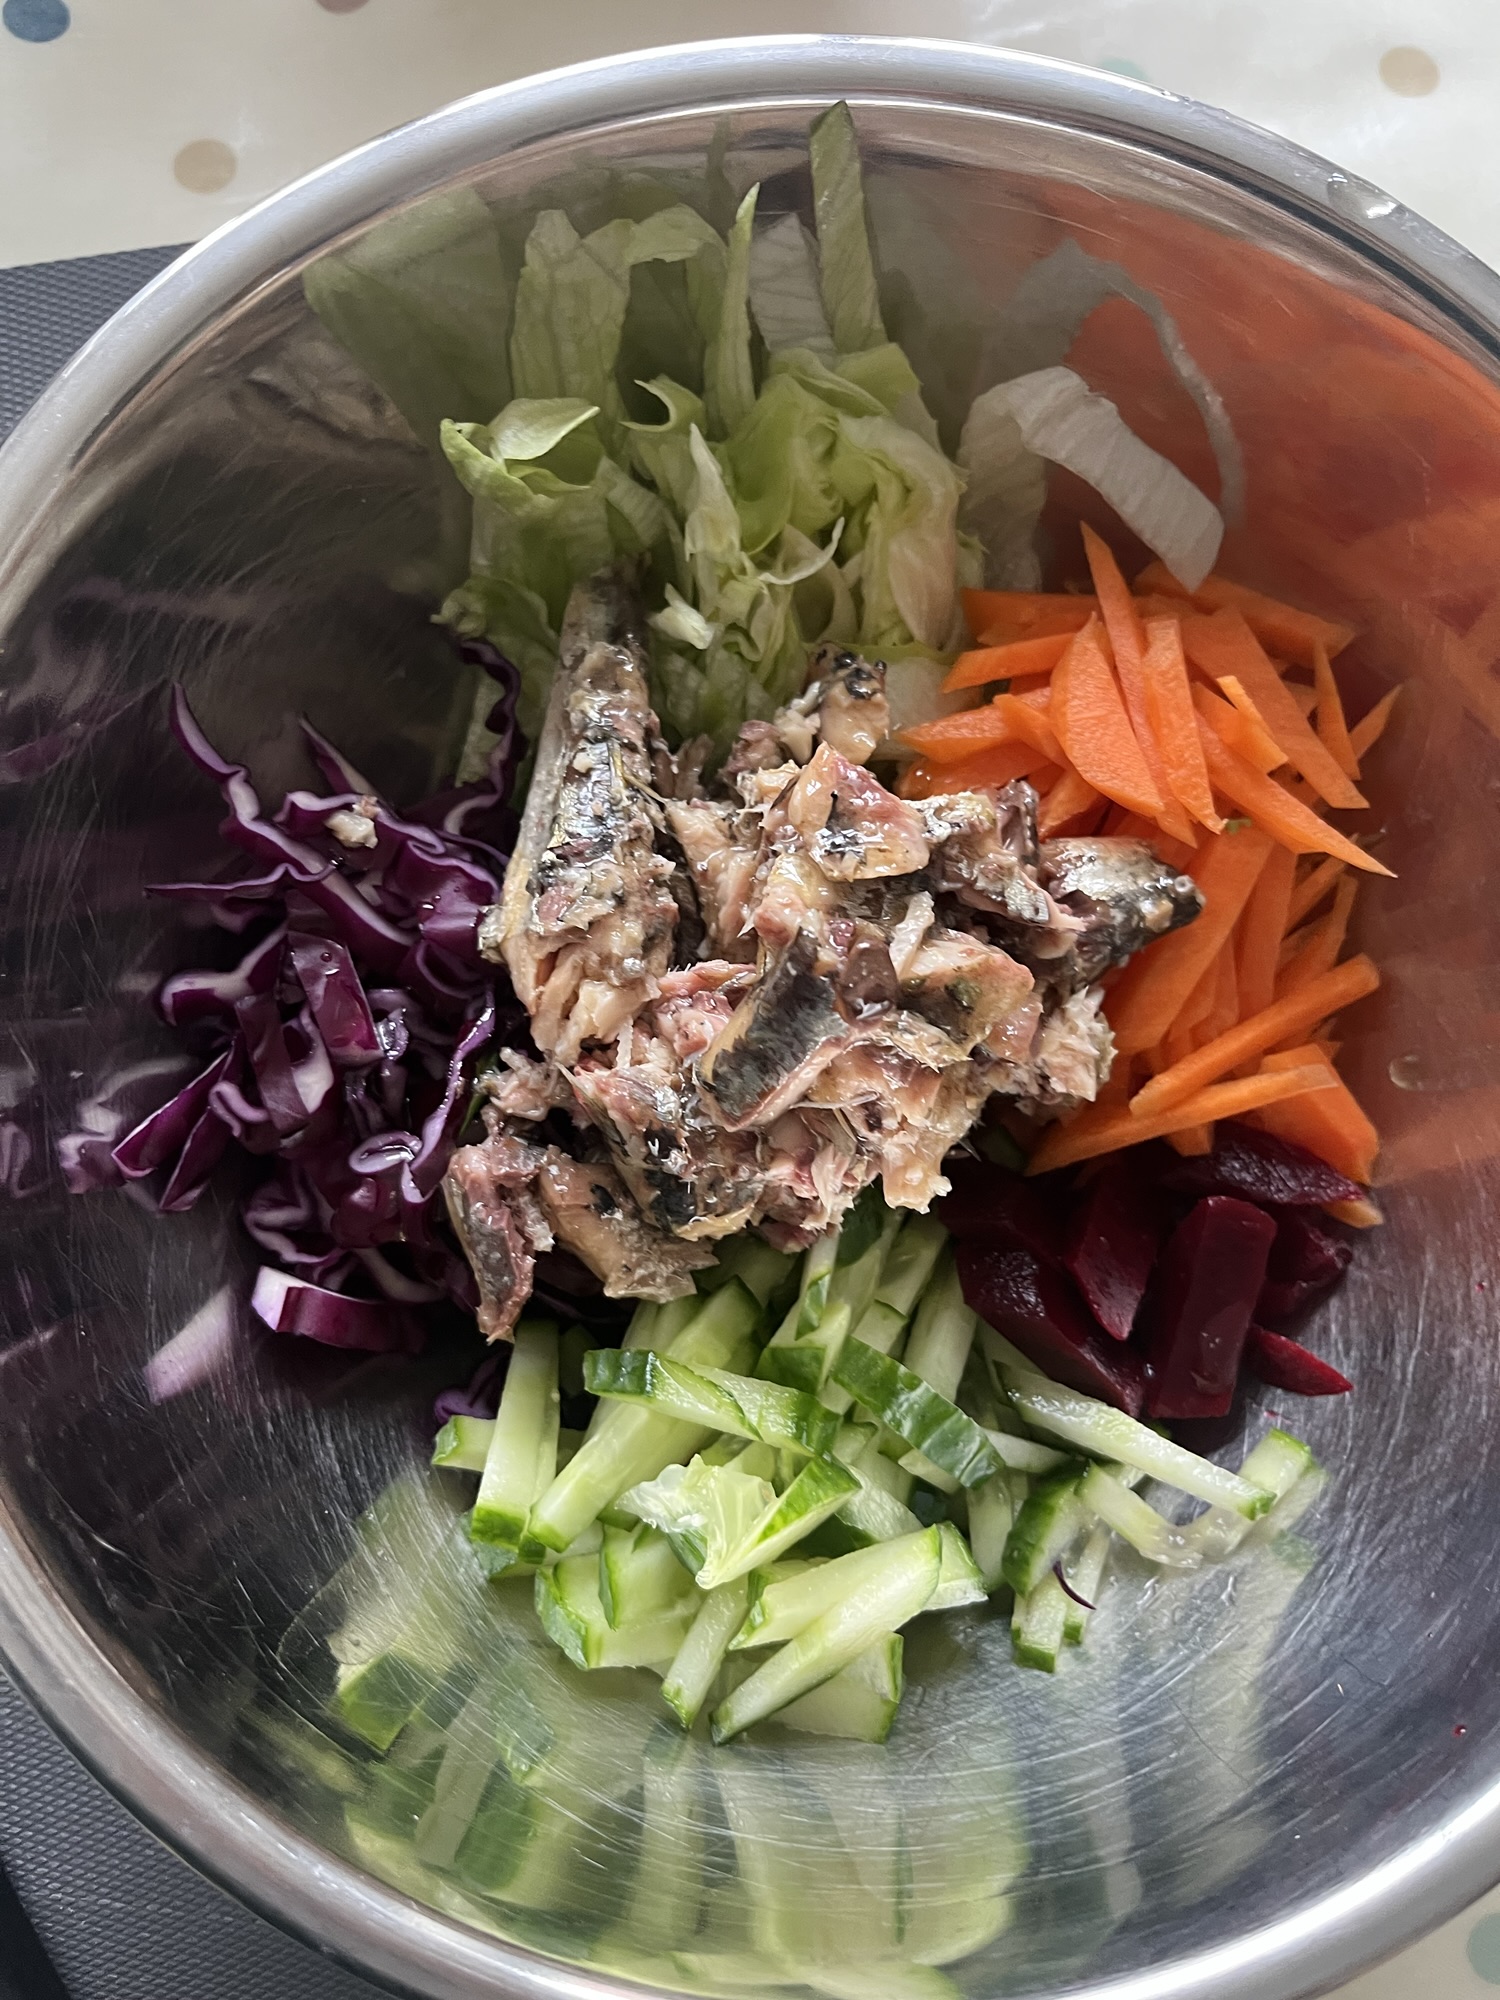
options for protein (fried tofu, bulgogi beef, tinned fish (sardines, tuna)
gochujang* and sesame seed oil to taste. *If you have zero spice tolerance, then my family will substitute ketchup for gochujang. Recently, my sister has made and used an Asian-inspired vinagraitte so that it’s kinder to her stomach.
Method
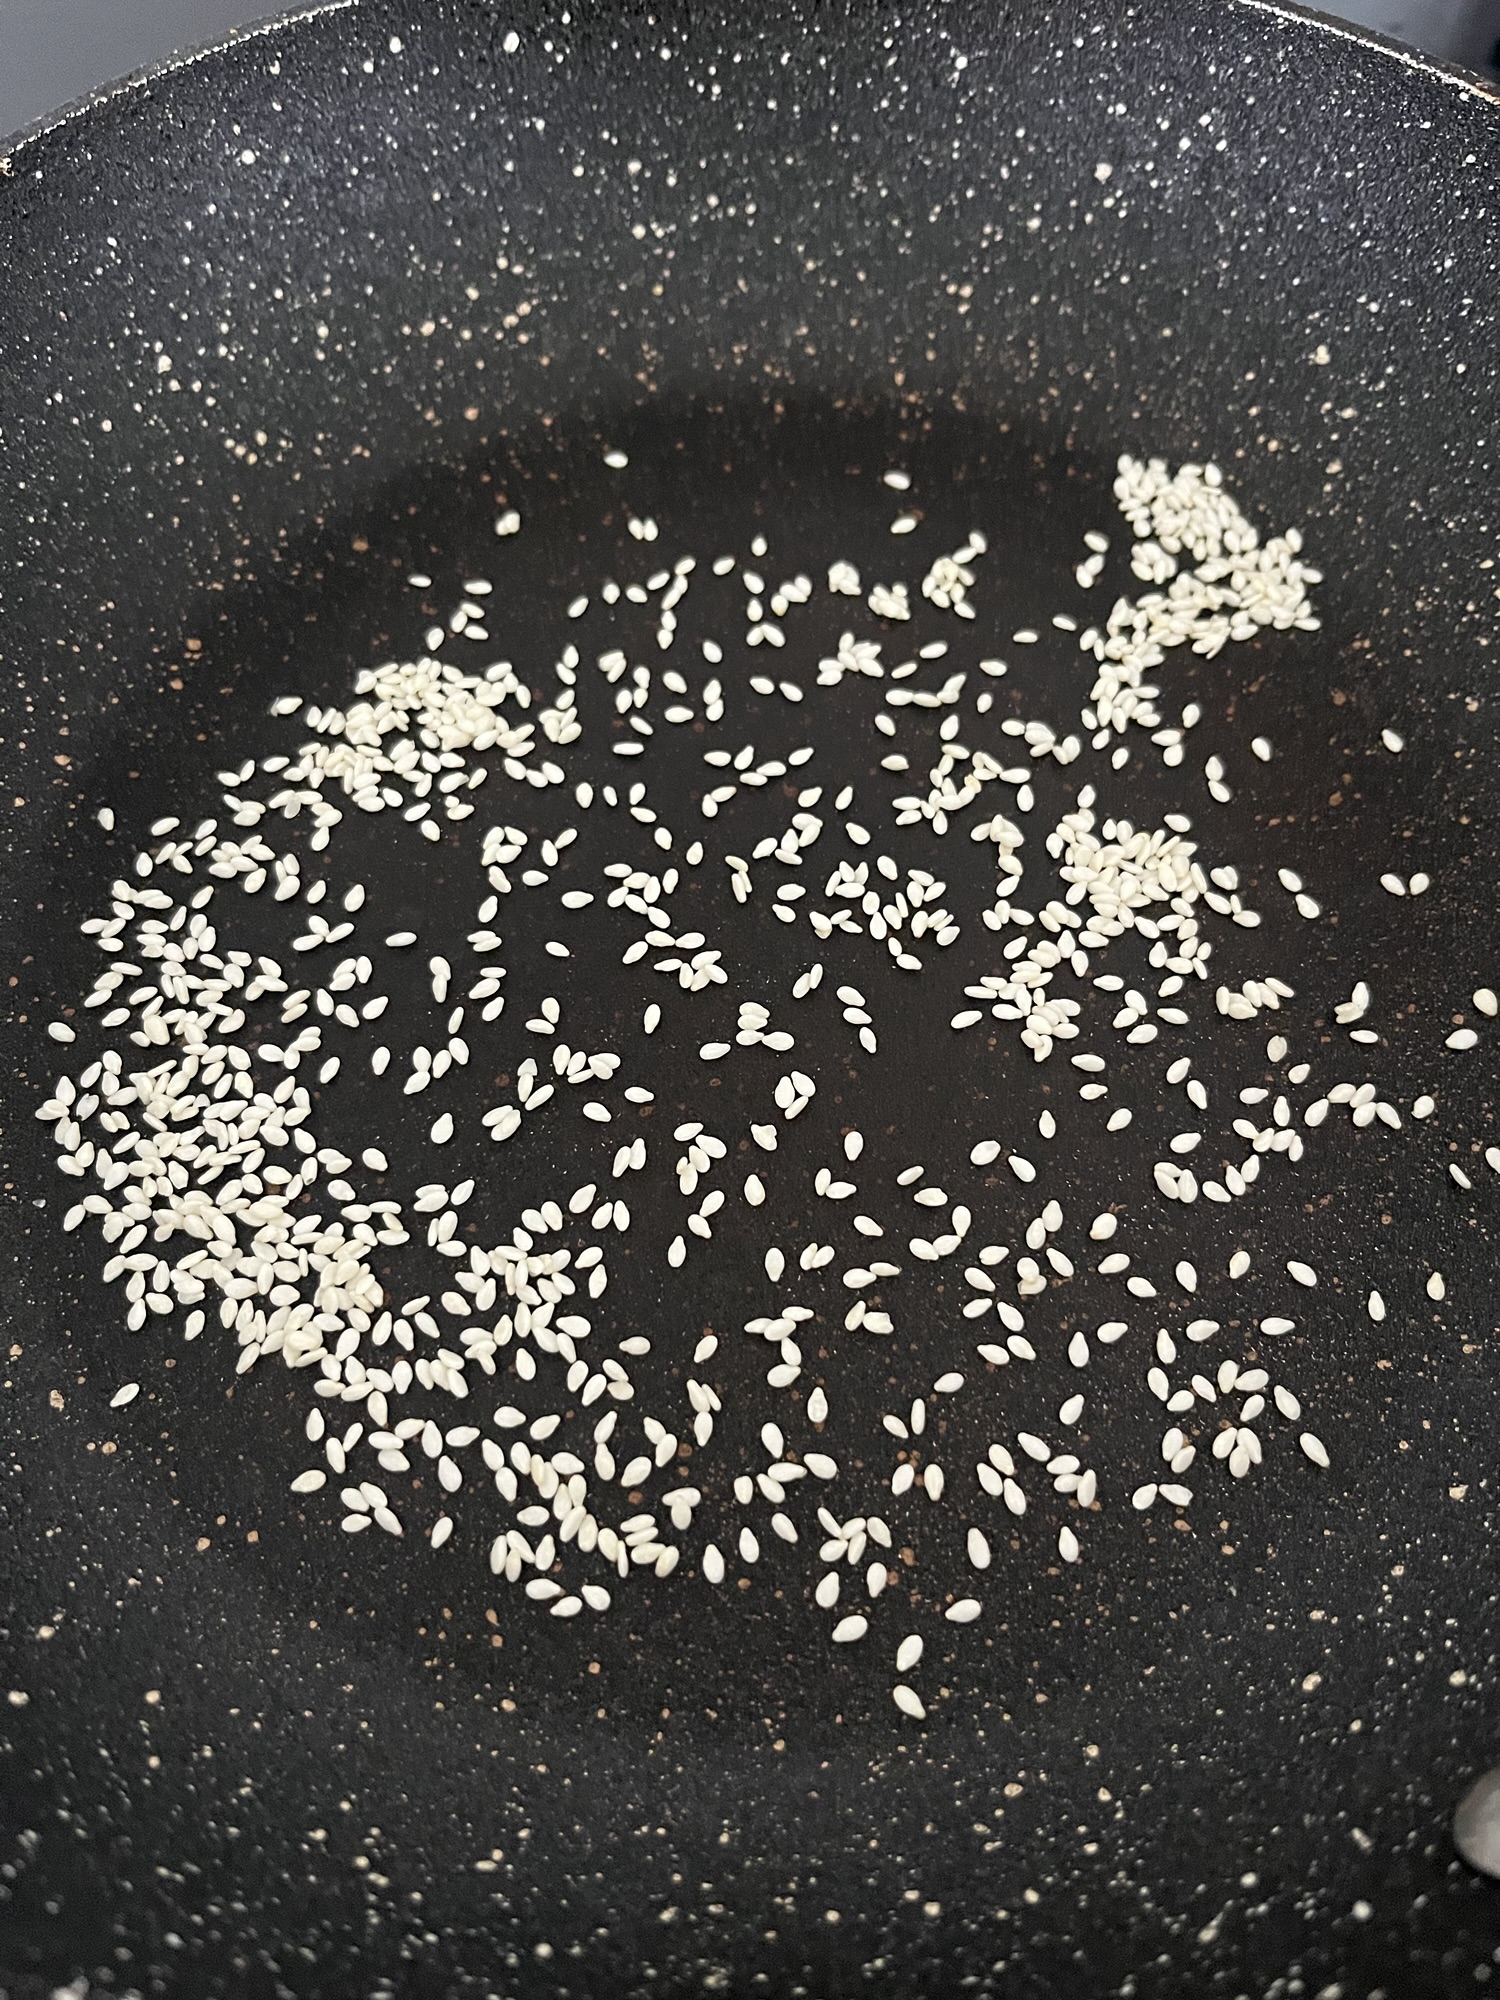
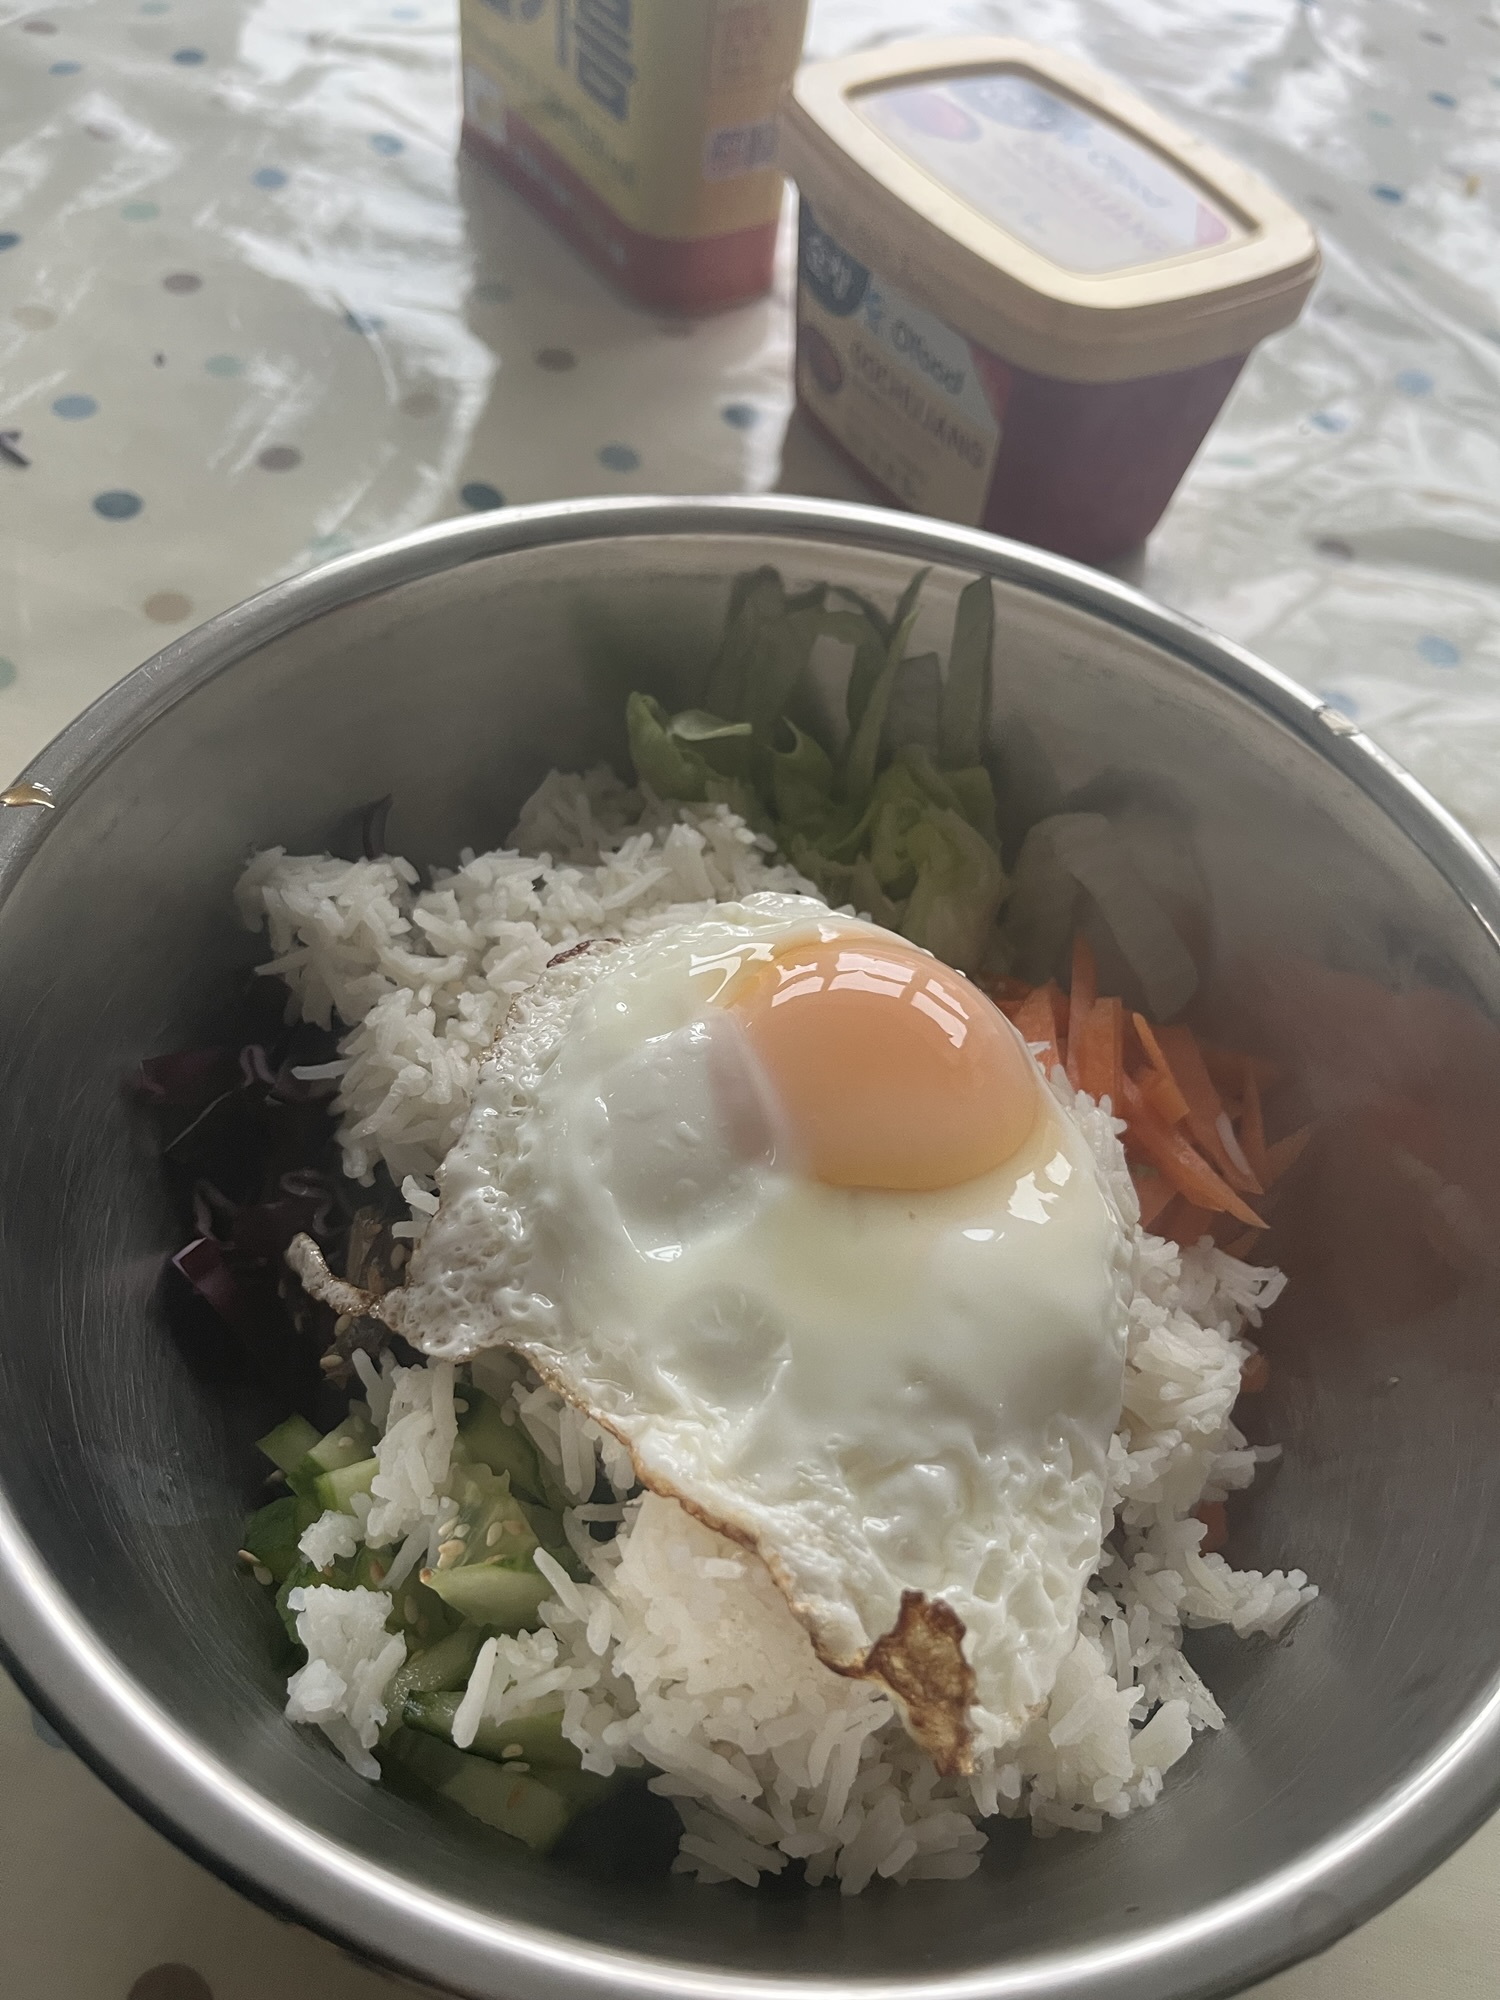
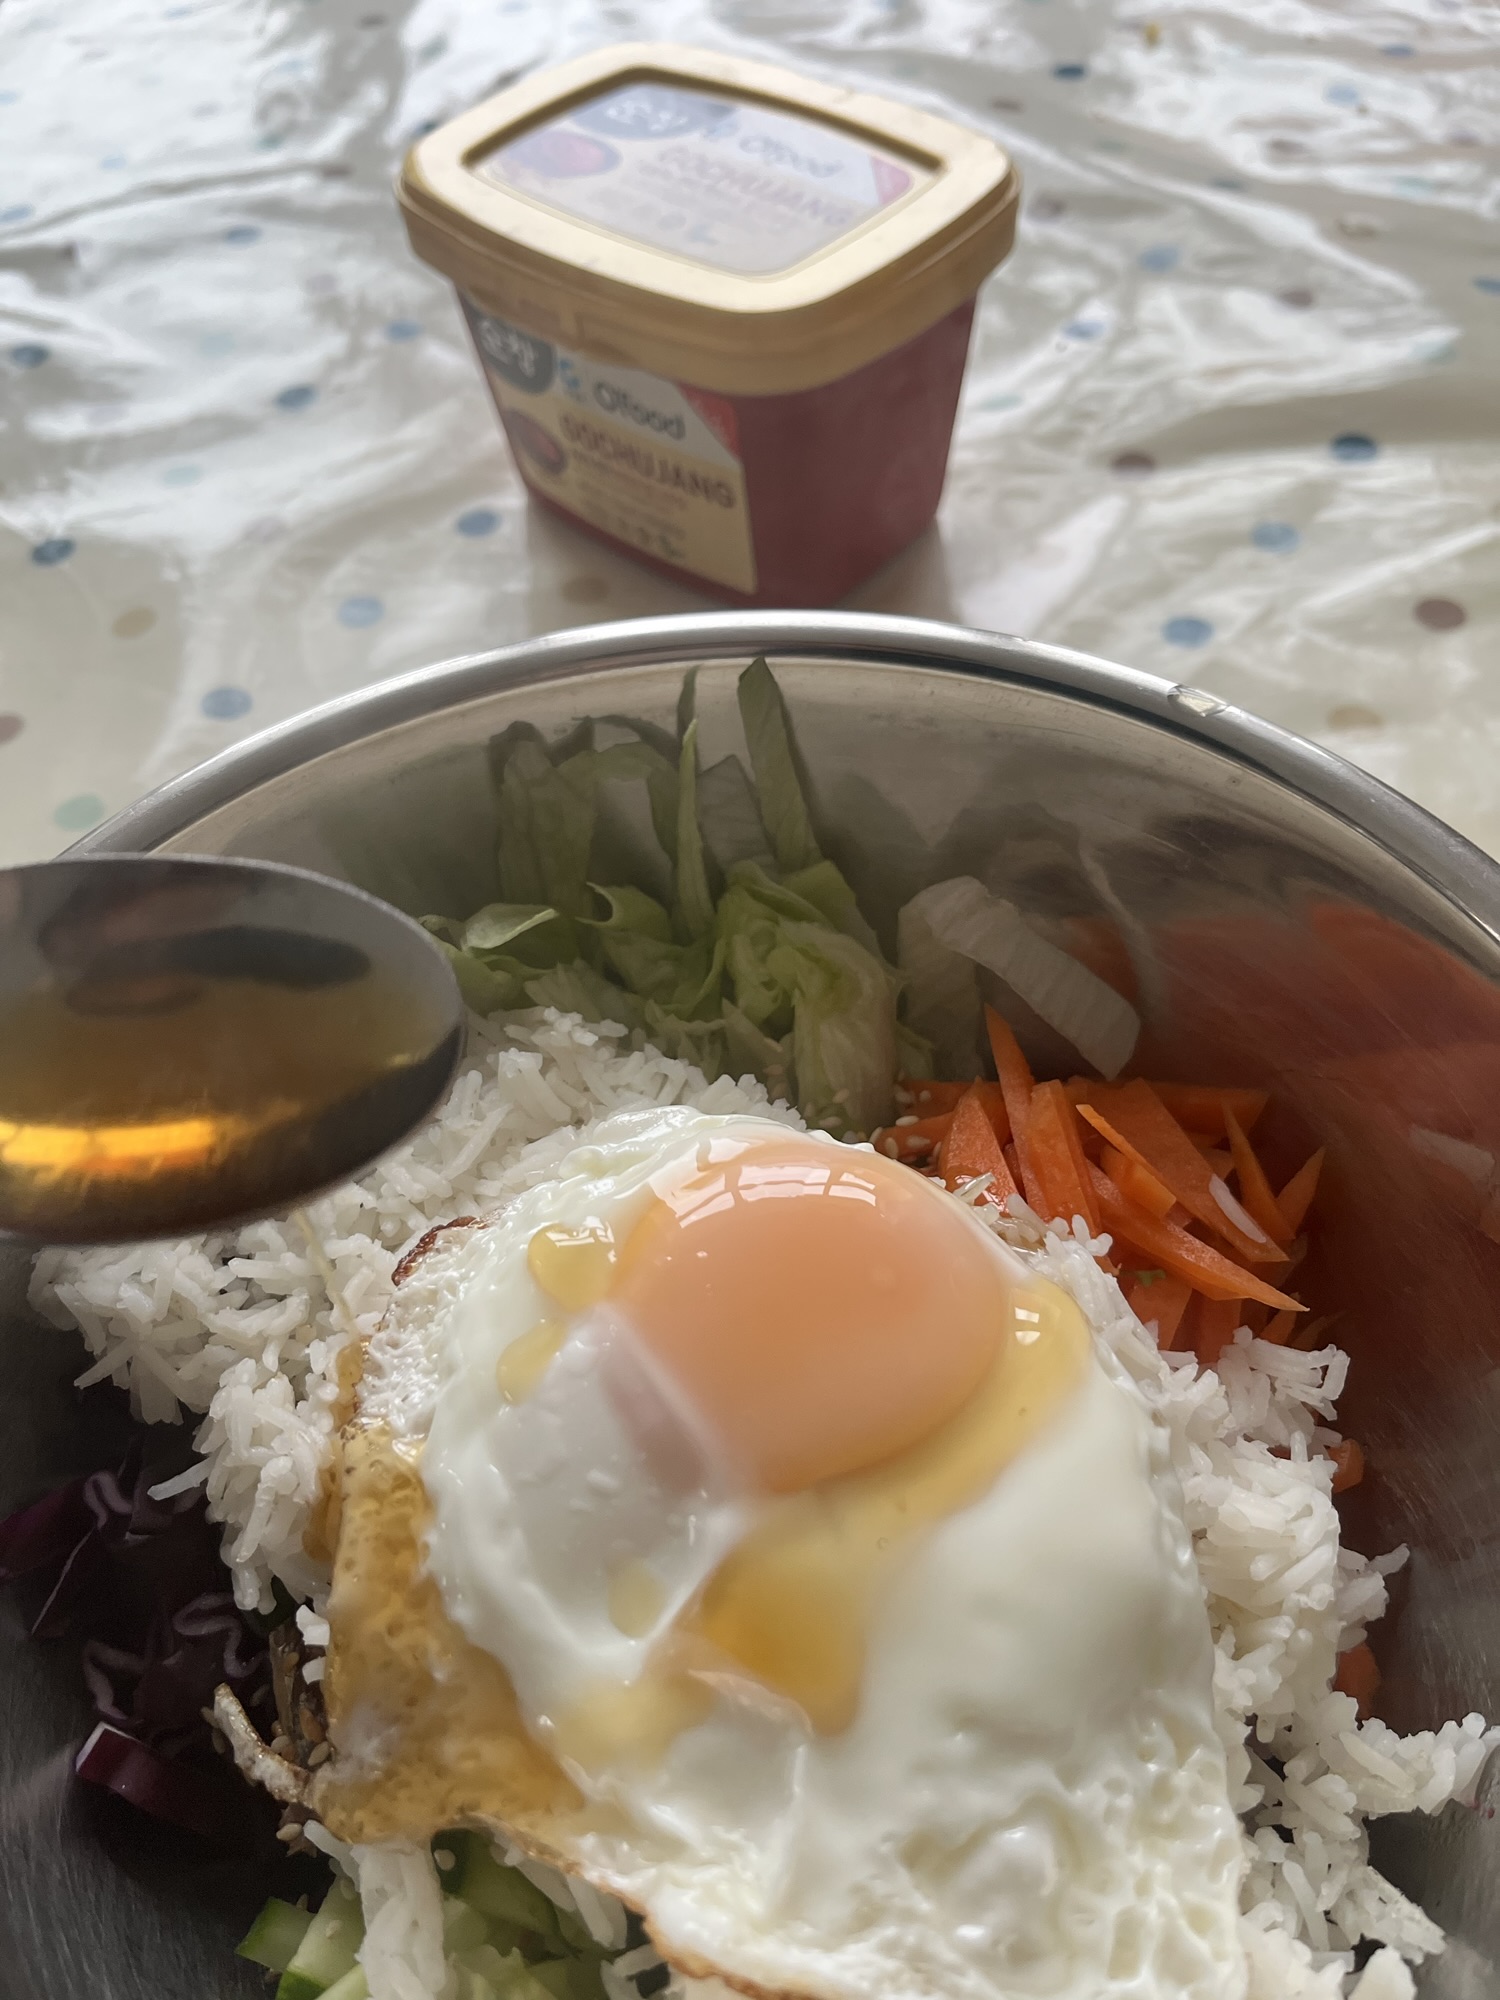
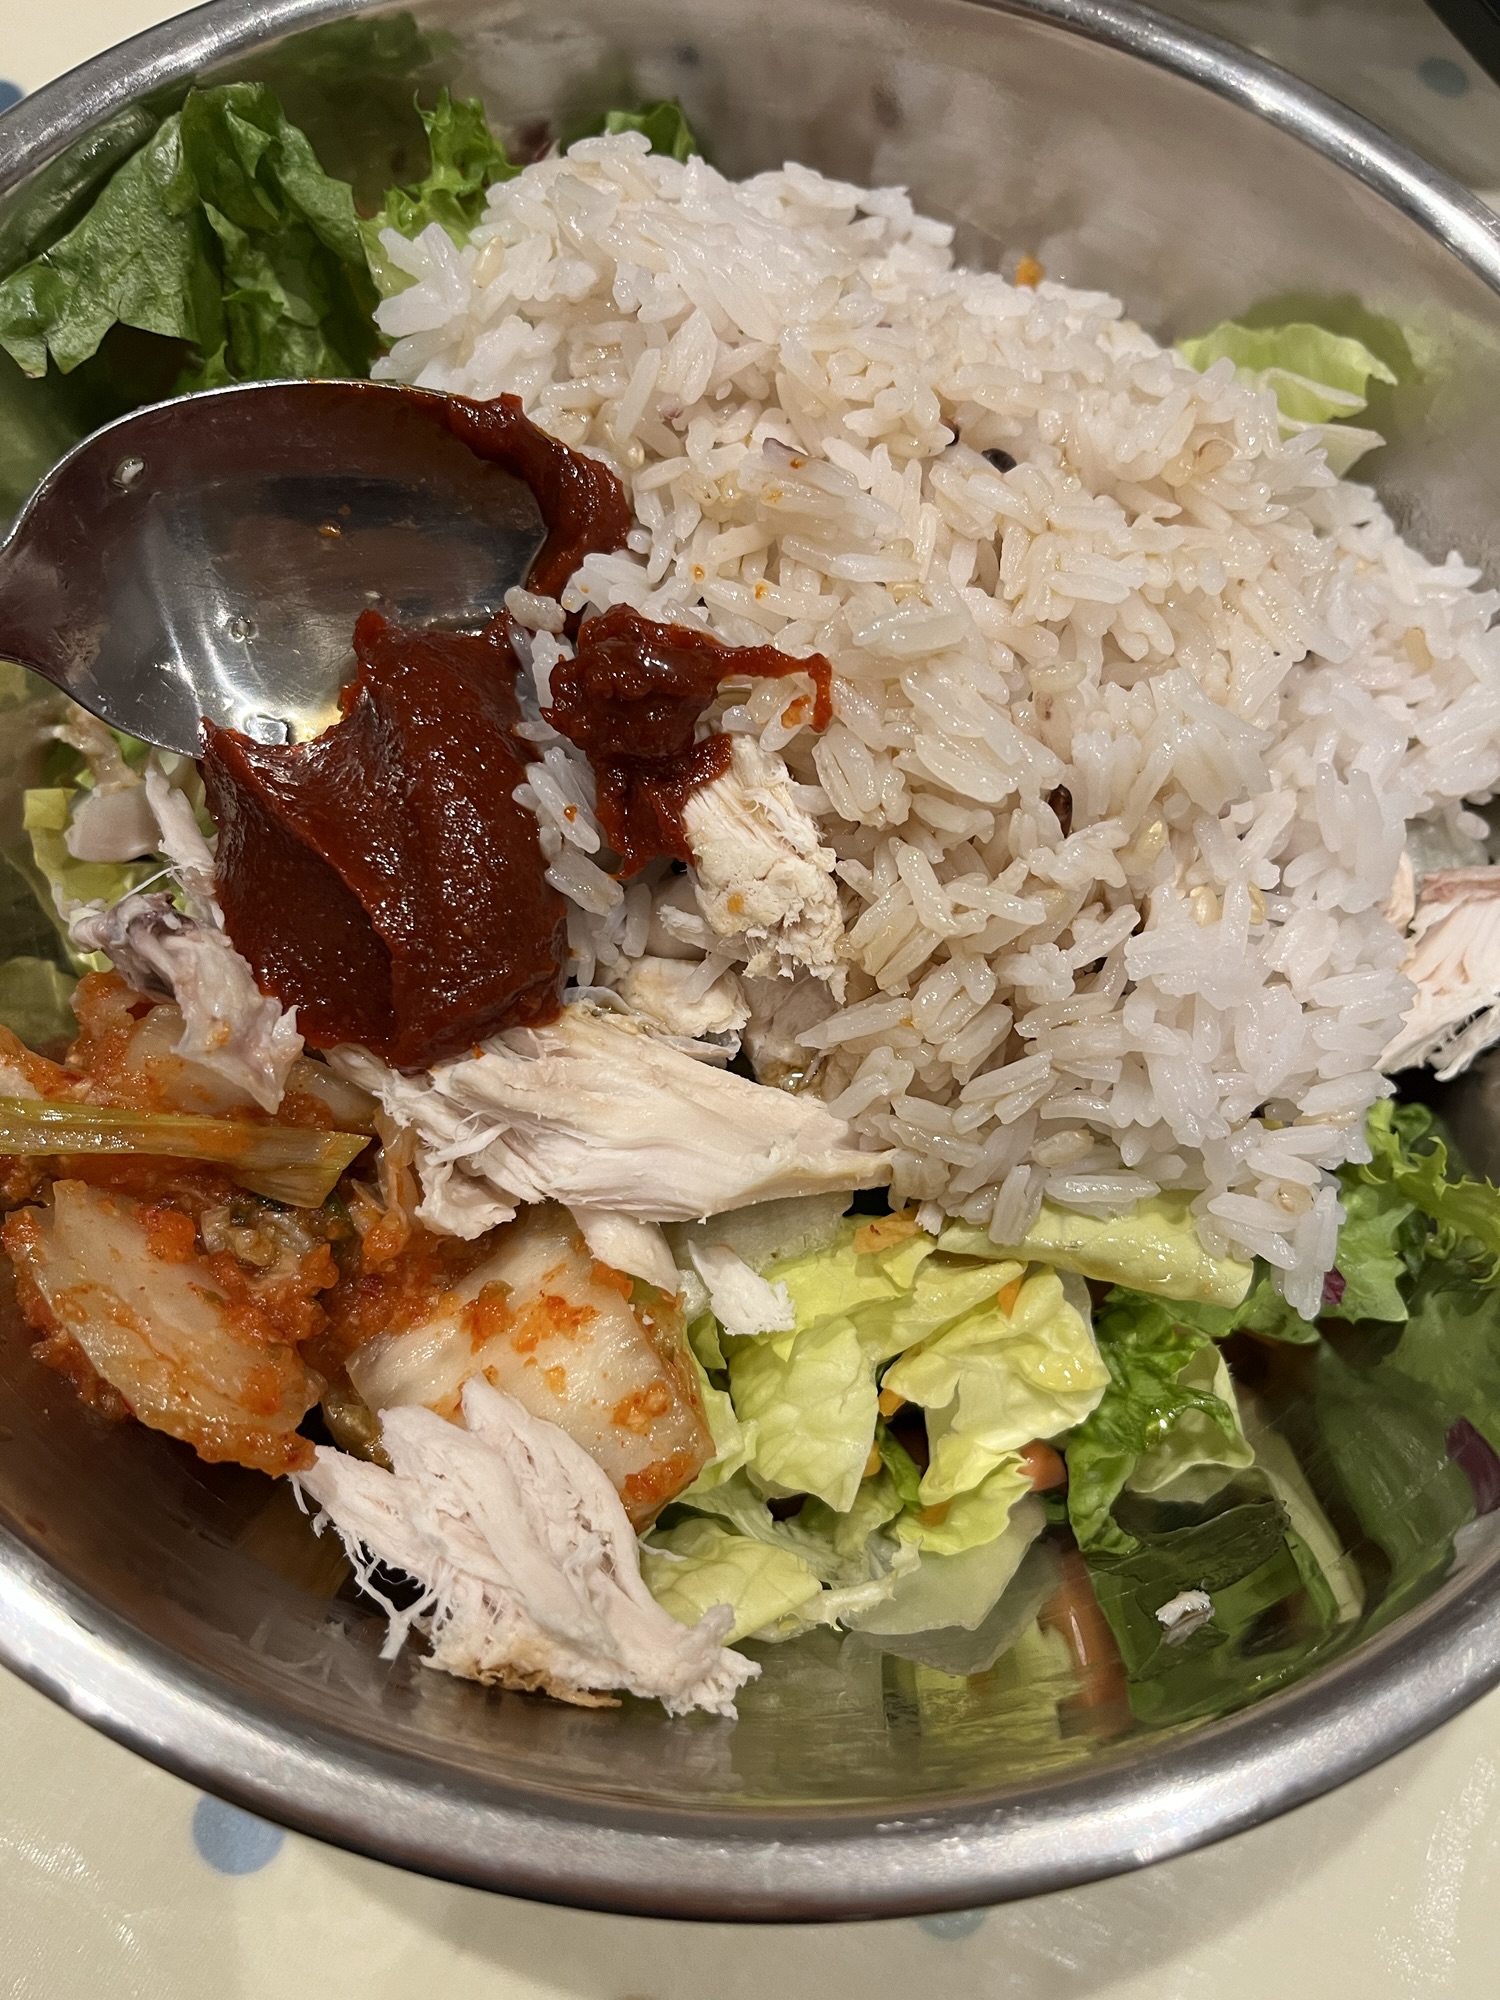
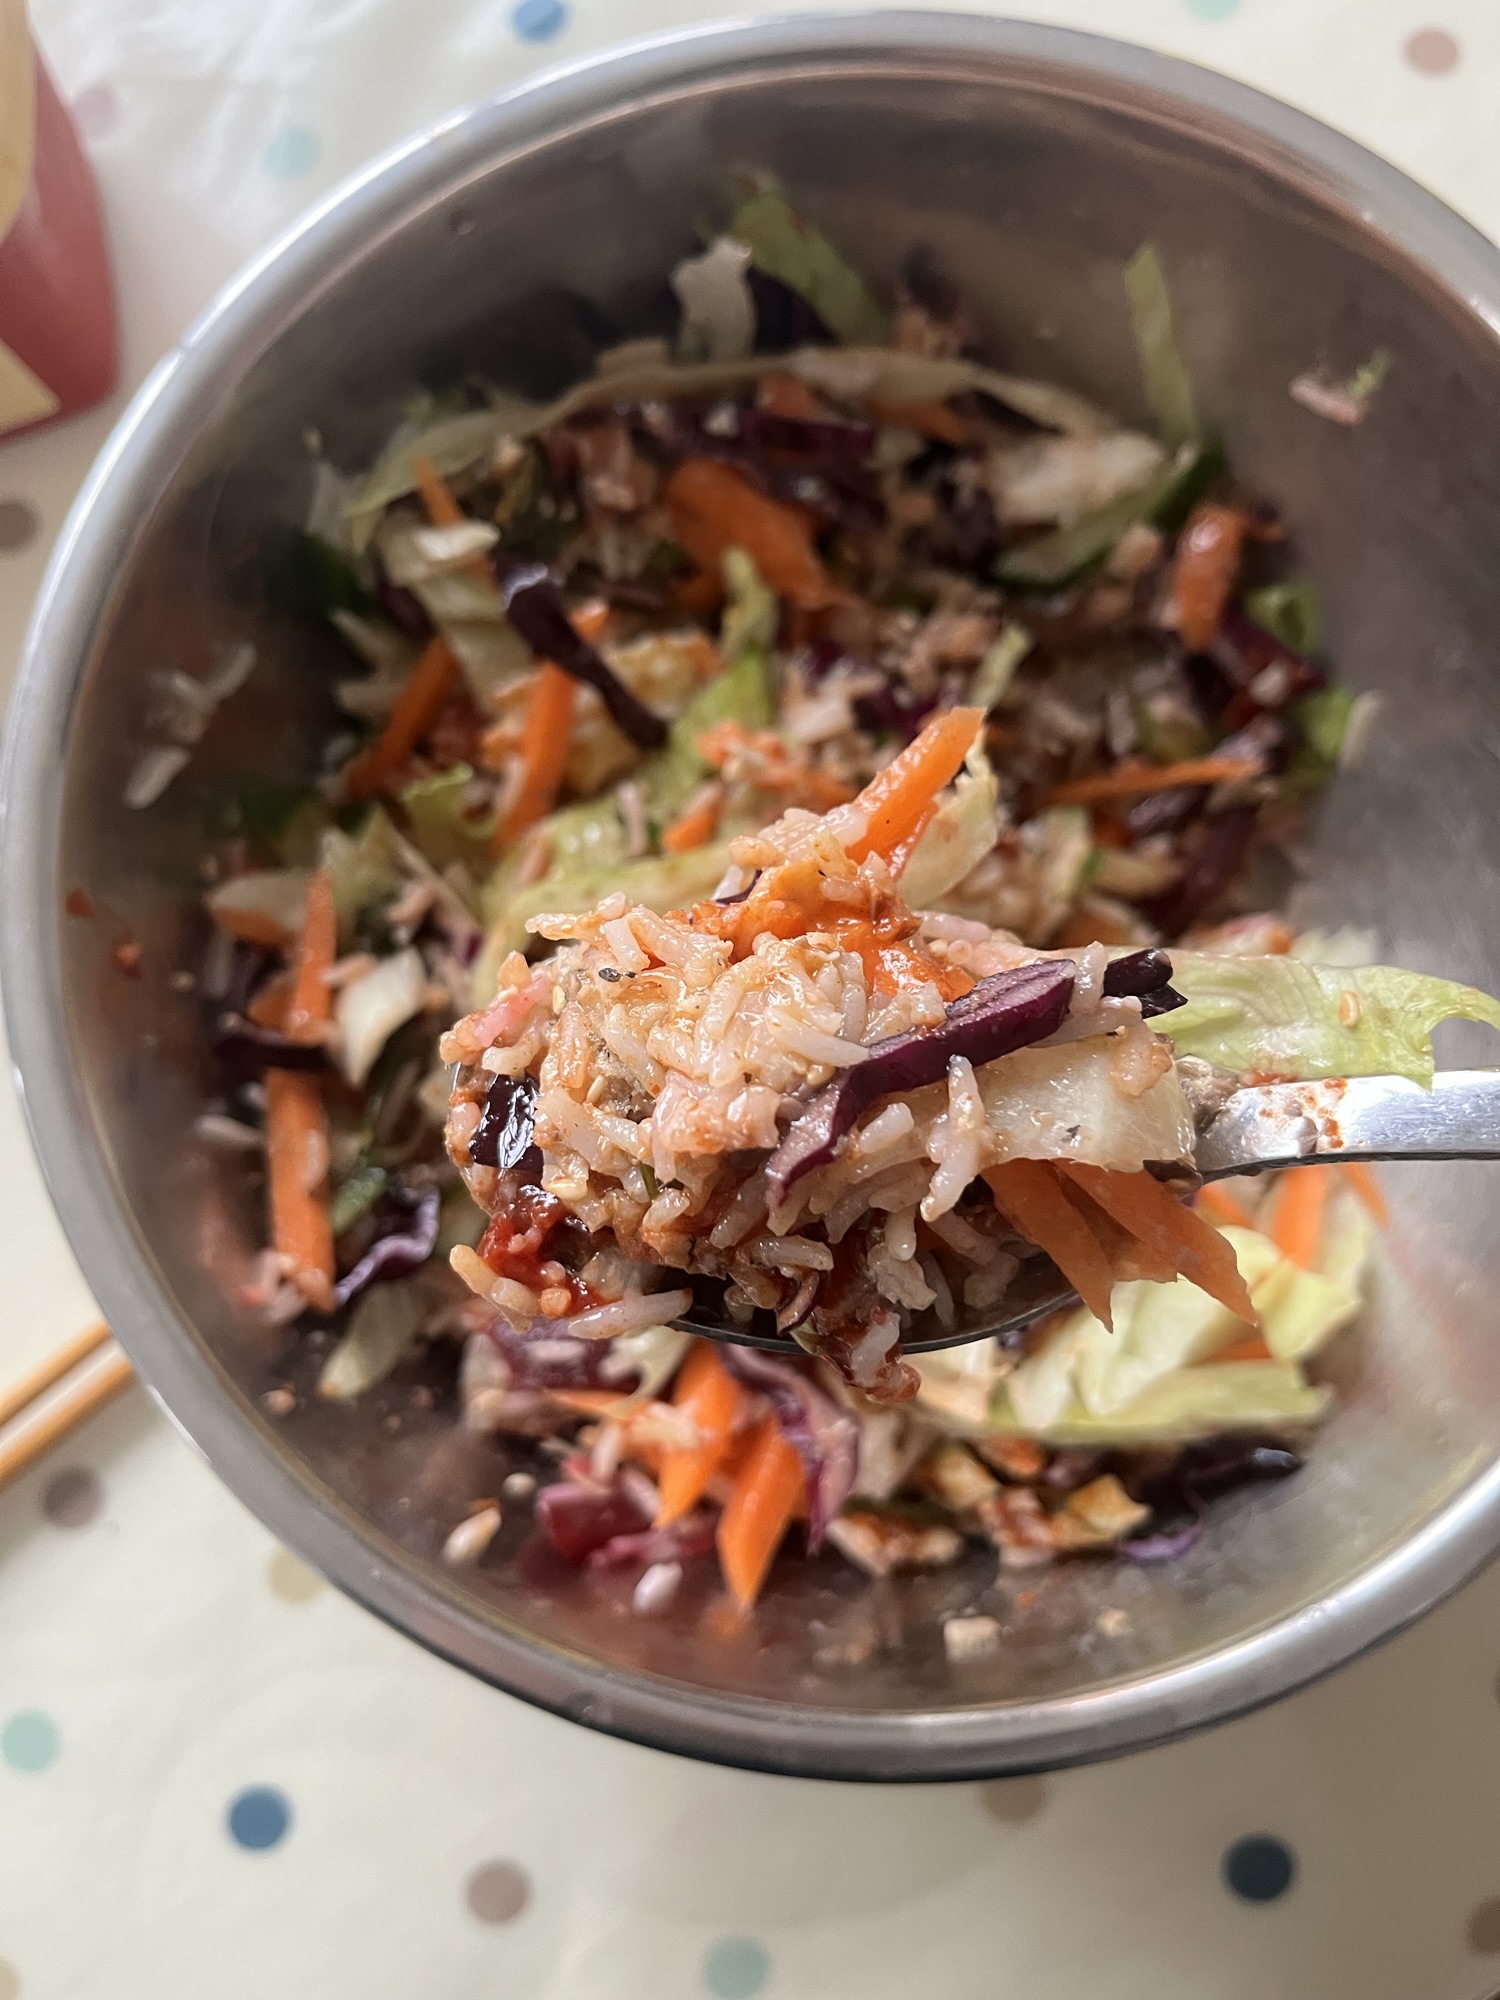
2. Prepping the vegetables4. Now assembled in a bowl4. Adding a protein, this time it’s sardineI added the totally optional step of toasting sesame seeds, just because I wanted to5. Adding the fried egg on top6. Add in your sesame seed oil and gochujang to taste
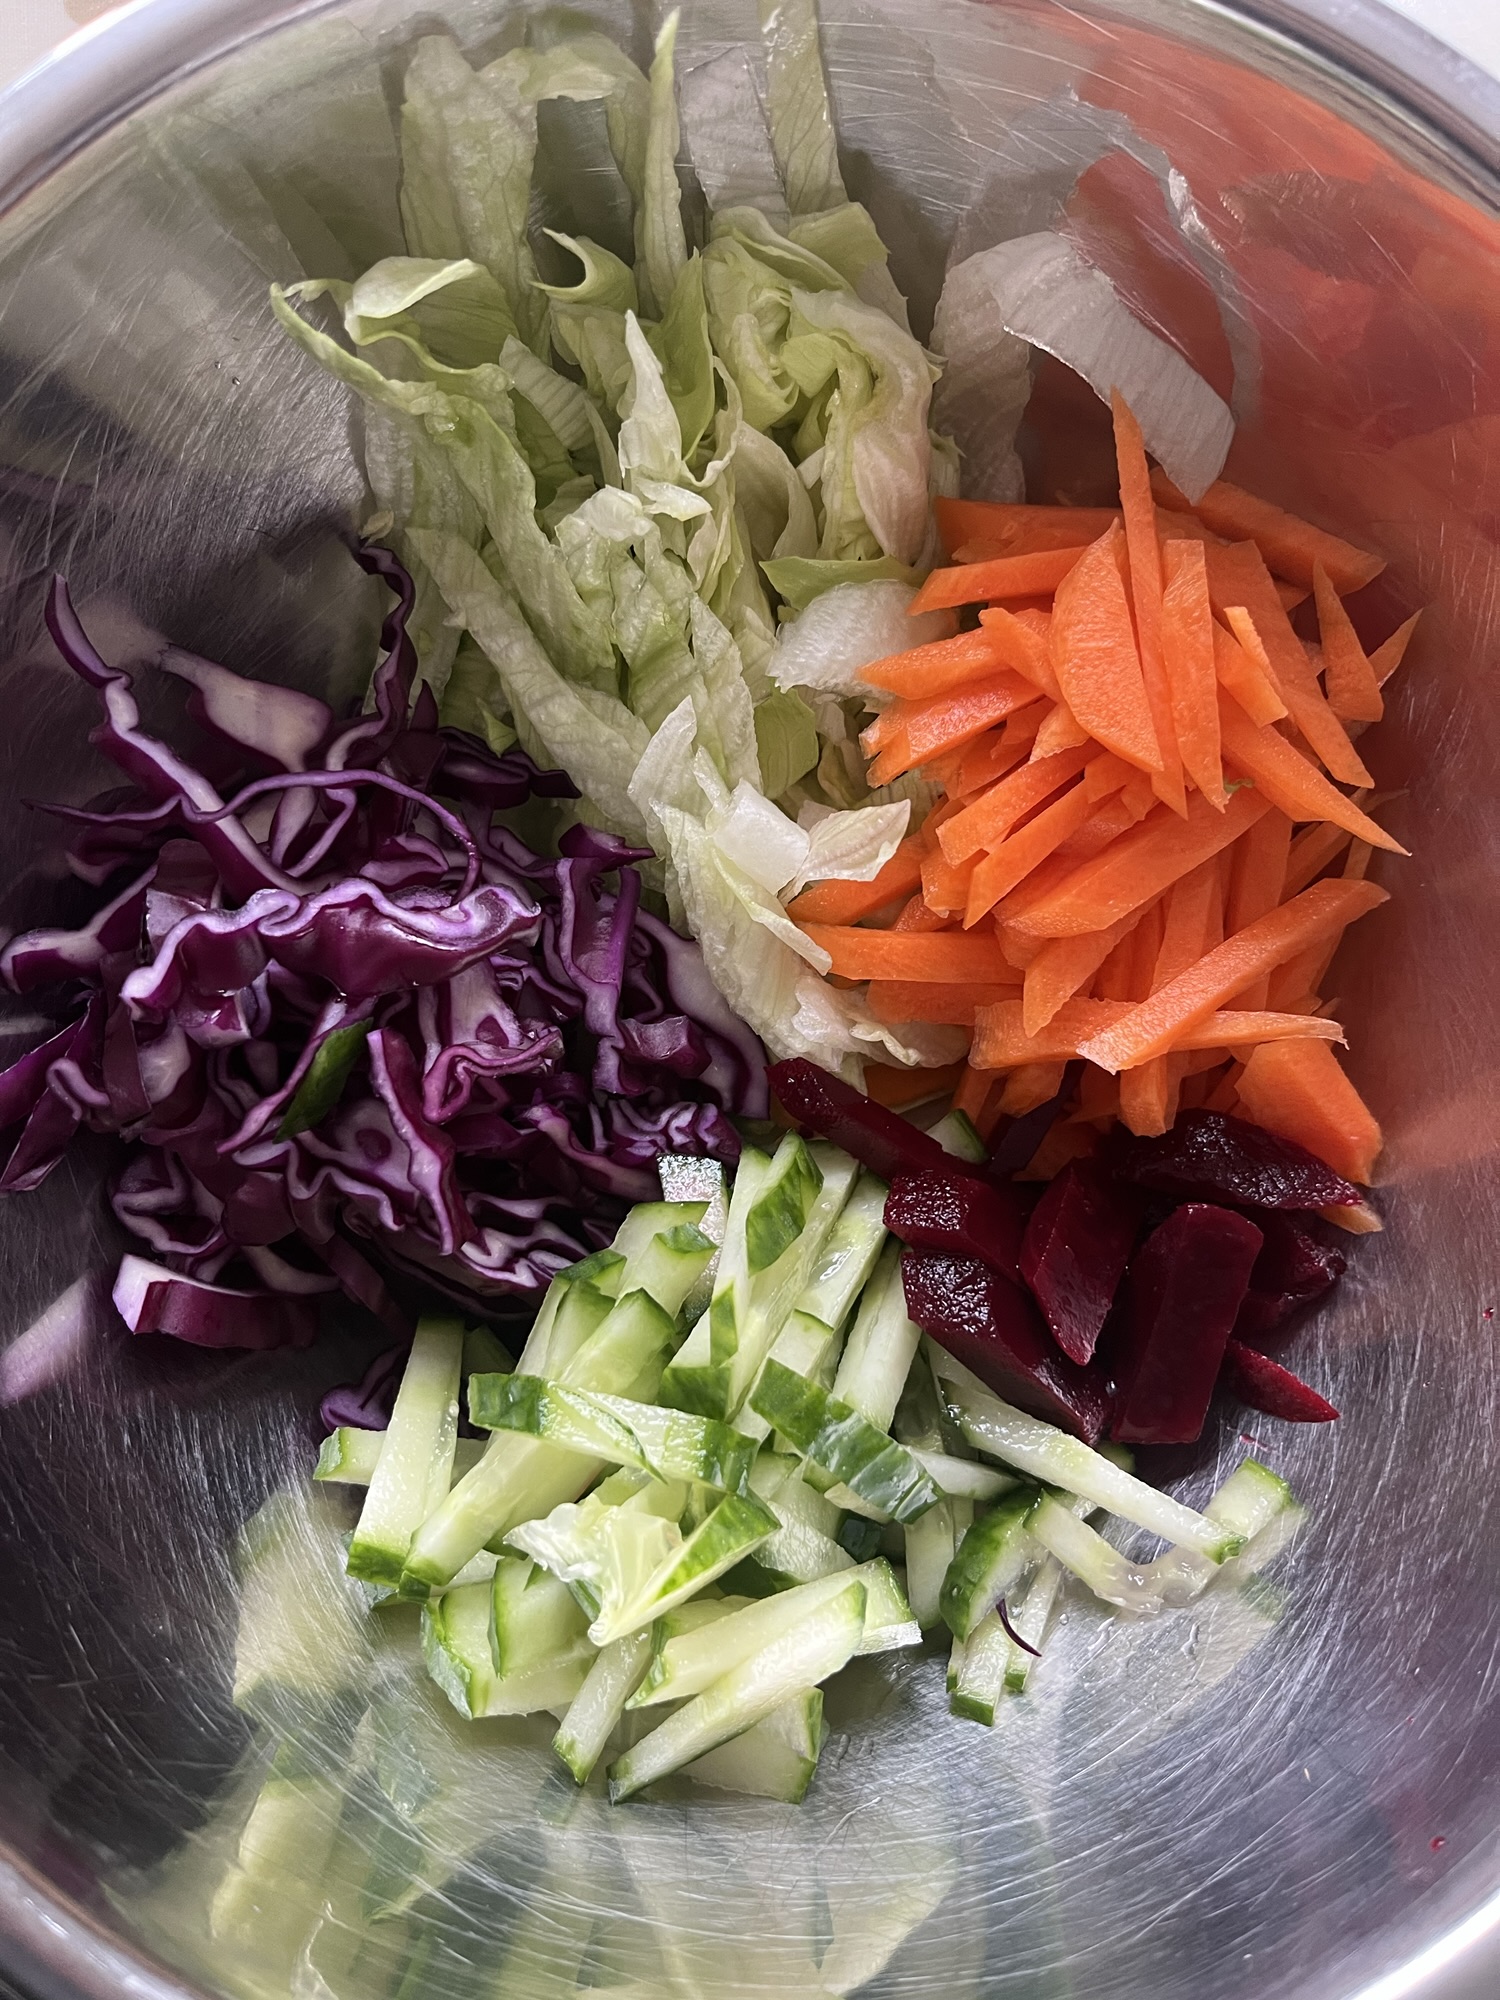
Cook the rice and get the serving bowls ready. Everything else can be prepped in the time that the rice is cooking.
Prepare the vegetables. You’ll note that the vegetables are julienned. This is important so that your spoon can pick up a mixture of ingredients in each spoonful.
Cook the protein (if using and need cooking).
Ideally, the rice goes in first into each serving bowl, and then you add the vegetables. Traditionally, each vegetable has its own segment in the bowl to show off the colours.
Fry the egg and place it on top of everything.
Serve with gochugang and sesame seed oil on the table. Each person can help themselves to however much they want. I would suggest a tablespoon of sesame seed oil first and then the gochujang, so that it’s easier for the gochujang to come off the spoon. Then mix mix mix it up so that all the gochujang mixes in. 맛있게 드세요. Bon appetit.
Add the gochujang. I said I wasn’t precious about the presentation. Proof: the egg is hiding beneath the rice. HeheMix, mix, mix!
It’s not just me who loves this dish. I make it regularly for the family I live with. The 8 year old surprised the adults when she asked for bibimbap as her birthday meal next week. Her parents will make it and this recipe was written up primarily so that they have a point of reference. It’ll probably have some more cooked elements in it, liked fried mushrooms and carrots and I’ll marinate some beef as the protein.
Let me know how you get on with it. I say this with both enthusiasm and a bit of ‘oooooh – but please keep the essence of it’. It may challenge my ideas on bibimbap and make me consider what bibimbap really is. And that it isn’t just rice mixed up in a bowl.
Here is a very easy kimchi recipe for you. It is my mum’s mak-kimchi 막김치 or 맛김치 recipe, made even easier by me. Mak-kimchi is the one where the cabbage is all cut up, rather than quartered, which makes it quicker to make and serve up. The leaves are cut into bite-sized pieces. This means that you don’t have to cut them when you serve it, which you do with a traditional kimchi recipe where the cabbage is quartered and fermented thus.
In Korea it is made with Korean cabbage, baechu. I only discovered recently that it is slightly different from Chinese leaves or Napa cabbage, which is what my mum uses and most kimchi recipes outside of Korea use. In the UK, it’s called Chinese leaves; in the US it is called Napa cabbage. I haven’t provided an exact quantity of cabbage in grams as in the winter, the Chinese leaves can be so skinny that I need 3, but in the summer they are so big and I use 2.
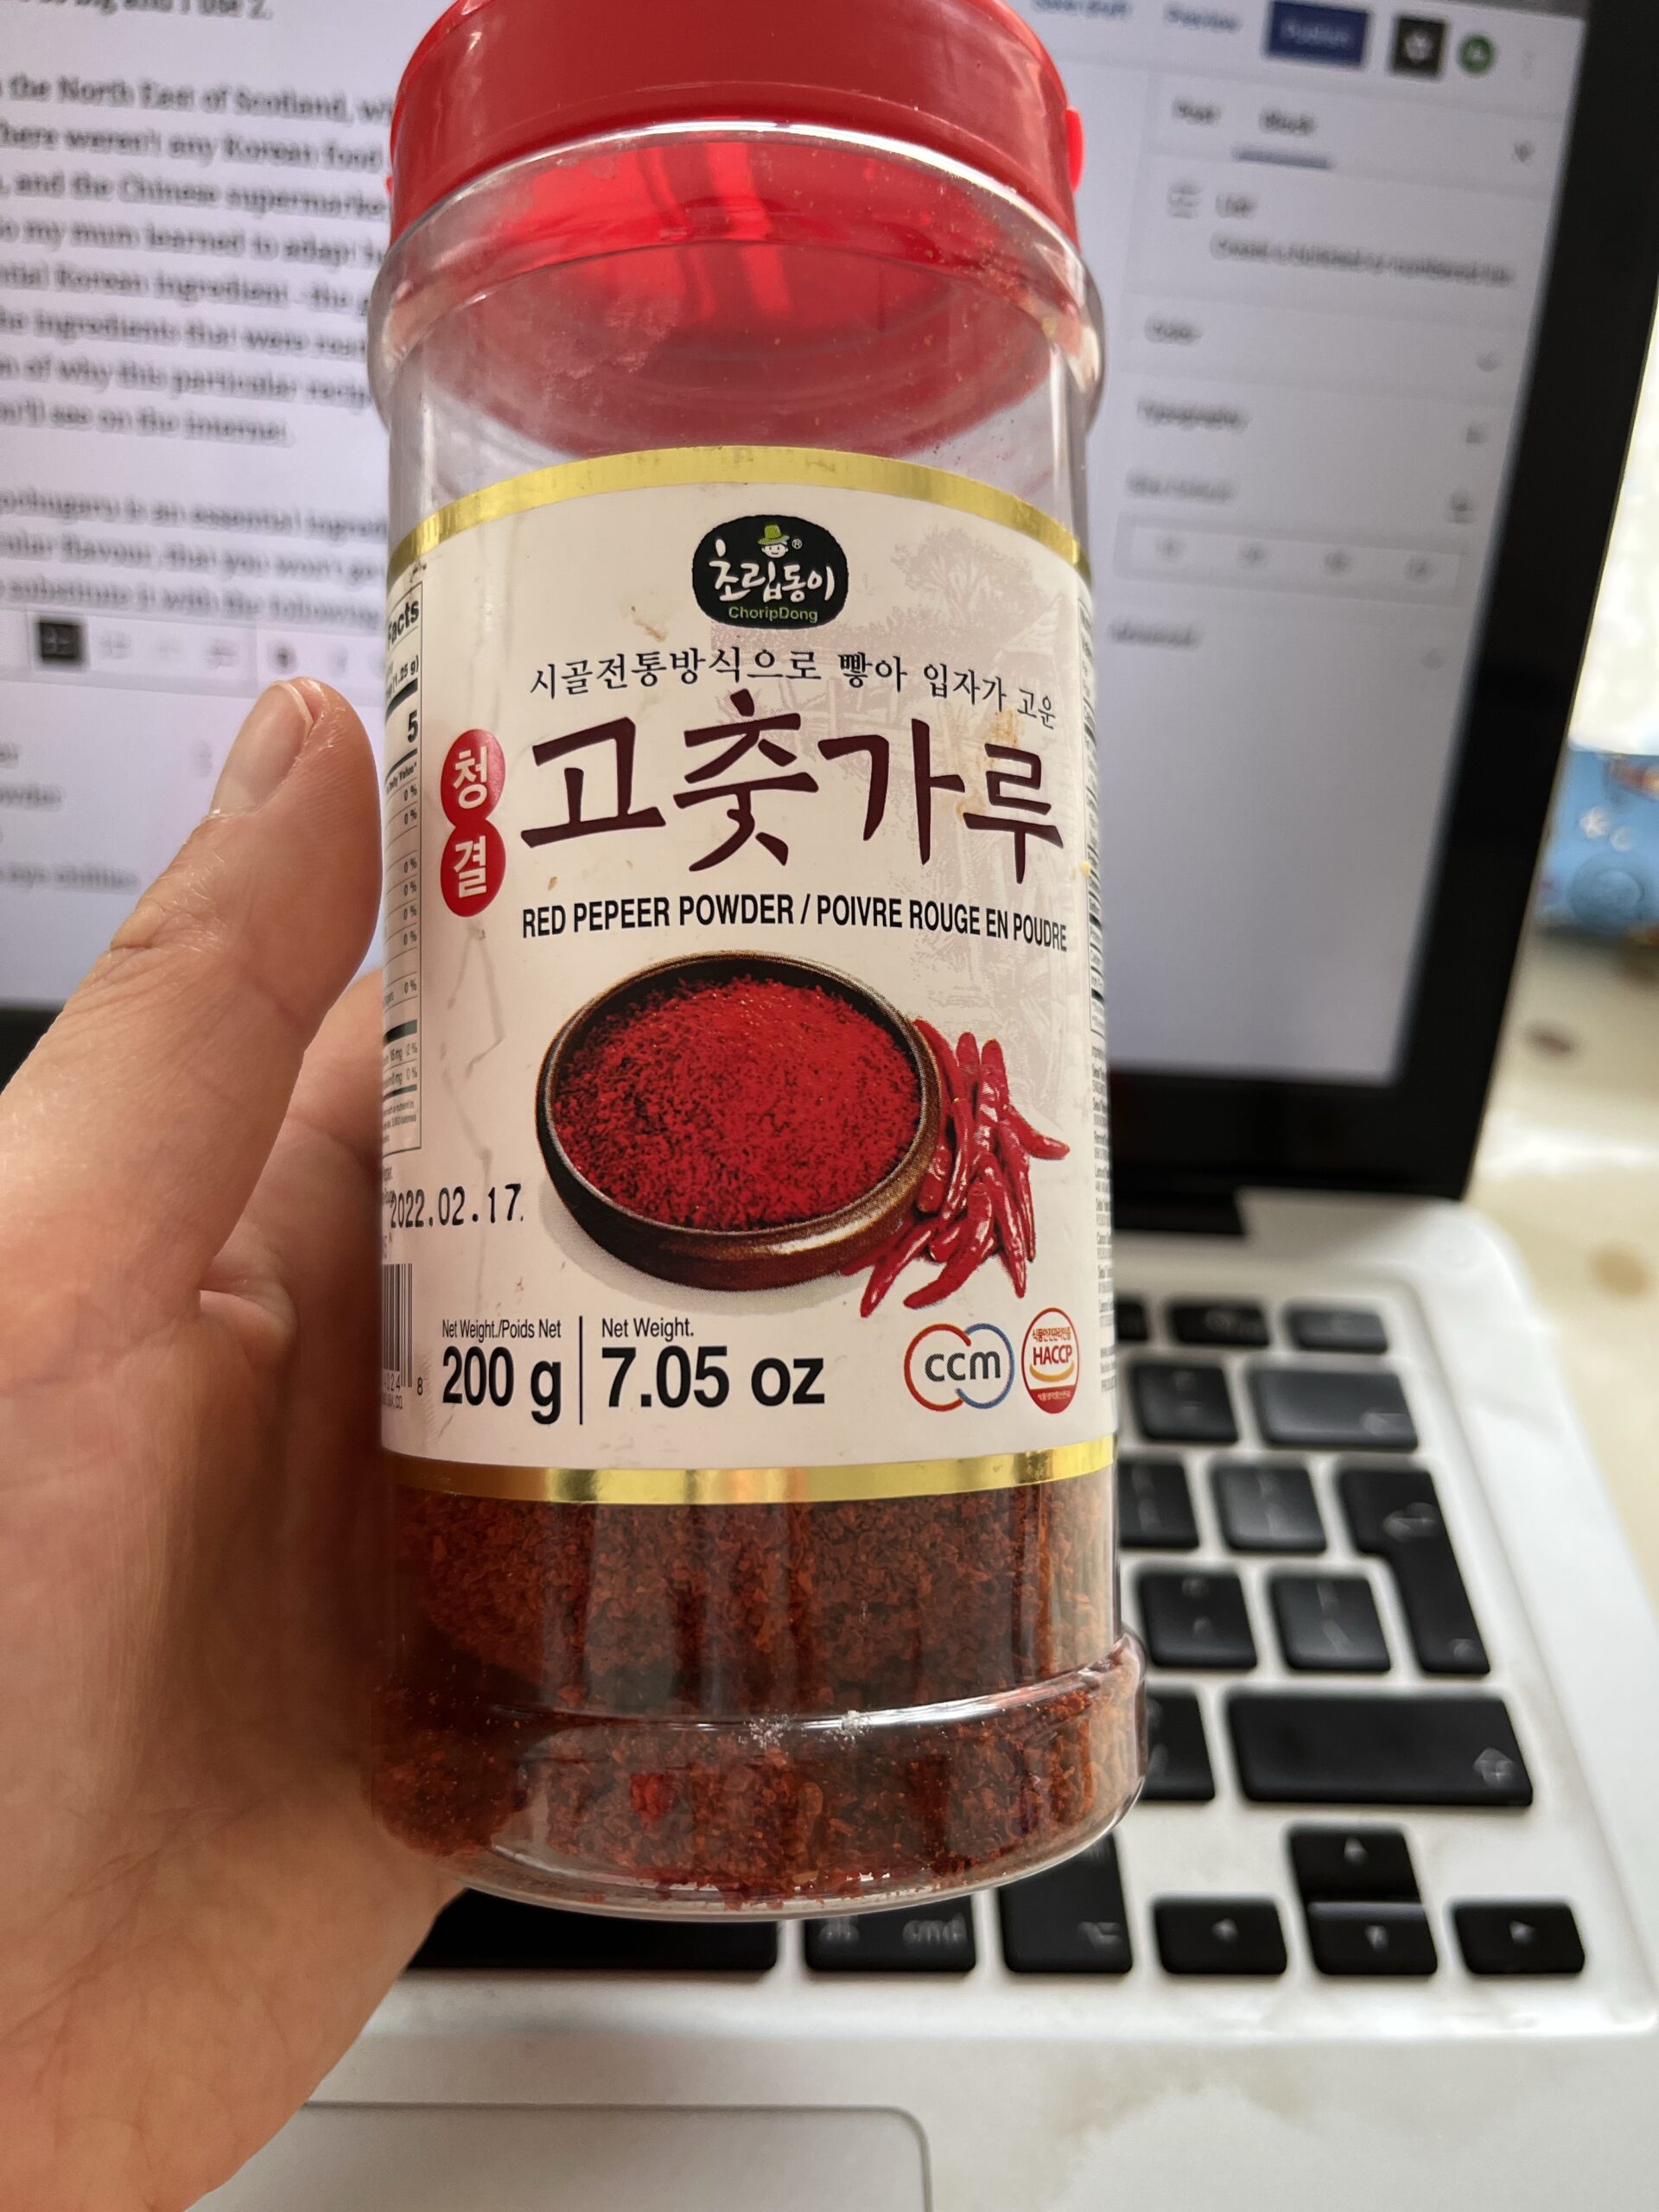
We grew up in the North East of Scotland, where there wasn’t a big Korean community. There weren’t any Korean food shops like you got in New Malden (London) then, and the Chinese supermarket hardly, if at all, stocked Korean ingredients. So my mum learned to adapt her recipe to supplement the carefully hoarded essential Korean ingredient – the gochugaru, the Korean red chilli pepper flakes – with the ingredients that were readily available to her. This is all by way of an explanation of why this particular recipe is perhaps a bit different from the others that you’ll see on the internet.
An example of some gochugaru powder that I bought in the UK
By the way, gochugaru is an essential ingredient. The Korean red chilli pepper flakes have a particular flavour, that you won’t get from another chilli substitute. People have tried to substitute it with the following and then reported back to me that it didn’t taste right (well of course – you missed out an essential ingredient!):
chilli flakes
chilli powder
cayenne powder
red chillies
fresh birds eye chillies
paprika
Learn from their mistakes, go and buy some. Korean food has gained in popularity since I was a child, and in the UK, gochugaru is readily available in many Chinese or Korean food stores. I’ve even spotted it in some of the larger supermarkets.
This version is not particularly spicy. You can adjust the spice levels if you desire by adding in more tablespoons of gochugaru. There was also a period of time when my mum had to cut out all spicy food from her diet, and as she was the main chef in the home, meant that we did too. However, she continued making kimchi and the recipe evolved around her dietary requirements.
*My recipe varies from my mum’s a little (or a lot, depending on how important you think the changes are). Firstly, in our method of cutting up the cabbage. She separates out each leaf of cabbage, halves it and then cuts it into pieces. I halve the whole cabbage lengthways, then cut again lengthways so that it is quartered. Then I cut them into bite-sized pieces – about 2.5-3cm wide. I think that my way is quicker; my mum is shocked by it. I also don’t use shrimp paste, or fresh shrimps when I make it simply because I can’t be bothered to and I stick to fish sauce for ease. However, my mum does because it adds a deeper flavour to it. Maangchi’s Easy kimchi recipe and Korean bapsang Easy kimchi recipe, the other two recipes that I refer to from time to time, include shrimp. Maybe one day, I will do the same.
Equipment you will need:
A large sharp knife and chopping board
A blender or food processor. A hand blender also works. If you don’t have any of these then you’ll need a vegetable grater.
1-2 large bowls, like a washing up bowl.
1 large colander
Saucepan and spatula
Storage: I store the kimchi in various former large (500-700g) pickle/beetroot jars. Prepare about 5, depending on their size.
Ingredients
2-3 Napa cabbage or Chinese leaves, depending on their size. Normally I use 2 medium-large ones.
lots of table salt
1 medium white/brown onion, peeled
1 ripe pear
5cm ginger, peeled – it depends how fat or skinny the ginger is. Aim for 1:1 ginger to garlic.
6-7 cloves of garlic, peeled
1-2 red peppers, depending on the quantity of Chinese leaves
5 spring onions
1-2tbsp fish sauce
2 tbsp gochugaru – the Korean red chilli pepper flakes
1 tbsp glutinous rice powder, sometimes called sweet rice powder (GF people – this doesn’t contain any gluten but it is sticky)
5 tbsp or 75ml of cold water
Method – Stage 1: prepare and salt the cabbage. This is an important step in cleaning and killing any bad bacteria.
To clean the cabbage, remove any of the outer leaves that have discoloured too much or too bruised. Cut the cabbage into bite-sized pieces using either my mum’s way or my way* and put into a large bowl/basin. Fill the bowl with water to clean the leaves. Drain in the colander. You will probably have to do this in stages due to the quantity of the leaves.
In a separate bowl, put one layer of cabbage in, then generously sprinkle salt over it. Next put another layer of cabbage over that first layer and generously sprinkle salt over it. Repeat with all the cabbage.
Leave for about 2-5 hours, turning every 30-60mins to salt evenly, so that the salt draws out the moisture out of the cabbage. In my experience, the length of time it takes varies depending on the quantity and the weather. It is faster in warmer weather. Do not, and I repeat DO NOT, leave the cabbage to salt overnight. It will make the overall flavour of the leaves a bit too salty.
You will know when it is ready when the white sections of the cabbage are more translucent, bend easily and don’t snap. The cabbage will have reduced by about half too. When ready, drain the water and rinse in clean water 2-3 times to remove the salt. Drain and set aside.
Halfway there – it’s not bendy and translucent enough yet When it is ready, it will bend easily and be more translucent.
Stage 2: make the rice paste. Do this while the cabbage is salting to give it time to cool. This is optional, but does add make the fermentation process quicker and helps the cabbage to absorb the kimchi paste better.
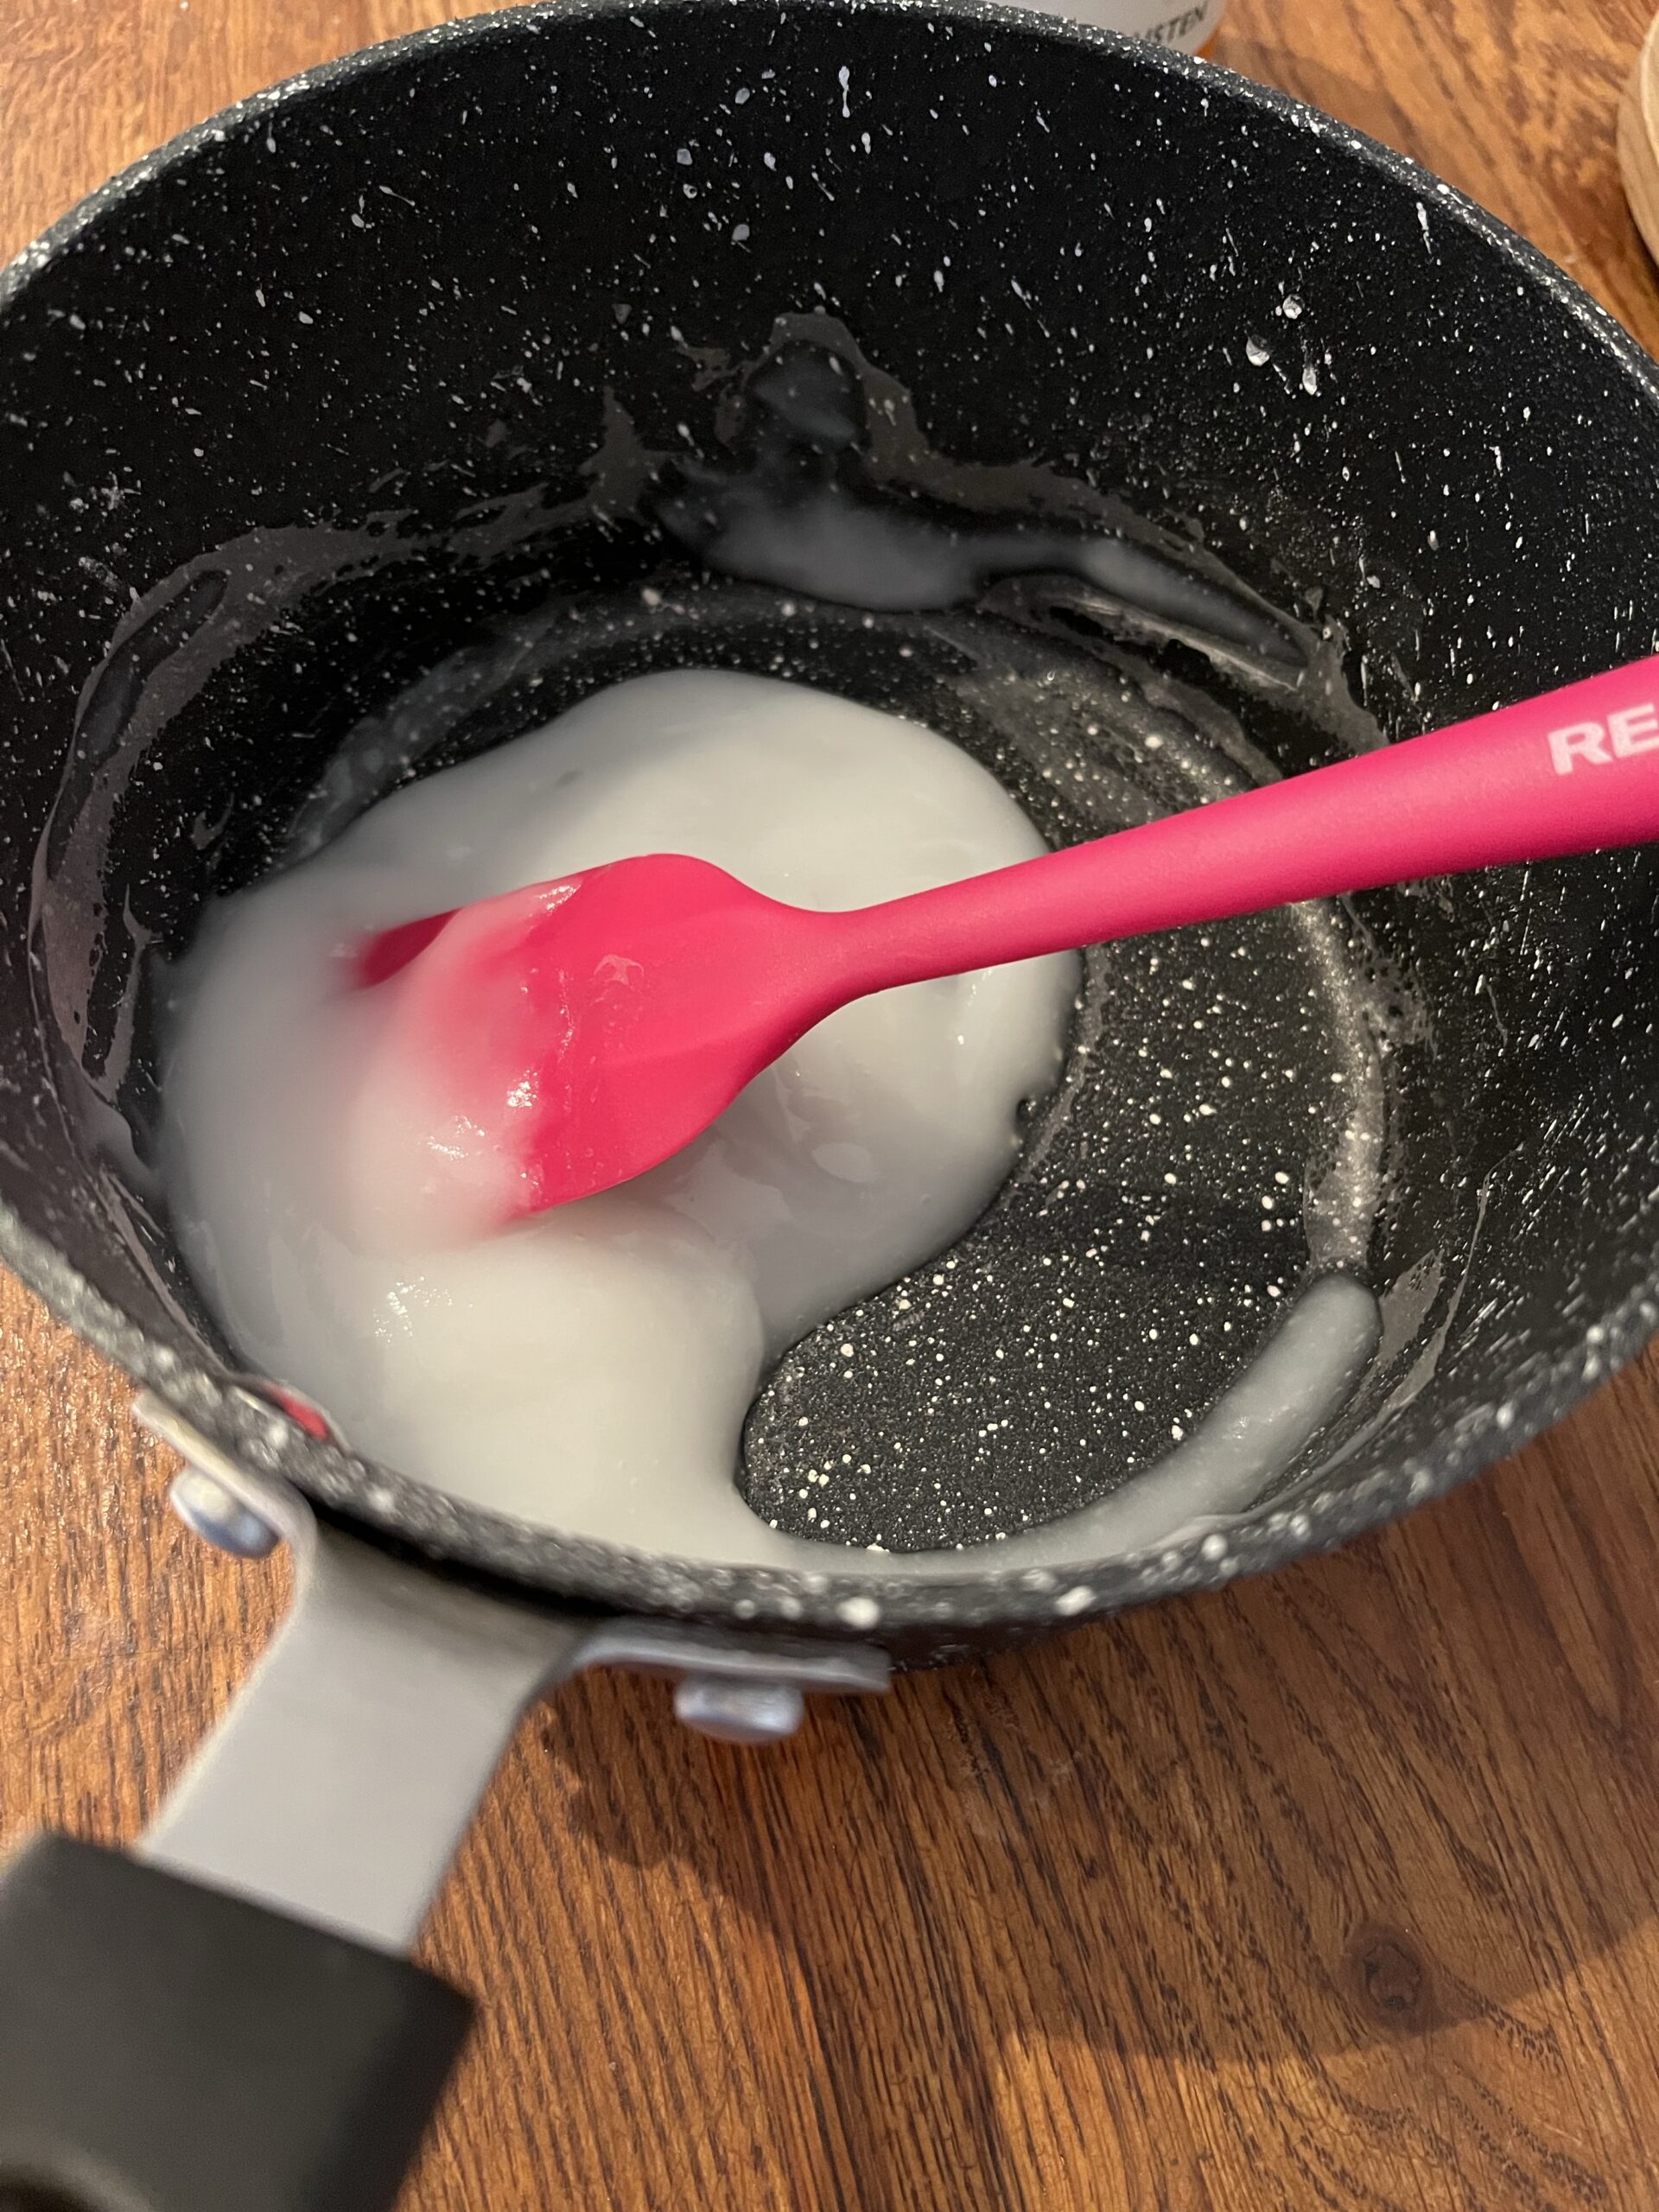
In a small saucepan dissolve 1 tbsp of glutinous rice flour into 75ml of cold water. Heat it on a medium heat, stirring, until your spatula leaves a line through it. Leave it aside to cool.
The glutinous rice paste
Stage 3: prepare the kimchi paste
Wash and prepare your vegetables (apart from the spring onions – you’ll use them later) and pear to put into the blender/food processor. Peel and cut the onion into quarters, cut the pear into 3 cm chunks (skin on), cut the ginger and red peppers into 3 cm chunks, and pop in the peeled garlic cloves. Whizz it up so that it has all blended.
If you don’t have a blender or food processor then use a grater to mince the garlic, ginger, pear, onion and red pepper into a large bowl. The coarse side of a box grater may work or I’ve used one of the Korean vegetable graters that I listed under equipment.
Mix in the gochugaru, the rice paste and 1 tbsp of fish sauce and give it another whizz in the blender.
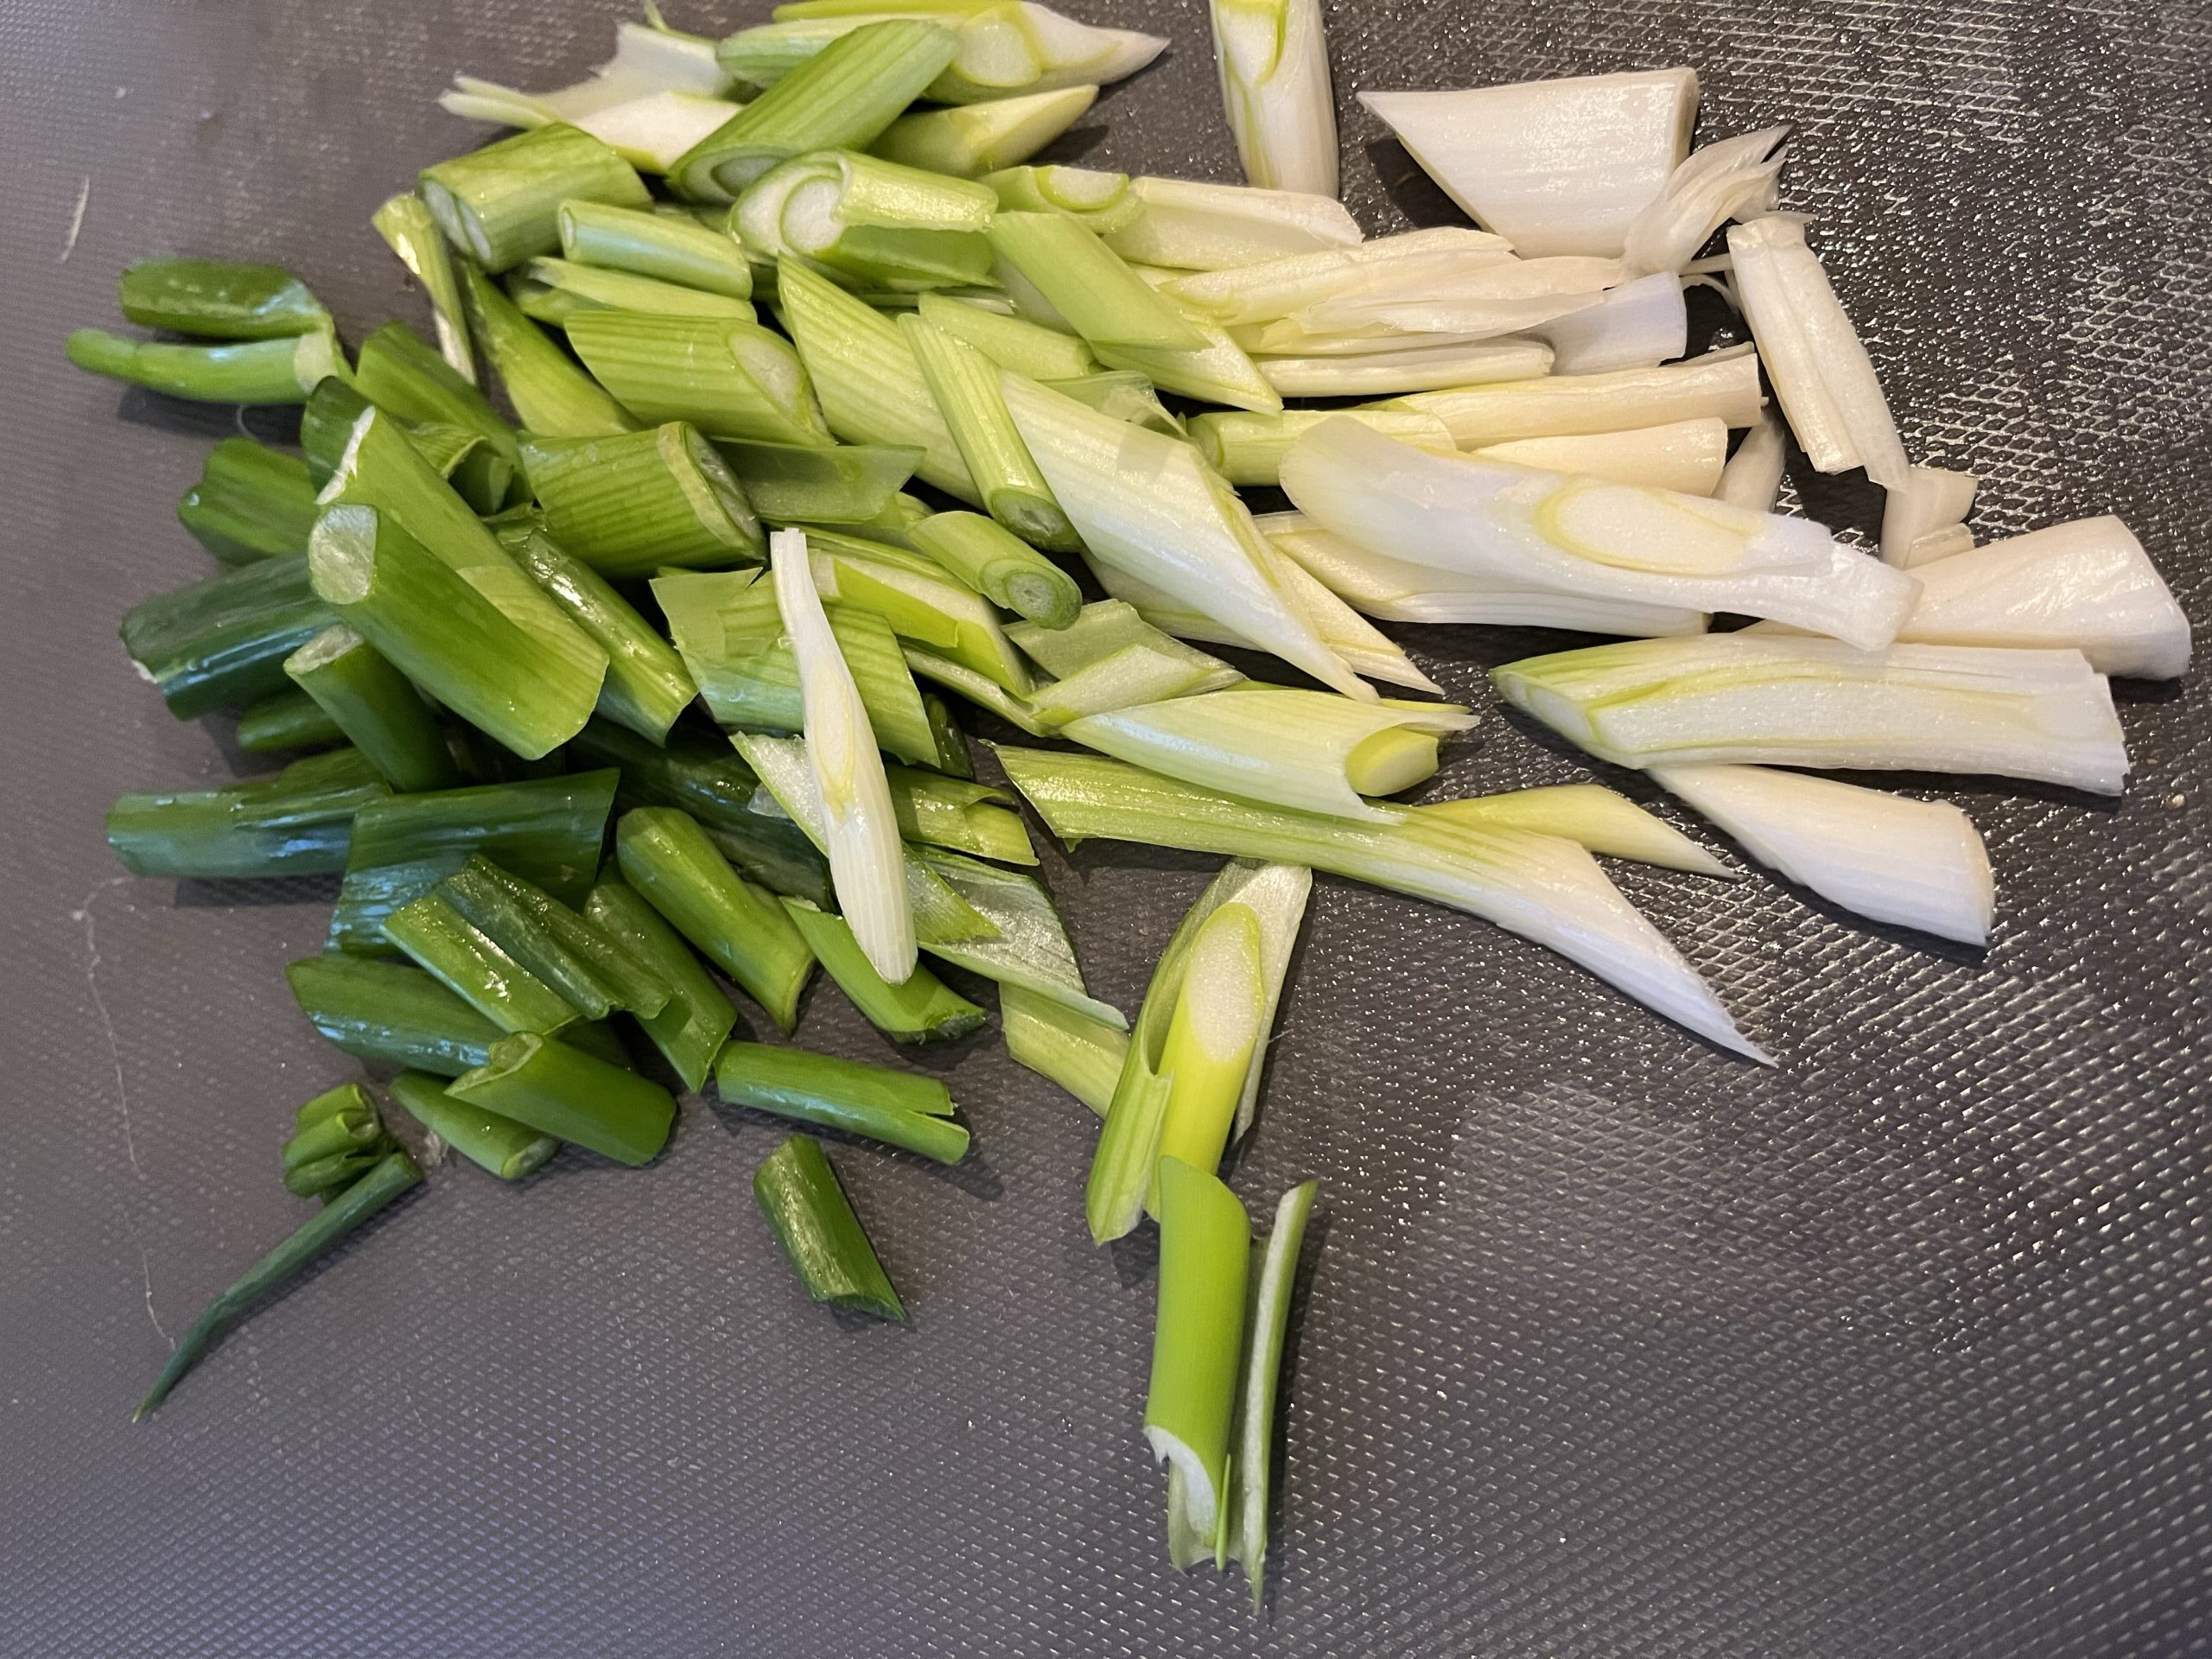
Wash and clean the spring onions. We use be using the whole spring onion. I notice that in the UK only the white part gets used, which makes me 😢. Chop the bottom off, trim the top, then slice the spring onions diagonally in 2-3cm strips.
Preparation for the kimchi paste
Sliced spring onions
Stage 4: mix them all together
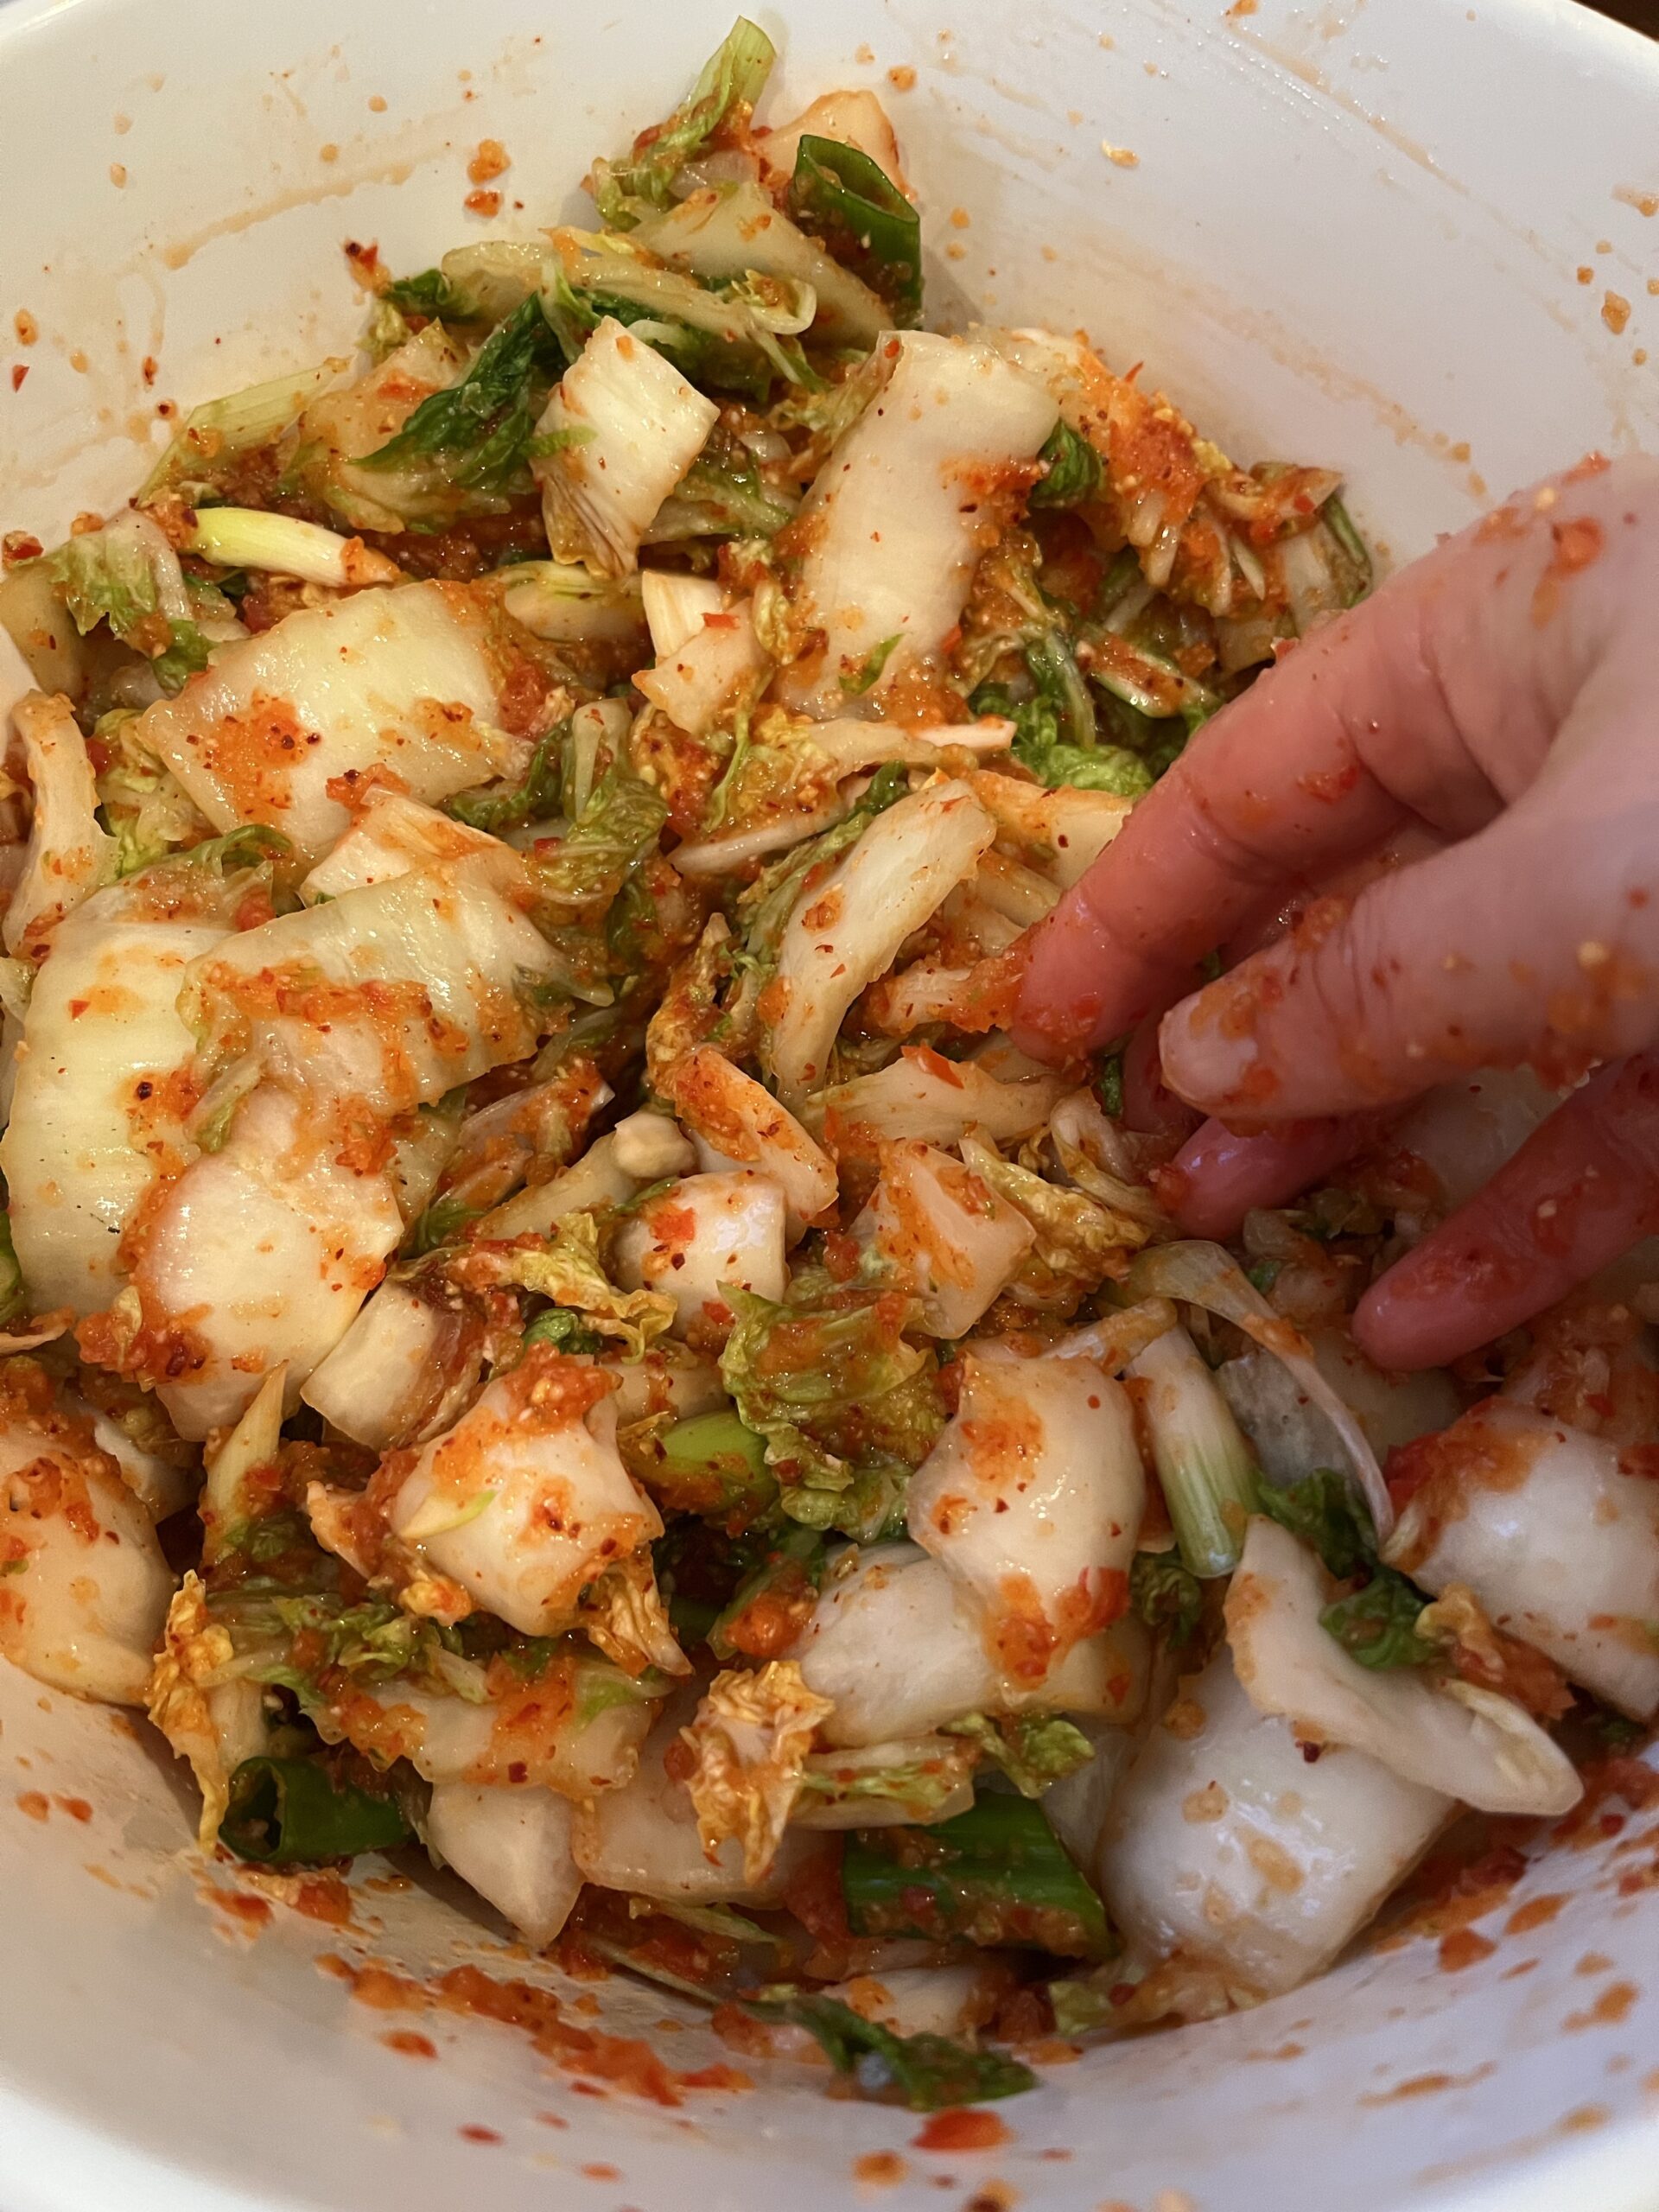
Now thoroughly mix the cabbage with the kimchi paste. Taste and if you think that it should be a bit saltier, add one more tablespoon of fish sauce. Taste again and if you think it needs a bit more then add a bit more. Remember though, you can always add salt but you can’t take it away.
Stage 5: store, ferment and serve
Then it’s time to store it in cleaned jars. Leave a bit of space at the top so that any kimchi juices can bubble up during the fermentation process. I leave it out on a kitchen countertop for 1 day and then store it in the fridge. From experience, it is a good idea to put it on something, such as a plastic container in case any juices spill out.
To serve and eat – it is best to leave it to ferment for a couple of days. When you go to serve some up, then turn it around a bit in the jar and get the stuff that isn’t at the top. You can also eat it immediately on the very day that you made it, if you want to. If you do, I recommend serving it like a salad drizzled with some sesame seed oil and sprinkled with some toasted sesame seeds over it.
Freshly made kimchi in their jars ready for fermenting