Double Chocolate Muffins (vegan)

The final recipe test for vegan double chocolate chip muffins

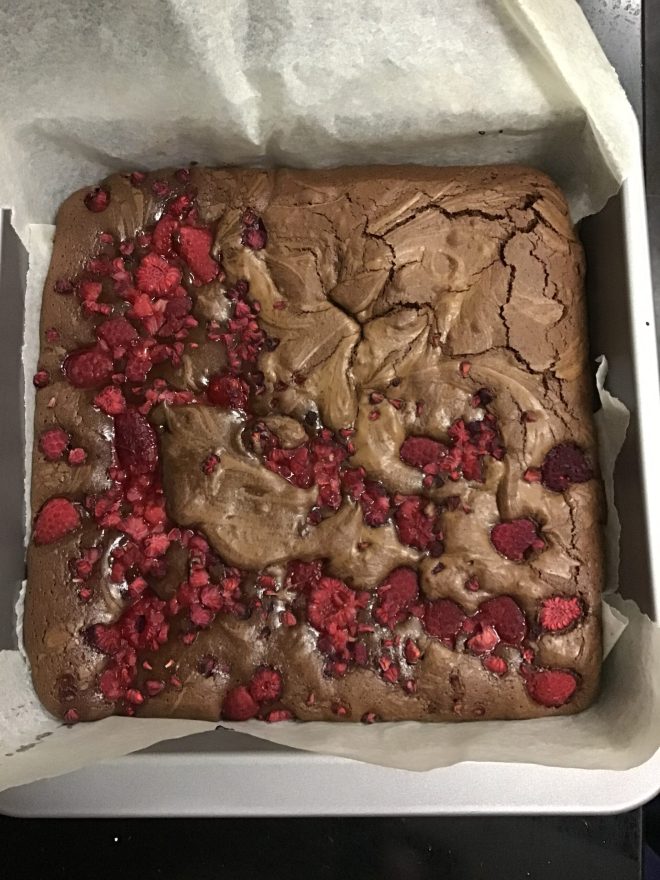
I decided to lean into vegan baking last month, it being Veganuary. I came across a recipe book at the library, The Naughtiest Vegan Cakes in Town by Mellissa Morgan, of Ms Cupcake (a London vegan bakery which sadly closed 2 years ago). First off, this is a fantastic recipe book if you are new to vegan baking. She includes a Quick Start guide with explanation on ingredients, which is useful if, like me, you’ve felt overwhelmed by them, and a guide to baking without eggs and dairy. There is an additional section on substitutions (e.g. if you want to go gluten-free and refined sugar free) and trouble shooting common vegan baking problems. However, as the best way to review a book is to test out the recipes, I duly borrowed the book and tried out the Victoria sponge cake, which turned out very well. Then when my vegan colleague mentioned that she craved muffins, I set out to make them.

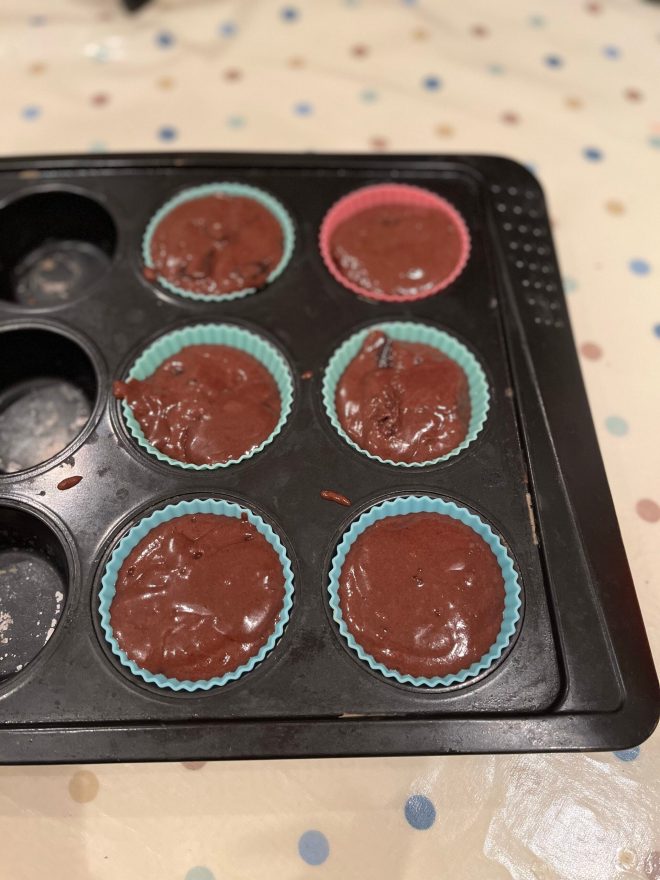
Now, there is no double chocolate chip muffin recipe in the book. Therefore, I adapted her mint chocolate chip cupcakes. The first iteration were incredibly good. The texture and the flavour were spot on. I made the first batch with soya milk and another with almond milk. They both worked and the type of plant based milk didn’t make enough of a difference. However, I calculated the amount of sugar in each muffin and at the original 200g in the recipe (which makes 12) that was just over a tablespoon of sugar per muffin. That’s without the additional sugar from the chocolate chips/chunks. A little high perhaps? Thus began a series of experiments to reduce the amount the sugar in the recipe. I detailed it in a little table for you.

Amount of sugar in the recipeSugar per muffin (approx) without the addition of chocolateTexture/FlavourAdditional flavouring
200g16.67 (just over a tablespoon)incredibly good1.5 tsp instant coffee
180g15g (1 tbsp)incredibly good1.5 tsp instant coffee
150g12.5 (2.5tsp)still yummy2 tsp vanilla extract and 1 tsp instant coffee
120g10g (2 tsp)denser texture, slightly too bitter1 tbsp vanilla extract
Results of sugar reductions in double chocolate muffins

I took it as low as 120g, which then changed the texture of the muffin so that it becomes denser, slightly stodgy and began to taste a bit soapy and bitter. The chocolate chunks in the muffin masked that unpleasantness. However, let’s be frank. When you bite into a double chocolate muffin, you want it to taste good, not healthy.

So, in the recipe below, I’m going to suggest that you could add anything between 150-180g of sugar. Consult the table above to decide how much sugar you’d like and how to adapt the additional flavourings. I think coffee always complements and enhances chocolate. The vanilla extract brings out sweetness without adding any sugar.

In the end, as I was testing out many variations of this recipe, I decided that I’d halve the recipe each time. That is one of the joys of this particular recipe. It’s pretty simple to scale up or down.

By the way, I like making this in a large measuring jug. It is easier for pouring the mixture into the muffin cases at the end, but a medium sized bowl also works. I alternated between using a whisk and a metal spoon/spatula to mix, but I prefer the whisk for the quantity below.

Top tips: mix until it has just combined and bake them immediately.

Fill the muffin cases and then tap to release the air bubbles

Ingredients for Double Chocolate Chip Muffins, adapted from Mellissa Morgan. It will make 12 muffins.

  • 200ml unsweetened plant based milk – I tend to use soya milk
  • 20ml cider/rice vinegar or lemon juice
  • 150-180g caster sugar (my favourite is 180g*)
  • 170g self raising flour (or 170g of plain flour and 2tsp of baking powder and omit the 1/4tsp of baking powder that follows)
  • 30g cocoa powder
  • 1/4 tsp baking powder (omit this if you’re using plain flour + 2tsp of baking powder)
  • 1/4 tsp bicarbonate of soda
  • 1/4 tsp salt
  • 150g 70%+ dark chocolate roughly chopped up, alternatively use dark chocolate chips (check to see that they are dairy free)
  • 80g vegetable oil
  • 1 tsp instant coffee granules/powder*
  • 2tsp of vanilla extract*

*When using 180g of sugar, add 1 tsp of instant coffee but no vanilla extract. Unless you really want to.

Method

  1. Mix the soya milk and the vinegar together and set aside for 10 minutes. This makes a soya buttermilk. Then add 1tsp of instant coffee so that it has a chance to dissolve. Preheat the oven to 180°C/350°F/Gas mark 4 and line your muffin tray with muffin cases.
  2. In a large measuring jug or a medium sized bowl, measure out the dry ingredients, that is the self raising flour, caster sugar, cocoa powder, baking powder, bicarb of soda, salt and the roughly chopped dark chocolate. Whisk it together so that they are all combined thoroughly.
  3. Add the vegetable oil and the vanilla extract (if using) to the curdled soya milk mixture and whisk to combine. Then add this to the dry mixture and mix quickly until just combined. It’s important not to work quickly and not over mix it. If there are a few lumps, that is okay. If it is lumpy, on the other hand, I’d continue mixing it for a few more seconds.
  4. Tap the jug onto the surface. This stops the raising agents from working too quickly. Then pour or measure out the batter evenly into each of the muffin cases. Tap the muffin tray hard on the work surface to pop the bubbles, then bake in the middle of the oven for 20 minutes. They’re ready when a skewer comes out without cake crumbs but may have a little bit of melted chocolate hanging onto it. Let them cool in the muffin tray for 5-10 minutes before taking them out to cool completely. They will store in an airtight container for 5 days, maybe more..? Honestly, they haven’t made it any further than that in my house.

The verdict? Incredibly good. The texture is airy and light, and the chocolate chunks in the muffin are so satisfying. I always think that almost every chocolate baked good will taste better the next day. So, make them at night and have one for breakfast the next day. 😉

On the note of vegan chocolate. I’ve observed a greater selection of vegan chocolate, which is great. However, they are often much pricier. A lot of dark chocolate, 64%+, is dairy free. I will always check the list of ingredients on the packet before using. I prefer to chop it up roughly and then add it. I haven’t ever checked to see if dark chocolate chips are dairy-free. If you do, then please let me know in the comments.

The brown butter chocolate chunk cookies aka Crack Cookies

Tonight as I was wondering which recipe to share with you (it was between apple crumble and poached eggs), I remembered that I’d been baking a lot of cookies recently and posting photos of them on Instagram. It’s time, isn’t it. The time has finally come to share my crack cookie recipe that I’ve been promising for a while.

Top tip: Keeping cookie dough balls in the freezer are an investment in your future self’s happiness.

There are variations of that sentence around the internet and social media. That’s my paraphrase above. It is one of the reasons why I love making these cookies. This recipe will make enough so that you can store some away (like squirrels do with their nuts in preparation for winter) for a moment when you really want to eat a cookie, or bake something but have no energy for it. That was me two nights ago. I arrived home from work physically and emotionally exhausted, wanting to be fed and then to sit down with a home baked biscuit to watch episode 2 of the Great British Bake Off – Biscuit week. Fortunately I live with a family who will let me do all those things and I had frozen cookie dough balls stashed away in the freezer.

a sauce pan with butter browning and foam
As the butter melts, it foams as the water evaporates.

I went through a phase when I was obsessively recipe testing chocolate chip cookies in Phnom Penh to perfect that American style cookie of soft and gooey on the inside, with crispy edges. This was a pretty happy time for those around me. Being around so many more internationals opened up a whole other world of baked goods, their expectations of them and their tastebuds. I enjoyed the challenge of trying to recreate those baked goods that they were nostalgically craving that I had never tasted before. And then of course selling them.

Photo credit to @pipcree who took this photo at one of my final pop-ups in PP.

I learned stuff as I researched which I’ll share with you because that’s what this blog is about:

  • THE MOST IMPORTANT part is to REST the dough so that the baking magic can happen. Firstly, it allows the flour to absorb the fats and the liquids and thus create that puffy, crispy texture. Secondly, the sugars get a chance to chill out and mellow out resulting in richer flavour. In some baking chemistry magic by resting them, they will taste sweet but not overly sugary. It’s a minimum 2 hour wait if you’re impatient, but preferably overnight.
  • I often use a stand mixer to make this but the joy of this recipe is that as all the butter is melted, it is easy to do in a large bowl and a spatula/large mixing spoon.
  • Allow the brown butter to cool down. Sometimes I don’t and it results in a more delicate, tender cookie.
  • Remember with a cookie recipe, you don’t want to cream the butter and sugar together. We just want to mix them sufficiently, not beat air into them.
  • Mix up different types of chocolate to create a more complex chocolate profile, that’s why I use dark and milk chocolate. I read somewhere (I’m sure it was on Serious Eats but I can’t find the link) that if you use one type of chocolate then your taste buds get used to and stop tasting it. However, if you vary different makes or types of chocolate, your tastebuds will continue to taste them.
  • My recipe testing pales in comparison to Serious Eats. I am still learning.
  • Brown butter creates a rich, nutty flavour which I really enjoy.

Why do I call them crack cookies? That’s the nickname that my friend Grace gave them and it caught on. These cookies are really more-ish, sweetly addictive, soft but slightly crispy and satisfyingly not overly sweet. The brown butter gives a slightly nutty flavour, without any nuts, and the two types of chocolate means that each mouthful is a flavour party. I made two batches of these cookies for the soft opening of her store, Ginger and Grace. For some reason, they didn’t make it onto the tables but her friends discovered them later that evening and ate through an entire batch of them. I guess that cemented their reputation as crack cookies.

Now I tell people that these brown butter, chocolate chunk cookies are my best work.

The cookie recipe comes from Ambitious Kitchen. I haven’t made any major changes to it, except I like to weigh everything so obviously here I’ve converted it into grams. There’s a very similar recipe on Joy the Baker. The differences are that Monique browns ALL the butter, uses dark brown sugar, uses two different types of chocolate, adds in a tablespoon of greek yoghurt and doesn’t use nuts. Joy uses light brown sugar but adds in 1 tsp molasses, adds pecans and uses dark chocolate only. I prefer the Ambitious Kitchen version.

Making a double batch of cookies

Ingredients for Brown Butter Chocolate Chunk Cookies very slightly adapted from Ambitious Kitchen

  • 227g butter
  • 100g white granulated sugar
  • 200g dark brown sugar
  • 1 large egg and 1 egg yolk
  • 1 tbsp natural yoghurt or greek yoghurt
  • 2 tsp vanilla extract
  • 280g plain flour
  • 1 tsp bicarbonate of soda
  • 1/2 tsp table salt
  • 140g dark chocolate cut into small chunks, or the chocolate chips, or round discs*
  • 140g milk chocolate cut into small chunks, or the chocolate chips, or round discs

*for prettier looking cookies: if using round discs of chocolate, keep around 21 discs aside to firmly place on the cookies after they have baked. The chocolate will temper as they melt and thus have a nice shine making them prettier to eat.

Method

  1. First brown the butter. Add all the butter to a medium-sized saucepan and place over medium heat. It will start to froth and cackle. That is the water evaporating. Continue and stir the sides and scrape the bottom a few times so that it doesn’t burn. When it is ‘as quiet as a ninja’ (quote from Stella Parks) it is ready. Take it off the heat and either pour the butter in a bowl to cool down, not forgetting to scrape the browned bits from the sides and bottom. Or as I often do, fill up the sink with cold water and carefully place the hot pan in there to cool down.
  2. Add both the sugars into a large mixing bowl and the cooled brown butter and mix for a minute or two until they are combined. I use the paddle beater (K-beater on the Kenwood). Don’t discard the egg white. Store it in the freezer for a cocktail or macaron/meringue baking on a later date.
  3. Now add in the vanilla extract, yoghurt and the large egg and egg yolk and mix again for a minute. It will look and smell like toffee.
  4. In a separate bowl, measure out the flour, bicarbonate of soda and salt and whisk to mix. Then add this to the butter/sugar/egg mixture and mix slowly so that the flour doesn’t fly up.
  5. When it looks like the flour has just about combined then add in the chocolate chunks and mix again.
  6. At this stage, I prefer to measure out into 2 tablespoons of cookie dough (I like to use a medium ice cream scoop) and roll them into balls and place them on a lined baking tray so that the cookie dough can chill out in the fridge for at least 2 hours before baking them. Sometimes, I will cover them and leave them overnight in the fridge to bake the following morning. More often, I will cover them and put them in the freezer overnight and then store the frozen cookie dough balls in a bag.
  7. When you’re ready to bake them, pre-heat the oven to 170°C/350°F/Gas mark 4 and line a baking sheet/tray with baking paper. Space them out so that there are 5 cms between each dough ball as they will spread. Sprinkle the cookies with a bit of table salt. If baking from chilled, bake for 11-13 minutes. If baking from frozen, bake for 14-16 minutes. The dough will spread out and go a golden brown colour. The middle will be gooey so when you take it out, it is important to leave them to cool and harden for 15 minutes on the baking sheet. Otherwise it will split into many pieces and chocolate goo will cover your fingers. That doesn’t sound too bad, does it. Haha.

You’re welcome and enjoy.

My favourite way of portioning out the cookie dough is with a medium sized icecream scoop.
In the absence of a scoop, weighing scales works. Preparing them for their overnight stay in the fridge hotel.

You can vary the flavour and texture. I added 140g dark chocolate and 140g chopped pecans to the cookies at the top of the post. You could substitute the pecans for walnuts or hazelnuts if you like. Play around with it and let me know how you get on.

Cheesecake Brownies

Two baking trays with brownie mixture. The one on the left hand side has salted caramel, the one on the right hand side is cheesecake
Salted caramel and cheesecake brownies side by side

You may have picked up already that I really enjoy playing around with the different flavour combinations in a brownie. When I ran a home baking business, as my side hustle, in Phnom Penh, I’d sometimes put a poll out on social media. What brownie flavour would you like next? Cheesecake was a popular request. Cambodians generally really like cheesecake but I made very few to sell because the ingredients were pricey. Thus when this hybrid worked out, it turned out to be a happy compromise. As I am me, I found ways to play around with more flavours and ingredients. I’ve listed them at the end of the cheesecake ingredients.

cake box with cheesecake brownies inside, a green business card with love, Han-Na
Cheesecake Brownies were a popular order

Last month, I wrote about how I’d picked up a painful thumb injury which I was trying to let heal. It is mostly better now so I made cheesecake brownies and a giant cookie this weekend.

When I posted a picture of this cheesecake version on the post about the infinitely variable fudgy brownies, I said that I’d give you the recipe later as it involves a few more steps. Since then, my brownie recipe and story have featured on TheBrightApp (which is a new social networking site that someone I know is involved in – go check it out). There was a comment that the variations could feature as a different recipe post each time, which is kind. I’m not sure if that will be possible, but here’s the cheesecake brownie version in the meantime.

Ingredients all lined up
Cheesecake Brownie ingredients all lined up ready
All the swirls

I adapted this from Smitten Kitchen’s Cheesecake-Marbled Brownie recipe. I wanted to use my more recent whisking to ribbon stage brownie method, so I took note of the cheesecake ingredients and the marbling instructions but combined it with my chosen brownie method. However, you could use my simpler, no frills or ribbons, brownie recipe too. There are more detailed instructions in the previous posts on how to make brownies in general. I’ve added photos below the recipe to expand on the addition of cheesecake.

Ingredients for Cheesecake Brownies, adapted from Smitten Kitchen

Brownie ingredients

  • 150g unsalted butter, cut into small cubes
  • 150g dark chocolate (at least 60%), broken up, roughly chopped
  • 2 large eggs plus 1 egg white*
  • 200g caster sugar
  • 100g plain flour
  • 20g cocoa powder
  • 1/2 tsp of salt
  • 1 tsp of vanilla extract

Cheesecake ingredients

  • 150g full-fat cream cheese
  • 1 egg yolk from the egg in the brownie ingredients*
  • 50g caster sugar
  • 1tsp vanilla extract, or replace with
  • Optional flavour ideas – zest of an orange, 1 tbsp of dark rum or plum wine.
  1. Preheat the oven to 180°C/355°F/Gas Mark 4. Line a deep tin. For this quantity a 20cm square tin or a rectangular 27×20 or 28×18 will work.
  2. Start preparing the brownie mixture. Melt the chocolate and butter together and just after it has melted, add in the salt, vanilla extract and leave it on the side to cool down. Ways of doing this are on a previous post.
  3. As you keep an eye on the chocolate and butter melting, prepare the cheesecake mixture. Put all the cheesecake ingredients into a small bowl. Save the egg white for the brownie mixture. Mix to combine until smooth. I often use a hand mixer, but you could beat with a spatula. See photos below.
  4. Turn your attention to readying the rest of the brownie mixture. In a stand mixer bowl (if using) otherwise a medium bowl, crack the two eggs and add the saved egg white into the bowl and add the sugar. Use a stand mixer or an electric hand mixer on high speed to start whisking the eggs and sugar until they are at a ribbon stage. Ribbon stage is when the egg and sugar mixture are a pale yellow colour, doubled or even tripled in volume and when you lift the whisk over the mixture, the batter will fall slowly and leave a trail like a ribbon that will hold its shape for a few seconds. It will take about 10 minutes. I still use a timer to make sure I beat them for long enough. Don’t start beating the eggs/sugar until the chocolate/butter has melted because the chocolate/butter mixture needs this time to cool down.
  5. As the eggs and sugar are whisking, measure out the flour and cocoa powder into another bowl. Sieve it if there are lots of lumps in the flour and cocoa. Otherwise, use a whisk to loosen and mix them together.
  6. When the eggs and sugar have reached a ribbon stage, reduce the speed to low and add the melted chocolate and butter mixture to the eggs and sugar. Whisk until it all appears to have mixed together. If you are using an electric hand mixer, you may need to turn off the mixer, add the chocolate/butter and then switch it back on again to avoid a mess. I speak from experience.
  7. Now fold in the flour and cocoa powder using a spatula, or a spoon until it is well combined.
  8. Pour all the mixture into the baking tin. Debs says that if you want to create an even more marbled effect, then reserve some brownie batter to dollop on top of the cheesecake before swirling them together. I’ll let you experiment.
  9. Use a tablespoon to dollop the cheesecake mixture evenly into the brownie mixture. Use the back of the spoon to swirl the brownie and cheesecake together. I like to go up and down vertically and then again horizontally. See photo below.
  10. If you want to add in any texture (such as crushed biscuits) or fruit (such as raspberries or blackberries), do it now and push them into the marbled mixture.
  11. Bake in the oven for 20-25 minutes. They should be firm to touch at the top but still wobble when you shake it. Leave to cool completely in the tin and if you can bear it, cover them and leave them overnight in the fridge. They will be easier to cut and the flavours will have deepened.
ingredients for the cheesecake element
The ingredients for the cheesecake mixture – see step 3
Cheesecake mixture beaten until smooth
Beat the cheesecake mixture until smooth – see step 3
a table spoon dolloping cheesecake mixture into the brownie mix
Cheesecake mixture being dolloped – Step 9
the end of the spoon going up and down to create a swirling effect between the brownies and the cheesecake mixtures
Begin to swirl – step 9
frozen raspberries added to half of the cheesecake brownie before baking
I added some frozen raspberries to half of the tin because I fancied some raspberry cheesecake brownies. I didn’t measure it out, but I’m guessing 45g for half a tin?
4 cut up brownies.  The two nearest are raspberry cheesecake brownies and the two further away are vanilla cheesecake brownies
Tada – two variations from one tin. At the forefront there is raspberry cheesecake brownies and at the back, vanilla cheesecake brownies

Fudgy Chocolate Brownies: infinitely adaptable

Experimenting with peanut butter and salted caramel brownies.

Recently, I was asked in an interview, “what do you contribute to a team?” The first thought that popped into my head was brownies. However, perhaps that wouldn’t be such a professional way to answer the question? So, instead I answered something about how I am a really good team player and the many different skills I’d bring to the team, rather than saying that my contribution is a baked sugar high laden with chocolate. I meant to mention my excellent brownies at the end as an aside, but I forgot.

Immediately once the interview was over and as I reflected on how it went, I wished that I had led with the brownies though because it would have revealed more of my true self. My flatmate and colleague concurred (now assigned to the status of previous flatmate and colleague: that teaching job contract having just ended and we’ve moved out). Though, we then agreed in the next breath that my crack cookies are my best work. So, another time, I’ll be that little bit braver, relax and say, “brownies and cookies.”

The first time that I made these during lockdown was at the beginning of marking many, many student essays whilst living at my sister’s. I’d broken a personal record and spent 5 hours on a paper, checking for plagiarism and looking up citations, and still hadn’t finished it when thoroughly fed up and discouraged, I decided to put it down until the next day. A WOD (workout of the day) with 100 burpees and an evening spent singing, baking these brownies put me in a better mood. I left it out on the side to cool down and develop even more flavour overnight. My sister said that her contribution to my happiness was not diving into them that night. I shared a photo of them on a work group chat and subsequently made friends with a colleague who wanted the recipe.

Pretty Raspberry Brownies
The raspberry burst brownies which fuelled the essay marking

Awkwardly, I didn’t have the recipe at hand to share. It lived in the form of an excel spreadsheet, a hangover from my baking business days. Instead, I sent her a link to my raspberry burst brownies and made a mental note that it was time to publish this recipe.

I created this recipe in Cambodia whilst supplying brownies for a cafe because I wanted to create a brownie with more height and volume that I could adapt with a variety of fillings, such as cheesecake and salted caramel. In addition, my usual go to, very easy brownie recipe which the raspberry burst brownies are adapted from suddenly stopped working for me after I upgraded my oven. They were coming out cakier. Some people prefer their brownie consistency like that but I much prefer them to be fudgier with that delightful cracked top. The timing of it might have been purely a coincidence and have nothing to do with me switching from one of these electric toaster ovens to a standing oven cooker. I’ve shared the only decent photo that I appear to have of my toaster oven for you. If you’ve always lived in the UK, then you may have no concept of what I’m talking about. In most parts of S.E Asia, ovens do not come standard in a furnished kitchen. This is the oven in which I began my baking business and I used it for the first 2 years. It only allowed me to do one tray of cookies, a cake or brownies at a time and by the end it wouldn’t heat above 150°C. When I moved and invested in a new oven, it was a game changer.

My toaster oven that lived on the floor
My toaster oven lived on the floor. I’m piping coconut churros.
my new oven
I moved apartment and my new oven fitted into this space perfectly. This was taken the day the oven was delivered and fitted. If you look carefully you can see I had to buy extra long wiring because the power socket was on the other side of the room.

Anyway, it gave me an excuse to try out a new brownie making method for me that I’d seen Ed Kimber use in this video in which you mix the eggs and sugar for about 10 minutes until they form into a ribbon stage (I’ve explained what ribbon stage is in step 4 of the method) and then add the melted chocolate and butter. Mixing the eggs and sugar for that long, creates volume and structure and I deduced, would help me create that dense fudgy consistency and crinkly top each time. It did. At the bottom of the post, I’ve also included for you, a few photos of the different flavours that I’ve played with and how I’ve adapted them.

I played around with the sugar quantity. Most brownie recipes ask for larger quantities of sugar, but I’ve always liked the challenge of seeing how little sugar I can add to baking and it still taste good. From experience, 150g is too little but anything between 200-230g is perfect. I’ll adapt it depending on the additional flavours I want to add. For example, with salted caramel, I use less because of the added sweetness from the caramel. With raspberry I use more to counteract the tartness of the raspberries.

Brownies components ready to mix together
All the components ready to mix together

I prefer to make these in a stand mixer using the whisk attachment because it is easier to leave the stand mixer running during the egg and sugar whisking part whilst getting on with other tasks, rather than holding an electric hand mixer for 10 minutes.

Top tip 1: if using an electric hand mixer, place a tea towel underneath the bowl to keep it stable and stop it moving around.

Top tip 2: once baked, leave these to cool down completely, cover and place in the fridge overnight. Not only will they taste better as the flavours mature and deepen, but they will also be cold. Cut them with a sharp knife and you’ll get those beautiful clean lines.

So here’s the recipe for the Infinitely Adaptable Fudgy Chocolate Brownies. They’ll make between 12-16 brownies or 20 mini brownie bites.

Ingredients

  • 150g unsalted butter, cut into small cubes
  • 150g dark chocolate (at least 60%), broken up, roughly chopped
  • 3 large eggs
  • 200-230g caster sugar (depending on how sweet you’d like them and the additional flavours you want to add)
  • 100g plain flour
  • 20g cocoa powder
  • 1/2 tsp of salt
  • 1 tsp of vanilla extract
  • 1 tsp of instant coffee granules (optional) – I use it because it helps bring out the chocolate flavour
  • And then whatever flavours* you’d like to add, or not.

Method:

  1. Preheat the oven to 180°C/355°F/Gas Mark 4. Line a deep tin. For this quantity a 20cm square tin or a rectangular 27×20 or 28×18 will work.
  2. Melt the chocolate and butter together and just after it has melted, add in the salt, vanilla extract and the optional instant coffee granules and leave it on the side to cool down. There are various ways you can melt chocolate and butter.
    • The more cautious, ahem proper, approach is to use a bain marie, that is put the butter and dark chocolate in a heatproof bowl that can sit on top of a saucepan with simmering water. Make sure that the bottom of the bowl doesn’t touch the hot water in the saucepan. Slowly melt the chocolate and stir regularly. This way you won’t burn the chocolate.
    • Another easier way is to use the microwave. Put chocolate and butter in a heatproof bowl, place a paper kitchen towel on top of the bowl so that butter won’t pop out as it melts. Melt it in 20 second bursts, stirring each time.
    • My way, is to use a heavy bottomed saucepan. I put the chocolate and butter in it and melt it at a low heat, stirring regularly. I take it off, just as the last few chocolate/butter bits aren’t quite melted because they will melt in the residual heat of the saucepan.
  3. In the meantime, measure out the flour and cocoa powder into a small bowl. Sieve it if there are lots of lumps in the flour and cocoa. Otherwise, use a whisk to loosen and mix them together.
  4. As soon as the chocolate/butter mixture is off the heat, crack the eggs into a medium sized bowl and add the sugar. Use a stand mixer or an electric hand mixer on high speed to start whisking the eggs and sugar until they are at a ribbon stage. Ribbon stage is when the egg and sugar mixture are a pale yellow colour, doubled or even tripled in volume and when you lift the whisk over the mixture, the batter will fall slowly and leave a trail like a ribbon that will hold its shape for a few seconds. It will take about 10 minutes. I still use a timer to make sure I beat them for long enough. Don’t start beating the eggs/sugar until the chocolate/butter has melted because the chocolate/butter mixture needs this time to cool down.
  5. When the eggs and sugar have reached a ribbon stage, reduce the speed to low and add the melted chocolate and butter mixture to the eggs and sugar. Whisk until it all appears to have mixed together. If you are using an electric hand mixer, you may need to turn off the mixer, add the chocolate/butter and then switch it back on again to avoid a mess. I speak from experience, haha.
  6. Now fold in the flour and cocoa powder using a spatula, or a spoon until it is well combined.
  7. Pour into the baking tin.
  8. Bake in the oven for 18-20 minutes. They should be firm to touch at the top but still wobble when you shake it. Leave to cool completely in the tin and if you can bear it, cover them and leave them overnight in the fridge. They will be easier to cut and the flavours will have deepened.

*You can add various flavours to this, or not if you want them plain. I’ve given you a few of suggestions and photos below. Do let me know how else you adapt them.

For raspberry burst brownies 2.0, I add 90g of raspberries. I mix in half before I pour it into the baking tin and then scatter the remaining half where there are spaces.
For raspberry and white chocolate, do the above and add 100g of chopped white chocolate. Mix half the chocolate into the batter with the raspberry and then fill the spaces with the remaining 50g.
Walnut Brownies
For nutty ones, I use 100g of nuts. For this one, I’ve used walnuts. I pick out 12-16 walnut halves to place on top for evenly then roughly chop and mix in the rest to the mixture before I pour into the baking tin and then place the remaining walnut halves on the top.
Salted Caramel and Hazelnut Brownies
For hazelnut and salted caramel. I made these to use up leftover ingredients as I was packing to return to the UK. Use 100g of roughly chopped hazelnuts and 100g of salted caramel. I mixed in half the hazelnuts into the mixture, then after I poured it into the tin, I blobbed salted caramel with a teaspoon evenly and scattered the rest of the hazelnuts over the top.
Swirls of cheesecake in brownies
Swirled cheesecake brownies, but I’ve realised that the salted caramel and the cheesecake ones are a little more complicated, so I’ll post those recipes another day.

What happened next with that interview? How many points have I accumulated? In this current job hunting cycle, I racked up 103 points. Incidentally, I got offered that job, even without the promise of these brownies. So, I’m currently in the throes of transition once again and relocating down to the Midlands.

Dark Chocolate Cashew Almond Butter Cookies

I meant to publish this recipe a few months ago, but I didn’t have the photos ready.  I still don’t have the perfect photo sequence for how to make these cookies.  But it’s the middle of the Open and these cookies were thought up between a few crossfitters so better like this than never, right?  Besides, what better timing than the middle of the CrossFit Open Games to tell you how I got started on CrossFit and baking paleo cookies.

The ingredients for the cookies minus the bicarbonate of soda

I started CrossFit in February last year.  I had been given a tough teaching schedule at my school and they weren’t letting me push back on it.  As I despaired, I felt God say to me, “Han-Na, you’re stronger than you think you are.” Since I often experience God in physical activities, I decided to also translate that into trying out CrossFit to see how strong I was.  This was after months of pushing back on my coaches because I was very happy in the Bootcamp classes and not interested in getting stronger.

Pretty soon, it was clear to my coaches, that I had the potential to lift heavy weights.   I, on the other hand, intimidated by lifting anything vaguely heavy and the technicalities of the lifts, really did not enjoy the barbell work for the first few months.  Not long ago, one of them encouraged me, as I was going for my 1 rep front squat max, that I had the ideal physique of a squatter.  I’m not entirely sure what he means by that, do you?  Still, I managed 72kg that day, which I was delighted with.

Then one day, one of my coaches asked me when I was going to bake some paleo cookies for her.  I told her that Christina (of Joyfully Nutty) and I had just been talking about how to use cashew almond nut butter in baked goods and so why not try them in a cookie.

So, thank you Minna and the CrossFit community for pushing us into trying to make these paleo cookies.

I use the Dazed and Cashewed, cashew almond nut butter from Joyfully Nutty.  You could make these with a cashew nut butter or an almond nut butter, it comes down to preference.  I went off the back of Julie Wampler’s recipe from Table for Two, and experimented with reducing and changing the sugar to make it suitably paleo.  I was also baffled as to whether palm sugar is paleo or not.  It would appear that the paleo community embrace coconut sugar but differ on palm sugar.  The little personal research that I’ve done suggests that palm sugar is produced in the same way as coconut sugar, and therefore is paleo.

Then I discovered this delightful nugget.  With the addition of different spices, I could halve the sugar or omit the sugar completely and they would still result in tasty ‘sweet’ morsels, that are soft yet chewy.  Curious, I tried a sugar free version, which admittedly, is more delicate and will thus crumble more easily, but because there’s a lot of dark chocolate, you hardly notice that the sugar is gone.

Top tip: by adding spices, you can reduce or omit the sugar.

I believe that you could make these vegan by replacing the egg with flaxseed or chia seed but I’ve yet to try it.

Baking these is a cinch (read the method below), which is another reason why I like them.  You want to satisfy that cookie craving but don’t have to wait 24 hours to rest the cookie dough.  From start to finish, you could be sitting down with a cookie (or twelve) in 30 minutes, or less.

So here is the Dark Chocolate Cashew Almond Butter Cookies, adapted from Table for Two.

Makes between 12-14 cookies

  • 1 large egg
  • 60g palm sugar (*optional)
  • 1/4 tsp salt
  • 1/2 tsp cinnamon
  • 1/2 tsp turmeric
  • 250g cashew almond nut butter
  • 1tsp bicarbonate of soda
  • 100g dark chocolate*, broken into chunks. Or you could use dark chocolate chips. I use small round discs of chocolate.
  • *use one that is at least 65%.

Method

  1. Preheat the oven to 180ºC/350ºF or gas mark 4.  Line a large baking tray (or two depending on size) with baking paper.
  2. Whisk the egg, sugar, salt, cinnamon and turmeric together in a small mixing bowl.
  3. Add in the cashew almond nut butter and the bicarbonate of soda and mix until it is all combined.
  4. Stir in the dark chocolate.
  5. Place generous tablespoon dollops (sort of ping pong ball sized) of the cookies on the baking tray.  I use a 1½tbsp cookie scoop for the sake of ease now.
  6. Bake in the middle rack of the oven for 12-15 mins, or 10-12 mins in a fan oven.
  7. They will have puffed up a bit and be lightly golden brown in colour.  As they cool they will collapse slightly into themselves.  At this point, I like to place a chocolate disc on top of each cookie because I like how it looks.  Allow them to cool completely on the baking tray and then store them in an airtight container.
  8. In Cambodia’s humid climate, they’ll keep outside the fridge for about 3-4 days.  I normally store them in the fridge and they’ll happily chill out there for 2 weeks.  Or they freeze well.  But you know, they’re pretty tasty straight out of the freezer too.

The verdict?  You’d never know that this was a gluten free, dairy free cookie.  Soft  in texture and rich in flavour.  I get orders for these, with sugar, without sugar, without chocolate… hehe.  So you know that they’re customisable.  I like them as a pre-workout snack.  I also like them because it’s such an easy recipe.

Claire’s Chunky Chocolate Cookies

Chunky Chocolate Cookies

What’s my favourite chocolate cookie recipe so far? The recipe that came from a calendar of chocolate recipes and my then-housemate Claire baked, back in the day when I wasn’t very good at trying out new recipes. And, wow. Didn’t they smell gorgeous and taste incredible… with that wonderful chewiness that cookies should have, and a bit toffee-ish flavour (that’s the brown sugar talking)!! Lekker, lekker, lekker!

Without wanting to sound too much like a cookie monster, I decided to have a go baking them because I wanted to eat MORE! It turned out to be a really simple recipe (hurrah); a bit too simplified perhaps? I made quite a few basic mistakes when making these.

For instance, I discovered that cookies splay out in the oven, so if you don’t space them out enough, they can all meld into one big rectangular cookie, which you have to cut apart.

Next, I found out that if you don’t use baking paper, it’s hard to get the baked cookies off the baking sheet.

Then, there’s minutes in baking them so that they’re soft and chewy and them being rock hard. Err on the side of chewy caution, my friend and use a timer!

Finally, this is less of a mistake but a definite learning point. It was an eye-opener for me to realise how much sugar goes into making cookies. I kind of thought of them as a ‘healthy’ snack before then, but 500g of sugar doesn’t quite fit that category. Hmmm…. So, let’s say that you wanted to cut down the sugar a bit, then I’d try reducing the amount of white sugar you put in. I’ve not tried this yet, but I’d experiment with between using half or two thirds of white sugar. I’m not entirely certain how that will affect the chemistry and flavour. However, I would definitely not scrimp on the brown sugar because it’s the brown sugar that produces that more-ish nuttiness to the cookie’s flavour. That first time, I even asked Claire whether she’d put toffee in the cookies.

chocolate cookie dough

So, I’ve amended the method section so that you can build on my experience. Also, at the bottom of this post, I’ve listed some of different combinations that I’ve created by adapting this recipe.

This makes about 55 regular sized cookies (by regular, I mean 10-15 cm). Claire advised me later that she often halves the recipe so that there’s not an eruption of cookies. You can freeze them, if you have space in your freezer. I have rolled my spare cookie dough into ball shapes and frozen them in a ziploc bag. Later, all I’ll need to do is put the cookie dough balls out on some baking paper and sheet to defrost for an hour at room temperature, then pop them in the oven. A wonderful, ‘instant’ treat to have up your sleeve!

Ingredients

  • 250g soft dark brown sugar
  • 250g white sugar
  • 280g butter, softened
  • 2 eggs, beaten
  • 300g chocolate, roughly chopped into chunks (you can use dark, milk, white and in any combination)
  • 1tsp vanilla extract
  • 1/2 tsp bicarbonate of soda
  • 1/2 tsp salt
  • 500g plain flour
chunky chocolate cookies 1

Method
1. Pre-heat the oven to 180C/350F/Gas Mark 4. Prepare 2 baking sheets/trays with baking paper or greaseproof paper.
1. Mix butter with sugar until creamy and fluffy, with an electric mixer. If you don’t have one, then use a wooden spoon and beat hard!
2. Add the eggs, chocolate chips and vanilla essence and mix well. Add the bicarbonate of soda and salt to the flour and add to the other ingredients. Sitr to form a thick cookie dough.
3. Take ping-pong ball size amounts of the mixture, roll it into a ball and place spaced apart on the baking sheet/tray. Bake for 10-12 minutes in the oven. The cookies should be slightly golden brown. Let them rest for a few minutes and then gently place on a rack to cool.

chocolate chunk cookies 2
The top ones have been baked for 5 minutes too long and are too hard, whilst the bottom rather anaemic looking ones have been baked perfectly so that they’re chewy but with a bit of crunch.

Ideas for different flavours?
I’ve adapted the recipe a few times and substituted the 300g chocolate for:

  • 100g dried cranberries, 100g roughly chopped macadamia nuts & 100g roughly chopped white chocolate chunks
  • zest of 2 lemons & 300g dark chocolate chunks
  • 100g roughly chopped brazil nuts & 200g dark or milk chocolate chunks

Kids love the lemon and dark chocolate one – or at least the kids I’ve baked with when babysitting them.

%d bloggers like this: