Vegan hot cross buns (tangzhong method)

vegan hot cross buns
Vegan hot cross buns

Recently, I felt like I have had a breakthrough with my approach to vegan baking thanks to the MsCupcakes book. So I have been leaning into it. The book helped me reevaluate how I approach the free-from baking category. I’ve noticed that many vegan recipes have adapted an existing recipe purely with substitutions for ingredients, like ground flaxseed instead of an egg, or oil instead of butter. Sometimes the ingredient can seem peculiar and unusual, depending on where you live. For example, flax seeds were difficult to get hold of for a while. However, the book helped to start thinking that rather than finding substitutions for things, I should try to think about what that particular ingredient brings and whether I can replicate that texture or flavour in another plant-based way.

I love the spring that the tangzhong brings to the bun

Therefore in the last month, I have been testing out vegan hot cross buns because it’s Easter and because enriched bread should, in theory, be quite simple to adapt. Spare a thought for the family that I live with. They have been through five iterations of a vegan hot cross bun recipe in my quest to perfect them.

The first time, I substituted soy milk for milk and oil for butter and omitted the apples. They were alright but under-proved and missing the freshness from the apple. Next, I made buttermilk, using soy milk and cider vinegar in order to create a softer, rich dough. Buttermilk helps to create a soft texture normally in bread. They were better but the texture was a bit dense. Then I used the tangzhong method to create springy soft buns that would last longer and they were amazing. Why didn’t I stop there? They took 3 rises. One for the dough, then an overnight one with the fruit added in, and a final prove once the buns were shaped. The buns were cracking a bit as if they were underproved. As amazing as they were in flavour and texture, I wanted to simplify and shorten the method. (You can, of course, still do this recipe in 3 rises.) The fourth time, I decided to try reducing the number of rises to two, but they ended up under-proving and cracking at the top. I left it for a week while my brain mulled over it. Do plant-based enriched bread recipes generally take longer to prove than non-vegan recipes? I felt like they shouldn’t as they don’t contain eggs that can slow down the rise. Perhaps it has just been my impatience to get them baked that has resulted in under proved buns. I almost hit publish on the recipe at the end of March but then my perfectionism kicked in. A few days later, I hit on an easy solution – double the yeast in the recipe. It is such a simple answer that you wonder why I hadn’t thought of it earlier. Anyhow, that is what I did and this is what I present to you now.

I adapted this by adding the tangzhong knowledge I learned from last year’s sticky apple and raisin hot cross bun recipe to Paul Hollywood Hot Cross Bun recipe because mixed peel is back in the shops this year. However, I reduced the amount because I think that 50g is just fine. Some more notes on how you can vary the method. I like making this in the stand mixer as the tangzhong makes it a wetter dough. You can knead by hand but it will take longer.

Soft silky hot cross bun dough

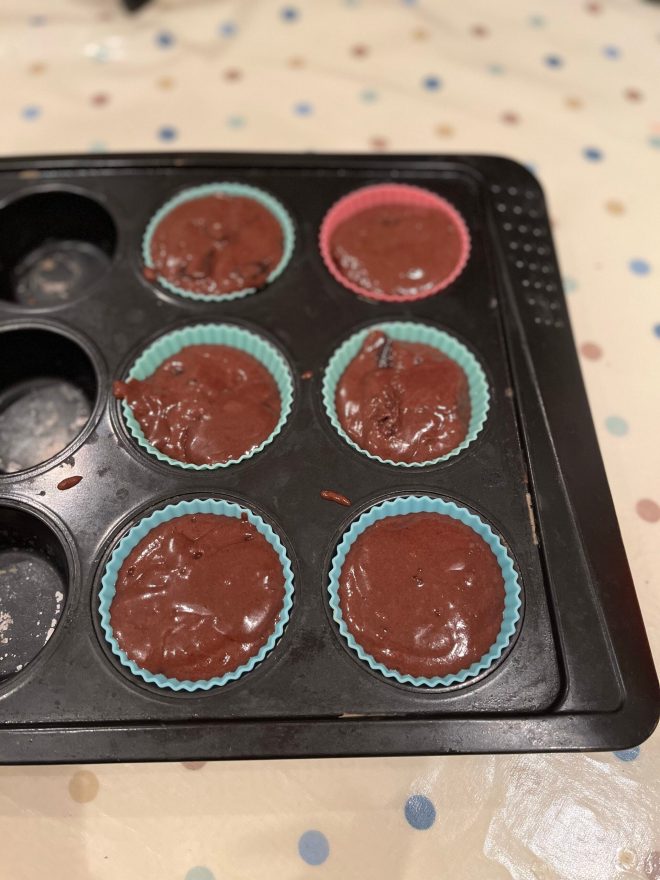
I’ve also been trying out different ways of mixing in the fruit with varying degrees of messy success. Method 1 is the put the fruit and the dough into the same bowl and mix it in. A slightly more detailed explanation of this is in my non-vegan version of Paul Hollywood’s Hot Cross Buns. Method 2 is to roll out the dough into a rectangle, scatter the fruit evenly over the top and then to take hold of one of the shorter sides and fold it a third into middle, and repeat on the other side so that it looks like a long rectangle. Next take one short end of the rectangle and repeat the folds again, so that it becomes a more compact rectangle. It is a neater process until the point when I roll it out into a long sausage shape in order to portion out 15 buns. At which point the dough starts breaking and the fruit spills out and away from the dough like runaway gems onto the countertop. Maybe I just need to work on my method 2. Finally, you can also make this with three rises or two, depending on your schedule. If going for three then reduce the yeast to 7g to allow for the overnight rise. The first rise is just the dough, the second as an overnight one after the fruit is mixed in and the third after the buns have been shaped. The method below details it for two.

Ingredients for vegan hot cross buns. This makes 15.

  • 500g strong white bread flour
  • 125ml water for the tangzhong
  • 250ml soya milk (or any unsweetened plant-based one) + 20ml apple cider vinegar or lemon juice
  • 60g caster sugar
  • 14g instant yeast
  • 1tsp (10g) salt
  • 2tsp cinnamon
  • 1tsp mixed spice
  • 70g dairy free margarine (I used vitalite) or vegan butter
  • 1 apple
  • Zest of 2 oranges
  • 150g sultanas
  • 50g mixed peel

Ingredients for the crosses

  • 45g plain flour
  • 2-3 tbsp cold water

Ingredients for the orange glaze

  • 1.5 tbsp granulated sugar
  • Juice of half an orange

Method

  1. First, make the buttermilk. Mix 250ml of soya milk and 20ml of apple cider vinegar in a measuring jug. Stir and leave to coagulate.
  2. Next make the tangzhong. Weigh out 500g of bread flour into a mixing bowl and from it take 25g (about 1 heaped tablespoon) of flour and put it in a small saucepan. Add 125ml of cold water, put it on the hob at medium heat and whisk or stir to combine the flour and water together in order to make a roux, or a paste. Keep stirring until it comes together and your whisk or spatula leaves a line. It’ll take about 1.5-2 mins. Leave to cool while measuring out the dry ingredients.
Your tangzhong is ready when you can leave a line in it
  1. In the mixing bowl with the flour, add in the yeast, sugar, salt and spices. Stir to mix.
  2. In the saucepan with the tangzhong, add the margarine and buttermilk and stir to combine. The margarine won’t melt completely and the buttermilk will make it look bitty and curdled but that’s okay. It will all get mixed in.
  3. Now add the wet ingredients to the flour and knead. I knead it in the stand mixer. I start at low (1) until all the ingredients are mixed in and then continue at medium (3) for about 9-10 minutes until the dough is stretchy and smooth. Take the dough out of the mixing bowl to form into a ball. Put a bit of oil in the bowl and place the dough back in there and cover. Leave for about an hour or until doubled in size.
  4. In the meantime, chop the apples, zest the oranges and stir to combine in a small bowl with the sultanas and mixed peel. Line two baking trays (or one large one).
After the first rise
  1. When the dough is ready, lightly flour the surface and turn the dough out onto it. Gently make it into a rough rectangle using your fingers to gently knock the air out of the dough. Take one long end, fold into the middle and press down with the heel of your hand. Repeat it with the other side. Then fold it in half and gently roll. The dough should feel stronger.
  2. As you know, I’ve been trying out a new way to incorporate the fruit with varying degrees of messy success. Here, I’m going to say to go with the second method because I think that with practice and tweaking, it will be easier. Roll out the dough into a rectangle, scatter the fruit evenly over the top and then take hold of one of the shorter sides and fold it a third into the middle, and repeat on the other side so that it looks like a long rectangle. Next, take one short end of the rectangle and repeat the folds again, so that it becomes a more compact rectangle. Then roll it out into a long sausage shape, divide into 3 equal parts, and then each part into 5. Each piece of dough will roughly weigh 90g. Cover the little portions with a tea towel as your form the buns.
  3. Add more flour to your surface. I like to have a little mound of it to dip into. Form the buns by taking each corner into the middle so it is a tighter round shape. Then flour the palm of your hand, or dip the top of the bun into some flour. With the dough in the middle of your hand, make your hand into the shape of a claw and move it around quickly in a circular shape. I’ve included a video of it below because it’s easier to show it.
How to shape a bun.
  1. Then put each bun onto the baking trays, leaving 2-3cms between each bun. Cover and leave to rise.
  2. As you wait, make the paste for the crosses by mixing the flour and water together. Put it into a piping bag and snip a little hole off the end.
  3. The buns will have finished their second rise after about an hour, when most of them will be almost touching each other or if you press down slightly on them, they will spring back gently but leave a small indent. Of course, this depends on the weather. In a hotter climate, this will take about 30 mins. About 15 mins before you think they’ll have finished rising, preheat the oven to 200°C/400°F/Gas Mark 6.
The buns ready after their second rise
Piping crosses. Also, the consistency for the paste is like this
  1. Pipe crosses on them by piping a line along each row of buns and then repeating in the other direction.  The crosses want to hug the sides of the buns.
  2. Bake on the middle shelf of the oven for 10 mins and then lower the temperature to 180°C. Bake for another 15-20 minutes, until golden brown. My oven has hot spots, so I turn the tray around after the first 20 mins.
  3. As they bake, make the orange glaze. Measure out the sugar and juice from half an orange into a small saucepan and melt the sugar over a gentle heat. Then turn it up to a medium heat for a few minutes so that some of the water evaporates and it thickens slightly.  Brush the sugar syrup over the warm buns and leave them to cool.

The verdict? I can’t resist one, still hot from the oven, sticky with the glaze and too hot for my mouth. They are full of flavour from the orange zest, fresh apple, spices and dried fruit and the kitchen smells delicious as you’re making them. The texture is springy and soft and they stay like that for 3 days. I love the sticky glaze on them. They are yummy toasted and buttered but honestly, I prefer to just eat them as they are. So, after day 3, when they are a little hard, I will heat them on high (800W) in the microwave for 15 seconds and they’re perfect.

Finally, everyone who has tried them tells me that they can’t tell that they are vegan.

Double Chocolate Muffins (vegan)

The final recipe test for vegan double chocolate chip muffins

I decided to lean into vegan baking last month, it being Veganuary. I came across a recipe book at the library, The Naughtiest Vegan Cakes in Town by Mellissa Morgan, of Ms Cupcake (a London vegan bakery which sadly closed 2 years ago). First off, this is a fantastic recipe book if you are new to vegan baking. She includes a Quick Start guide with explanation on ingredients, which is useful if, like me, you’ve felt overwhelmed by them, and a guide to baking without eggs and dairy. There is an additional section on substitutions (e.g. if you want to go gluten-free and refined sugar free) and trouble shooting common vegan baking problems. However, as the best way to review a book is to test out the recipes, I duly borrowed the book and tried out the Victoria sponge cake, which turned out very well. Then when my vegan colleague mentioned that she craved muffins, I set out to make them.

Now, there is no double chocolate chip muffin recipe in the book. Therefore, I adapted her mint chocolate chip cupcakes. The first iteration were incredibly good. The texture and the flavour were spot on. I made the first batch with soya milk and another with almond milk. They both worked and the type of plant based milk didn’t make enough of a difference. However, I calculated the amount of sugar in each muffin and at the original 200g in the recipe (which makes 12) that was just over a tablespoon of sugar per muffin. That’s without the additional sugar from the chocolate chips/chunks. A little high perhaps? Thus began a series of experiments to reduce the amount the sugar in the recipe. I detailed it in a little table for you.

Amount of sugar in the recipeSugar per muffin (approx) without the addition of chocolateTexture/FlavourAdditional flavouring
200g16.67 (just over a tablespoon)incredibly good1.5 tsp instant coffee
180g15g (1 tbsp)incredibly good1.5 tsp instant coffee
150g12.5 (2.5tsp)still yummy2 tsp vanilla extract and 1 tsp instant coffee
120g10g (2 tsp)denser texture, slightly too bitter1 tbsp vanilla extract
Results of sugar reductions in double chocolate muffins

I took it as low as 120g, which then changed the texture of the muffin so that it becomes denser, slightly stodgy and began to taste a bit soapy and bitter. The chocolate chunks in the muffin masked that unpleasantness. However, let’s be frank. When you bite into a double chocolate muffin, you want it to taste good, not healthy.

So, in the recipe below, I’m going to suggest that you could add anything between 150-180g of sugar. Consult the table above to decide how much sugar you’d like and how to adapt the additional flavourings. I think coffee always complements and enhances chocolate. The vanilla extract brings out sweetness without adding any sugar.

In the end, as I was testing out many variations of this recipe, I decided that I’d halve the recipe each time. That is one of the joys of this particular recipe. It’s pretty simple to scale up or down.

By the way, I like making this in a large measuring jug. It is easier for pouring the mixture into the muffin cases at the end, but a medium sized bowl also works. I alternated between using a whisk and a metal spoon/spatula to mix, but I prefer the whisk for the quantity below.

Top tips: mix until it has just combined and bake them immediately.

Fill the muffin cases and then tap to release the air bubbles

Ingredients for Double Chocolate Chip Muffins, adapted from Mellissa Morgan. It will make 12 muffins.

  • 200ml unsweetened plant based milk – I tend to use soya milk
  • 20ml cider/rice vinegar or lemon juice
  • 150-180g caster sugar (my favourite is 180g*)
  • 170g self raising flour (or 170g of plain flour and 2tsp of baking powder and omit the 1/4tsp of baking powder that follows)
  • 30g cocoa powder
  • 1/4 tsp baking powder (omit this if you’re using plain flour + 2tsp of baking powder)
  • 1/4 tsp bicarbonate of soda
  • 1/4 tsp salt
  • 150g 70%+ dark chocolate roughly chopped up, alternatively use dark chocolate chips (check to see that they are dairy free)
  • 80g vegetable oil
  • 1 tsp instant coffee granules/powder*
  • 2tsp of vanilla extract*

*When using 180g of sugar, add 1 tsp of instant coffee but no vanilla extract. Unless you really want to.

Method

  1. Mix the soya milk and the vinegar together and set aside for 10 minutes. This makes a soya buttermilk. Then add 1tsp of instant coffee so that it has a chance to dissolve. Preheat the oven to 180°C/350°F/Gas mark 4 and line your muffin tray with muffin cases.
  2. In a large measuring jug or a medium sized bowl, measure out the dry ingredients, that is the self raising flour, caster sugar, cocoa powder, baking powder, bicarb of soda, salt and the roughly chopped dark chocolate. Whisk it together so that they are all combined thoroughly.
  3. Add the vegetable oil and the vanilla extract (if using) to the curdled soya milk mixture and whisk to combine. Then add this to the dry mixture and mix quickly until just combined. It’s important not to work quickly and not over mix it. If there are a few lumps, that is okay. If it is lumpy, on the other hand, I’d continue mixing it for a few more seconds.
  4. Tap the jug onto the surface. This stops the raising agents from working too quickly. Then pour or measure out the batter evenly into each of the muffin cases. Tap the muffin tray hard on the work surface to pop the bubbles, then bake in the middle of the oven for 20 minutes. They’re ready when a skewer comes out without cake crumbs but may have a little bit of melted chocolate hanging onto it. Let them cool in the muffin tray for 5-10 minutes before taking them out to cool completely. They will store in an airtight container for 5 days, maybe more..? Honestly, they haven’t made it any further than that in my house.

The verdict? Incredibly good. The texture is airy and light, and the chocolate chunks in the muffin are so satisfying. I always think that almost every chocolate baked good will taste better the next day. So, make them at night and have one for breakfast the next day. 😉

On the note of vegan chocolate. I’ve observed a greater selection of vegan chocolate, which is great. However, they are often much pricier. A lot of dark chocolate, 64%+, is dairy free. I will always check the list of ingredients on the packet before using. I prefer to chop it up roughly and then add it. I haven’t ever checked to see if dark chocolate chips are dairy-free. If you do, then please let me know in the comments.

Vegan Banana Cake or Muffins

Vegan banana loaf 1.0 with lemon drizzle icing

I’d planned to share this recipe in January in case anyone had resolved to do veganuary. I wanted to let you know that this scrummy, flavoursome cake was possible to make and eat. You probably have the ingredients in your cupboard and fridge already, unless you aren’t vegan and possibly don’t already have an alternative dairy free milk in your fridge.

However, I don’t know whether people will have given up on their January resolutions, like dry January (not drinking alcohol in January) and veganuary (going vegan for January) after last week’s announcement about England going into lockdown 2.0. Whoever had been hoping that the stroke of midnight on Hogmanay 2020 was going to herald in a better year had their hopes cruelly dashed. Lockdown was something that I’m guessing most people were hoping would be left behind in 2020.

In the last real lockdown in March 2020, (I’m not counting what happened in November because there were fewer restrictions than what we have now), the internet exploded with stories and images of people baking banana cakes, banana breads, cookies and sourdough breads. Flour and yeast disappeared off the supermarket shelves and a little black market for flour and yeast began. I’ve bought a 25kg bag of flour, who wants to buy some from me? XX bakery is selling yeast. I understood the sourdough bread fascination – more time at home on their hands perhaps, so could feed the starter, watch the starter, turn the dough, bake the bread. I didn’t understand why banana cake or bread held the same fascination. I still don’t. Anyone want to enlighten me?

I created this vegan cake simply because of a combination of reasons. I’ve been wanting to create a good vegan banana cake recipe for a while, one of my colleagues is vegan and on Fridays, it had become a custom to have some sort of sweet treat that one of us would share. That was before Christmas, and the wildfire spread of the new Covid variant when we were able to go into the office.

Previously when I had researched vegan baking, bananas came up as a common, easily accessible substitute for eggs. If you’re interested, the other common substitutes in a cake are applesauce or a mixture of vinegar and bicarbonate of soda. Often they suggest replacing one egg with one banana: it helps to hold the structure of the cake together, which is what an egg does in a cake. I’m still a novice when it comes to vegan baking and I’ve only tried this in a banana cake, so I don’t know how it would affect the flavour of another type of cake.

I mushed together my recipes for vegan chocolate cake and spiced banana cake to come up with this recipe. The addition of boiling water at the end, was the one final comparison test that I did before I wrote up this blog post. In the final taste test when I was paying particular attention to the texture, my taste testers and I noted that the addition of water created a slightly lighter and more moist cake crumb.

Searching for textural differences. The top row: with the addition of hot water and the bottom row: without hot water. Welcome to my world of recipe testing.

You can play around with the filling. In version 1.0 I used purely currants and in 2.0, a mixture of currants and raisins. Both work. I think that walnuts and pecans, or dark chocolate would work too. You can also vary the spices. I chose to go with vanilla so that more of the banana flavour would come out. However, I know that lots of people like to add ground cinnamon or ginger or mixed spice to their banana cakes. I like doing it too. I also vary whether or not I add the icing. I think the addition of the lemon drizzle icing takes the cake up another level. However, if parents are trying to limit refined sugar from their children’s diet (or their own) then you can omit it completely. I think there is enough sweetness from the bananas and the dried fruit. It’s also less messy to transport as muffin snacks if there is no icing.

Edit 30th Jan: yesterday, I added an extra banana because I had one; reduced the sugar slightly to 80g (I think that I could have reduced it further) because overly ripe bananas have their own sweetness; replaced vanilla with ground ginger for a hint of heat and paired it with the lemon icing. It produced a bigger loaf and the house smelt glorious. Half of it disappeared within a day.

Just to add, I’m currently living with 4 other humans.

Perfect on a cold January day

Lastly, I experimented to see how easily this cake could adapt from a banana loaf to muffins. Very easily. This recipe will bake in a 2lb loaf tin (21x11x7cm) or 16 muffin cases.

The verdict? “Moist, scrummy, yummy, amazing, delicious..” – my colleagues, former housemate and the family that I currently live with are fans of this banana cake. Sometimes though, I’m not sure whether they’d say anything negative because they like homemade baked goods. You’ll have to try it for yourself and let me know.

Ingredients for Vegan Banana Cake or Muffins

  • 75ml vegan buttermilk (70ml soy milk or any vegan alternative milk + 1tsp of apple cider vinegar or lemon juice)
  • 85 ml of sunflower oil
  • 3-4 very ripe bananas mashed (about 300g-400g)
  • 80g-90g light brown sugar
  • 1tsp vanilla extract
  • 75g currants + 1/2tsp bicarbonate of soda – soaked in boiling water
  • 225g self raising flour
  • 1/2 tsp baking powder
  • 1/2 tsp bicarbonate of soda
  • 3/8 tsp salt
  • 50g boiling water

Ingredients for the lemon drizzle icing

  • 80-100g icing sugar
  • juice of half a lemon, you want between 3-5tsp so it really depends on the size of the lemon.
Measuring out the wet ingredients and the dry ingredients

Method

  1. Preheat the oven to 180°C/350°F/Gas Mask 4. If you are making a loaf, then oil and line a 2lb loaf tin. If you are making muffins, then line two muffin tray with 16 muffin cases.
  2. Prepare the dried fruit and make the buttermilk. In a cup combine the soymilk with one teaspoon of vinegar or lemon juice. Leave to one side for 10 minutes so it curdles. Boil the kettle and in a heatproof cup, measure out the currants and 1/2tsp of bicarbonate of soda. Add in the boiled water and leave it to one side while preparing the other steps.
  3. In a medium sized bowl, whisk together to combine the sugar with the mashed bananas, oil, buttermilk and vanilla extract. There will be white flecks where the buttermilk breaks up (I’ve included a photo below so that you don’t worry when you see this.)
  4. In another small bowl, measure out the flour, bicarbonate of soda, baking powder and salt. Whisk together to combine.
  5. Drain the currants and I rinse them with cold water to wash off any residual bicarbonate of soda.
  6. Add the currants and the flour to the wet mixture and use a spatula to combine together.
  7. Finally carefully add in the boiling water and mix thoroughly.
  8. Pour the mixture into a 1.5lb loaf or measure out into the muffin cases. I used silicone ones and put in 2 tablespoons of mixture in each.
  9. For the loaf: bake in the centre of the oven for 40-50 mins. Check after 30 mins and if it is browning at the top too much then cover with foil and continue baking. For muffins: bake for 15-18mins. To check if they are done, test with a sharp knife and it should come out clean. Leave to cool for at least 10 minutes.
  10. Prepare the lemon drizzle icing by sifting the icing sugar in a bowl and add in the lemon juice one teaspoon at a time until you get a runny consistency that coats the back of a metal spoon. Once the cake/muffins have cooled for 20 minutes poke holes in them and drizzle it over the cake or muffins in whatever shapes you desire.

Storage: Store the loaf/muffins in an airtight container. I think it tastes better the second and third day. It keeps well for 5 days and maybe longer, but it has always been all eaten by then.

Mix the wet ingredients together with the sugar
Muffin cases filled with 2 tablespoons of mixture
The vegan banana loaf 2.0 this time as muffins with no icing.

Finally I Mastered Crispy Kale

Kale Crisps Success!

A bag of kale, reduced down to 20p, was the last thing I bought before I received a notification from the Covid-app informing me that I had been in close contact with somebody with Covid-19 and I had to self-isolate for the next 8 days. So at 6.11am that morning I sent a message to cancel a run with my friend that morning, emailed my work to let them know and we did some rescheduling gymnastics so that I could work from home. Isn’t it odd that a bag of kale holds this memory for me now.

To be honest, I didn’t mind staying at home. My housemate didn’t have to self-isolate so she could get groceries for me and update me on what was happening in the realm outside of the front door. That is an odd detail, I know. I don’t fully understand the track and trace system we have in England. We figured out that my phone must have picked up something on my 20 minute train journey to work. Commuters who don’t wear their masks properly or socially distance appropriately stress me out. I was happy to temporarily cut out that bit of stress from my life.

I still had leftover pumpkin, lentil and goats cheese salad in the fridge, so I decided that for dinner that night, I’d crisp up kale and add it to the salad. I had only just mastered it the previous week whilst making a roasted squash risotto with crispy kale.

The goats cheese, pumpkin and lentil salad with crispy kale

I have been trying to make crispy kale for about 8 years and failing each time. Somehow, I had it in my head that I had to bake the kale at a low heat and so each time it would just come out soggy and burnt: an odd combination. This was due to the fact that I had first read about crispy kale in a post by Gwyneth Paltrow that also told me how to make oven dried tomatoes and either the recipe is actually wrong or I got confused between the two recipes. Then it was compounded by other recipes which told me to bake at a low temperature for 15-20 minutes. Instead, this roasted squash risotto with crispy kale recipe told me to preheat the oven to 230°c for the baking of the kale. I read that instruction twice to check and it worked.

Top Tip: the secret to crispy kale is a short baking time in a hot oven and dry kale.

Yes, once you’ve chopped and washed the kale, leave it to dry in a colander, or even better a salad spinner, for a while then spot dry it with a clean tea towel. This saves your tea towel from getting completely soaked. That is, unless you happen to have a bag of already prepped and washed kale.

Ingredients for Oven baked crispy kale, adapted from the Cooks Cook recipe

This will feed between 2-4 people.

  • 160g Kale
  • 1tbsp Sunflower/rapeseed or vegetable oil (depends on how much kale you have)
  • Salt and pepper to season, maybe a 1/4 tsp of each.
  • 1/2 tsp – 1tsp Paprika/Cayenne pepper/Chilli flakes or whatever spices you’d like (optional but highly recommended)

Method

  1. Preheat the oven to 220°C/425°F/Gas Mark 7 and prepare two large baking trays.
  2. Prepare the kale. Cut the kale, 2-3cm long. Remove any particularly tough bits of stalk, nearer the bottom of the kale. As you can see from the photos, I don’t really bother that much with removing the stalks because I don’t mind the extra bite. Wash the kale to remove any dirt. Leave it to dry in a colander or alternatively use a salad spinner. Then use a clean tea towel or paper towel to spot dry the kale so that it is as dry as possible.
  3. Add the kale into a large mixing bowl. Sprinkle over the oil, salt, pepper and any optional spices and massage in to make sure that each leaf has been coated. I prefer to do this part in a bowl because I find it gives a more even coat than when I do it on a baking tray. However, if you want to save on washing up, do this step on a baking tray.
  4. Lay out the kale in a single sheet as much as possible. This prevents steaming and sogginess. There will be a bit of overlap, don’t worry.
  5. Bake between 8-10 minutes so that they crisp up and are a mix of darker green and brown. Some leaves will get browner than others. I think that’s okay but if you want a more even crisp, then halfway through the baking time, move the leaves around.
  6. Leave it out on the baking trays to cool a bit before munching on it. It can be eaten on its own, added to a salad or a risotto for extra texture. Enjoy.
First, cut, wash and dry the kale
Coat with oil, sprinkle with salt, pepper and optional spices. This one has paprika. Then lay out on a baking tray

Roasted Brussels Sprouts: a game changer

Roasted brussels sprouts

Here’s a seasonal recipe for you, perhaps not the sweet one that you were hoping for this Christmas from me. If you like brussels sprouts or are somewhat ambivalent about them, do me a favour and give this recipe a go. I had boiled ones the other week at my work cafe as part of a Christmas lunch, and to be honest, I was a bit disappointed by their lack of imagination with this humble vegetable, given that they teach culinary skills.

I’m obsessed with roasted brussels sprouts. I first made them 3 years ago and they were a game changer. Roasting them brings out a nutty flavour somehow that you do not get when boiling or frying them. And texturally I find it really pleasing: soft but not soggy. Another bonus to roasting is that there is no bad smell when you cook them, although at the other end, I can not promise that the gasses will smell any sweeter.

Since being back in the UK, I have discovered that roasting brassica is my favourite way of cooking and eating them. Bold statement, I know. But so far, it holds true.

Brussels sprouts prepped with the bottoms sliced off and halved.

I have not given you quantities. Sorry. I have never measured out this recipe and now I’ve become that recipe writer who might say to you annoyingly, add a glug of olive oil and if you’re like me, you’d get peeved with them because how many millilitres is there in a glug of oil? Nevertheless, the only thing I can offer by way of excuse is that I have never measured this out because I always vary the amount of brussels sprouts depending on the number of people. I believe I think that 8 brussels sprouts per person is normal, based on the photo at the top, but then again, I do really love brussels sprouts.

Ingredients for roasted brussels sprouts

  • Brussels sprouts (however many that you’d like)
  • Olive oil (enough to coat the brussels sprouts)
  • Salt (to season)
  • Pepper (to season)
  • Chilli flakes (optional)
  • Juice of a lemon (optional)

Method

  1. Preheat the oven to 180°C/350°F/Gas Mark 4.
  2. Slice the bottoms off and halve them.
  3. Place cut side down on a baking dish.
  4. Sprinkle with olive oil and season with salt, pepper and if you want, chilli flakes.
  5. Bake in the oven for 20-25 minutes. Check halfway and shake them around a bit. If you forget this bit, don’t worry, there will be a bit of charring on some, but that tastes alright too.
  6. For a tangy finish, squeeze a bit of lemon juice over them at the end.

One of my friends recommended adding a drizzle of honey with chilli on them before baking them for additional flavour. That is a new twist that I’ll try this season.

Incidentally, I have also discovered whilst writing up this post that I’ve been spelling brussels sprouts incorrectly all my life, as brussel sprouts. Well, now I know.

What is your favourite way of cooking and eating brussels sprouts?

%d bloggers like this: