The brown butter chocolate chunk cookies aka Crack Cookies

Tonight as I was wondering which recipe to share with you (it was between apple crumble and poached eggs), I remembered that I’d been baking a lot of cookies recently and posting photos of them on Instagram. It’s time, isn’t it. The time has finally come to share my crack cookie recipe that I’ve been promising for a while.

Top tip: Keeping cookie dough balls in the freezer are an investment in your future self’s happiness.

There are variations of that sentence around the internet and social media. That’s my paraphrase above. It is one of the reasons why I love making these cookies. This recipe will make enough so that you can store some away (like squirrels do with their nuts in preparation for winter) for a moment when you really want to eat a cookie, or bake something but have no energy for it. That was me two nights ago. I arrived home from work physically and emotionally exhausted, wanting to be fed and then to sit down with a home baked biscuit to watch episode 2 of the Great British Bake Off – Biscuit week. Fortunately I live with a family who will let me do all those things and I had frozen cookie dough balls stashed away in the freezer.

a sauce pan with butter browning and foam
As the butter melts, it foams as the water evaporates.

I went through a phase when I was obsessively recipe testing chocolate chip cookies in Phnom Penh to perfect that American style cookie of soft and gooey on the inside, with crispy edges. This was a pretty happy time for those around me. Being around so many more internationals opened up a whole other world of baked goods, their expectations of them and their tastebuds. I enjoyed the challenge of trying to recreate those baked goods that they were nostalgically craving that I had never tasted before. And then of course selling them.
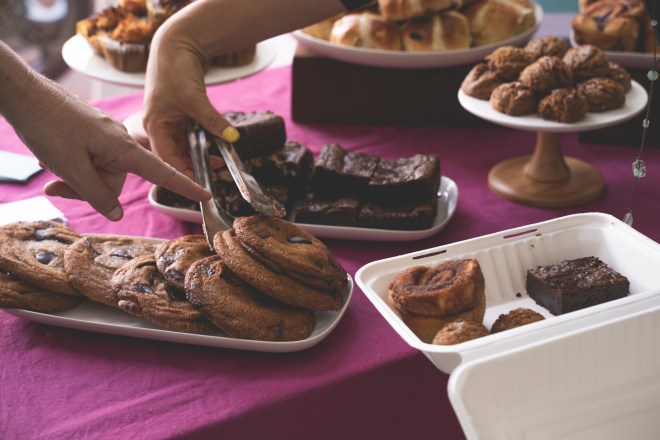
Photo credit to @pipcree who took this photo at one of my final pop-ups in PP.

I learned stuff as I researched which I’ll share with you because that’s what this blog is about:

  • THE MOST IMPORTANT part is to REST the dough so that the baking magic can happen. Firstly, it allows the flour to absorb the fats and the liquids and thus create that puffy, crispy texture. Secondly, the sugars get a chance to chill out and mellow out resulting in richer flavour. In some baking chemistry magic by resting them, they will taste sweet but not overly sugary. It’s a minimum 2 hour wait if you’re impatient, but preferably overnight.
  • I often use a stand mixer to make this but the joy of this recipe is that as all the butter is melted, it is easy to do in a large bowl and a spatula/large mixing spoon.
  • Allow the brown butter to cool down. Sometimes I don’t and it results in a more delicate, tender cookie.
  • Remember with a cookie recipe, you don’t want to cream the butter and sugar together. We just want to mix them sufficiently, not beat air into them.
  • Mix up different types of chocolate to create a more complex chocolate profile, that’s why I use dark and milk chocolate. I read somewhere (I’m sure it was on Serious Eats but I can’t find the link) that if you use one type of chocolate then your taste buds get used to and stop tasting it. However, if you vary different makes or types of chocolate, your tastebuds will continue to taste them.
  • My recipe testing pales in comparison to Serious Eats. I am still learning.
  • Brown butter creates a rich, nutty flavour which I really enjoy.

Why do I call them crack cookies? That’s the nickname that my friend Grace gave them and it caught on. These cookies are really more-ish, sweetly addictive, soft but slightly crispy and satisfyingly not overly sweet. The brown butter gives a slightly nutty flavour, without any nuts, and the two types of chocolate means that each mouthful is a flavour party. I made two batches of these cookies for the soft opening of her store, Ginger and Grace. For some reason, they didn’t make it onto the tables but her friends discovered them later that evening and ate through an entire batch of them. I guess that cemented their reputation as crack cookies.

Now I tell people that these brown butter, chocolate chunk cookies are my best work.

The cookie recipe comes from Ambitious Kitchen. I haven’t made any major changes to it, except I like to weigh everything so obviously here I’ve converted it into grams. There’s a very similar recipe on Joy the Baker. The differences are that Monique browns ALL the butter, uses dark brown sugar, uses two different types of chocolate, adds in a tablespoon of greek yoghurt and doesn’t use nuts. Joy uses light brown sugar but adds in 1 tsp molasses, adds pecans and uses dark chocolate only. I prefer the Ambitious Kitchen version.

Making a double batch of cookies

Ingredients for Brown Butter Chocolate Chunk Cookies very slightly adapted from Ambitious Kitchen

  • 227g butter
  • 100g white granulated sugar
  • 200g dark brown sugar
  • 1 large egg and 1 egg yolk
  • 1 tbsp natural yoghurt or greek yoghurt
  • 2 tsp vanilla extract
  • 280g plain flour
  • 1 tsp bicarbonate of soda
  • 1/2 tsp table salt
  • 140g dark chocolate cut into small chunks, or the chocolate chips, or round discs*
  • 140g milk chocolate cut into small chunks, or the chocolate chips, or round discs

*for prettier looking cookies: if using round discs of chocolate, keep around 21 discs aside to firmly place on the cookies after they have baked. The chocolate will temper as they melt and thus have a nice shine making them prettier to eat.

Method

  1. First brown the butter. Add all the butter to a medium-sized saucepan and place over medium heat. It will start to froth and cackle. That is the water evaporating. Continue and stir the sides and scrape the bottom a few times so that it doesn’t burn. When it is ‘as quiet as a ninja’ (quote from Stella Parks) it is ready. Take it off the heat and either pour the butter in a bowl to cool down, not forgetting to scrape the browned bits from the sides and bottom. Or as I often do, fill up the sink with cold water and carefully place the hot pan in there to cool down.
  2. Add both the sugars into a large mixing bowl and the cooled brown butter and mix for a minute or two until they are combined. I use the paddle beater (K-beater on the Kenwood). Don’t discard the egg white. Store it in the freezer for a cocktail or macaron/meringue baking on a later date.
  3. Now add in the vanilla extract, yoghurt and the large egg and egg yolk and mix again for a minute. It will look and smell like toffee.
  4. In a separate bowl, measure out the flour, bicarbonate of soda and salt and whisk to mix. Then add this to the butter/sugar/egg mixture and mix slowly so that the flour doesn’t fly up.
  5. When it looks like the flour has just about combined then add in the chocolate chunks and mix again.
  6. At this stage, I prefer to measure out into 2 tablespoons of cookie dough (I like to use a medium ice cream scoop) and roll them into balls and place them on a lined baking tray so that the cookie dough can chill out in the fridge for at least 2 hours before baking them. Sometimes, I will cover them and leave them overnight in the fridge to bake the following morning. More often, I will cover them and put them in the freezer overnight and then store the frozen cookie dough balls in a bag.
  7. When you’re ready to bake them, pre-heat the oven to 170°C/350°F/Gas mark 4 and line a baking sheet/tray with baking paper. Space them out so that there are 5 cms between each dough ball as they will spread. Sprinkle the cookies with a bit of table salt. If baking from chilled, bake for 11-13 minutes. If baking from frozen, bake for 14-16 minutes. The dough will spread out and go a golden brown colour. The middle will be gooey so when you take it out, it is important to leave them to cool and harden for 15 minutes on the baking sheet. Otherwise it will split into many pieces and chocolate goo will cover your fingers. That doesn’t sound too bad, does it. Haha.

You’re welcome and enjoy.

My favourite way of portioning out the cookie dough is with a medium sized icecream scoop.
In the absence of a scoop, weighing scales works. Preparing them for their overnight stay in the fridge hotel.

You can vary the flavour and texture. I added 140g dark chocolate and 140g chopped pecans to the cookies at the top of the post. You could substitute the pecans for walnuts or hazelnuts if you like. Play around with it and let me know how you get on.

Cheesecake Brownies

Two baking trays with brownie mixture. The one on the left hand side has salted caramel, the one on the right hand side is cheesecake
Salted caramel and cheesecake brownies side by side

You may have picked up already that I really enjoy playing around with the different flavour combinations in a brownie. When I ran a home baking business, as my side hustle, in Phnom Penh, I’d sometimes put a poll out on social media. What brownie flavour would you like next? Cheesecake was a popular request. Cambodians generally really like cheesecake but I made very few to sell because the ingredients were pricey. Thus when this hybrid worked out, it turned out to be a happy compromise. As I am me, I found ways to play around with more flavours and ingredients. I’ve listed them at the end of the cheesecake ingredients.

cake box with cheesecake brownies inside, a green business card with love, Han-Na
Cheesecake Brownies were a popular order

Last month, I wrote about how I’d picked up a painful thumb injury which I was trying to let heal. It is mostly better now so I made cheesecake brownies and a giant cookie this weekend.

When I posted a picture of this cheesecake version on the post about the infinitely variable fudgy brownies, I said that I’d give you the recipe later as it involves a few more steps. Since then, my brownie recipe and story have featured on TheBrightApp (which is a new social networking site that someone I know is involved in – go check it out). There was a comment that the variations could feature as a different recipe post each time, which is kind. I’m not sure if that will be possible, but here’s the cheesecake brownie version in the meantime.

Ingredients all lined up
Cheesecake Brownie ingredients all lined up ready
All the swirls

I adapted this from Smitten Kitchen’s Cheesecake-Marbled Brownie recipe. I wanted to use my more recent whisking to ribbon stage brownie method, so I took note of the cheesecake ingredients and the marbling instructions but combined it with my chosen brownie method. However, you could use my simpler, no frills or ribbons, brownie recipe too. There are more detailed instructions in the previous posts on how to make brownies in general. I’ve added photos below the recipe to expand on the addition of cheesecake.

Ingredients for Cheesecake Brownies, adapted from Smitten Kitchen

Brownie ingredients

  • 150g unsalted butter, cut into small cubes
  • 150g dark chocolate (at least 60%), broken up, roughly chopped
  • 2 large eggs plus 1 egg white*
  • 200g caster sugar
  • 100g plain flour
  • 20g cocoa powder
  • 1/2 tsp of salt
  • 1 tsp of vanilla extract

Cheesecake ingredients

  • 150g full-fat cream cheese
  • 1 egg yolk from the egg in the brownie ingredients*
  • 50g caster sugar
  • 1tsp vanilla extract, or replace with
  • Optional flavour ideas – zest of an orange, 1 tbsp of dark rum or plum wine.
  1. Preheat the oven to 180°C/355°F/Gas Mark 4. Line a deep tin. For this quantity a 20cm square tin or a rectangular 27×20 or 28×18 will work.
  2. Start preparing the brownie mixture. Melt the chocolate and butter together and just after it has melted, add in the salt, vanilla extract and leave it on the side to cool down. Ways of doing this are on a previous post.
  3. As you keep an eye on the chocolate and butter melting, prepare the cheesecake mixture. Put all the cheesecake ingredients into a small bowl. Save the egg white for the brownie mixture. Mix to combine until smooth. I often use a hand mixer, but you could beat with a spatula. See photos below.
  4. Turn your attention to readying the rest of the brownie mixture. In a stand mixer bowl (if using) otherwise a medium bowl, crack the two eggs and add the saved egg white into the bowl and add the sugar. Use a stand mixer or an electric hand mixer on high speed to start whisking the eggs and sugar until they are at a ribbon stage. Ribbon stage is when the egg and sugar mixture are a pale yellow colour, doubled or even tripled in volume and when you lift the whisk over the mixture, the batter will fall slowly and leave a trail like a ribbon that will hold its shape for a few seconds. It will take about 10 minutes. I still use a timer to make sure I beat them for long enough. Don’t start beating the eggs/sugar until the chocolate/butter has melted because the chocolate/butter mixture needs this time to cool down.
  5. As the eggs and sugar are whisking, measure out the flour and cocoa powder into another bowl. Sieve it if there are lots of lumps in the flour and cocoa. Otherwise, use a whisk to loosen and mix them together.
  6. When the eggs and sugar have reached a ribbon stage, reduce the speed to low and add the melted chocolate and butter mixture to the eggs and sugar. Whisk until it all appears to have mixed together. If you are using an electric hand mixer, you may need to turn off the mixer, add the chocolate/butter and then switch it back on again to avoid a mess. I speak from experience.
  7. Now fold in the flour and cocoa powder using a spatula, or a spoon until it is well combined.
  8. Pour all the mixture into the baking tin. Debs says that if you want to create an even more marbled effect, then reserve some brownie batter to dollop on top of the cheesecake before swirling them together. I’ll let you experiment.
  9. Use a tablespoon to dollop the cheesecake mixture evenly into the brownie mixture. Use the back of the spoon to swirl the brownie and cheesecake together. I like to go up and down vertically and then again horizontally. See photo below.
  10. If you want to add in any texture (such as crushed biscuits) or fruit (such as raspberries or blackberries), do it now and push them into the marbled mixture.
  11. Bake in the oven for 20-25 minutes. They should be firm to touch at the top but still wobble when you shake it. Leave to cool completely in the tin and if you can bear it, cover them and leave them overnight in the fridge. They will be easier to cut and the flavours will have deepened.
ingredients for the cheesecake element
The ingredients for the cheesecake mixture – see step 3
Cheesecake mixture beaten until smooth
Beat the cheesecake mixture until smooth – see step 3
a table spoon dolloping cheesecake mixture into the brownie mix
Cheesecake mixture being dolloped – Step 9
the end of the spoon going up and down to create a swirling effect between the brownies and the cheesecake mixtures
Begin to swirl – step 9
frozen raspberries added to half of the cheesecake brownie before baking
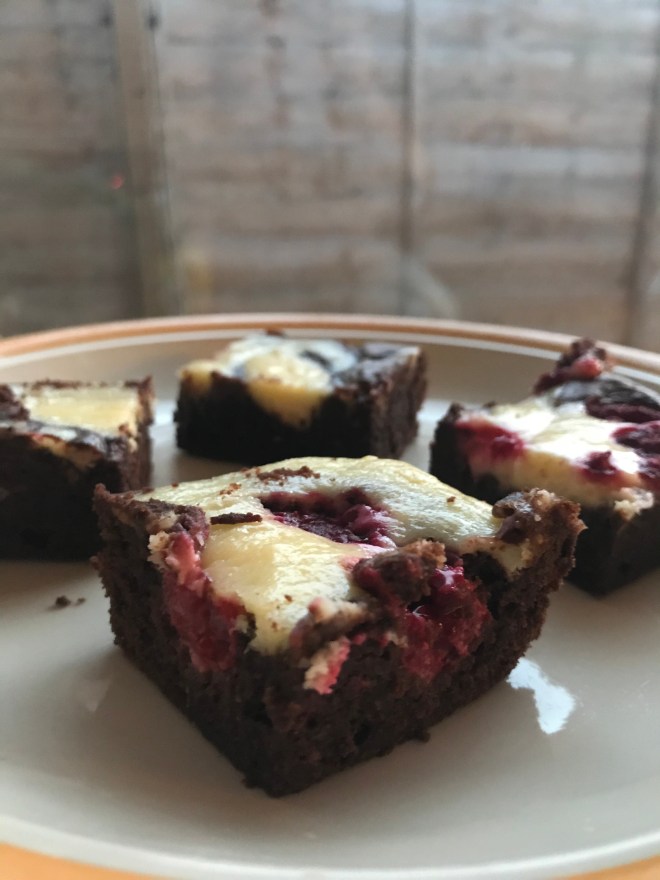
I added some frozen raspberries to half of the tin because I fancied some raspberry cheesecake brownies. I didn’t measure it out, but I’m guessing 45g for half a tin?
4 cut up brownies.  The two nearest are raspberry cheesecake brownies and the two further away are vanilla cheesecake brownies
Tada – two variations from one tin. At the forefront there is raspberry cheesecake brownies and at the back, vanilla cheesecake brownies

My hair is bpoa khiev

My hair is the sea.
Ombré, ombré.
Royal navy,
Turquoise green,
Seaweed brown,
Aquamarine.
 
My hair is a peacock,
Ombré.
An electric blue shock,
Feathers fan out
shimmering golden green 
and speckled black and
yellow eyes dance.
 
My hair is bpoa khiev.
In Khmer, it’s like
An unripe mango, blue.
Yes, blue as a cucumber,
and baby khatna kale.
Like rice paddy fields
in September.

I don’t know what the correct term is, but in Cambodia and I believe certain parts of northern Thailand, there is a difference in how they use the colours blue and green. As the poem references, a lot of vegetables and ‘greenery’ are described as blue. If you’re interested, I’ll write up more about it in another post. I’ve embraced how all encompassing the Khmer blue is in this poem that embraces the ombré, and it was mostly written after a coastal walk in Stonehaven.

Lockdown Hair: #growingoutaPixieCut

When are the hairdressers going to be allowed to reopen? What am I going to do about my hair?

I heard this a lot during the 12 week lockdown earlier this year. It appears that managing our hair growth was something all of us bonded over during lockdown. I think that I’m not alone in wanting to have hairdressers classed as essential services that can continue to stay open if we go into tighter restrictions, or dare I say, another national lockdown.

Perfect hairstyle in a tropical climate

By the way, I don’t normally like to post photos of myself on my blog, but I’ve taken the plunge for this post because I couldn’t see a way out of it. Anyway, this is me in my final few weeks as I’m having one of my goodbye *sob sob* lunches with friends. I think I’d recently had a hair cut.

About 4 years into living in Cambodia, I was finally brave enough to get a pixie cut.

It turned out to be perfect for life in a tropical climate, albeit at that point viewed upon as an unusual hairstyle for a female. In Cambodia, there is a custom of shaving one’s head when there has been a terrible tragedy. Normally you’d see the eldest in the family do this when there had been a death in the family. Thus when some of my Khmer friends saw my pixie cut for the first time, they thought that I had received some awful news and was very upset. Not so. There’s an interesting cross-cultural difference titbit for you.

growing out a pixie cut

I was still pretty attached to my pixie cut after I left Cambodia. It was one of the ways I could hold onto a remnant of me in Cambodia. Nonetheless, come May 2020, I asked on Instagram:

‘This is annoying. Maybe it’s time to cut my fringe myself or shall I endure growing it out?’

Most replied: grow it out.

Then in June 2020, I wrote a little ode to my pixie cut, which I’ve revised a little here.

Dear Pixie Cut,

Dear Pixie Cut,
It’s been a long time since we saw a hairdresser.
Now you tuft out at the back,
You get in my face when we run,
We can’t decide what to do about the fringe,
And you tuck beautifully behind my ears.

Is it time for us to part, move on and let you grow out?

Can I hold onto you for one last cut?

Finally it's a bob

In July, I was finally able to book an appointment with the hairdresser. I wrote a haiku.

4 months in lockdown.
#Growingoutapixiecut
Turned into a bob.

Yes, I decided the time had come to say goodbye. And honestly, I was alright with it. Time, eh. There’s no substitute for it being a healer.

By the way, are hashtags in poems allowed? Are they a thing?

Dear Mosquito

I am a mosquito magnet.

From my first week in Cambodia until the end, they were all over me. I used to joke that people around me didn’t need to worry about putting on mosquito repellant because the mosquitoes would feast on me first.

My bites would swell up so much that in my first month I was on anti-histamines to try to convince my body not to get so excited about them. People kept telling me that it would get better after 6 weeks. The mosquitoes would stop making a bee line for me. Nope. It took many years of constantly being bitten before my body decided that a small bump was a sufficient reaction. Then when I got dengue, I decided that I’d had enough of living with mosquitoes. But that is a story for another time.

Other mosquito poems have been published on this blog, testifying to my special relationship with them. Haha.

However, the time date on the holiday photos tell me that it was 18 months into my time in Cambodia, on holiday in Kep, that I started writing this – my original mosquito poem – and Mosquito, a haiku. I tested it out on the group at breakfast. They laughed a lot. We laughed a lot and then I slapped my arm because I’d just been bitten! I’ve tried finishing this poem a few times since but it just didn’t seem to work. This week, wanting to spend an evening, not marking student work, I finally got it out, pulled together the various versions, got some feedback on it from some of the members of the original audience. Et voilà.

Dear Mosquito

Dear Mosquito,
Regarding the note you left last night,
Notes, in fact.
Which I found
indelibly written in red.
Presumably to underline your point,
as a mark of your love.

Inflamed with lust,
Laced with a wee dram of poison,
As if to say, if I can’t have you
then no-one will.

It’s just that,
And, I don’t want to hurt your feelings,
I mean no disrespect.
But wouldn’t you agree that we appear to be quite unsuited to each other?
I don’t react well to you.
My defences go into overdrive.

Besides you’re not the first suitor
of your ilk, who has been pursuing me.

Let me explain.
Was it your great, great, great aunt
who chanced upon me?  Hmmmmmm…
Untouched, uninitiated in this
mating ritual.
A slap here, a sting there.

Did word somehow get out that I was
Prime and ready,
Sweet and easy pickings?

One after another,
persisting with their whining salutations
and affectionate greetings.
Arousing me after each visit.
You’d each leave.
Drunk on my blood.
I thought, this is my destiny.

We played tennis together.
It was electric.
You won, love/40.

I’ve clapped my hands for you.
Waited up in the wee hours of the morning to find you.
I’ve rubbed on lotions,
anointed myself with oil to
repel you.

Mosquito, explain.
What is it that you find so irresistible about me?
My bare skin?
My blood type?
My sweet scent?

Well, you leave me no choice
But to say that I have grown tired of your voice.
Wised up to your morning kisses.
The suffocating silences.
The nightly visitations.
Your methods of seduction
don’t beguile me any more.

Mosquito. 
No more.
I’m through.

Some of you have queried what I mean by playing tennis with a mosquito. Here is an example of an electric bat/racket to slay mosquitoes.

I still burn onions

Many, many years ago, before I moved out to Cambodia, when cooking was a still a delight, I half-jokingly set myself a target.  When I could master not burning onions and garlic whilst cooking, I would apply for the TV show Masterchef.

Well, I still burn onions.  A couple of weeks ago, I cooked Bon Appetit’s mushroom carbonara for my mum.  It was my third time making this recipe.  When I asked her what she thought of it, she, ever truthful, asked me, “Was it burnt?”  I related this story to some friends last night and they were taken aback.  “How can you still be burning onions?”  And not only them.  My Cambodian friends couldn’t understand how I could cook onions and garlic to an acrid black.  To them it was elementary: it’s about heat control.  Clearly I’m still a novice at it.  In my 6 years in Cambodia, I may have learned how to pound Cambodian curry pastes, bake the softest Texan cinnamon rolls, work with pastry at 32°c but I still burn onions.

When I recently moved back to the UK from Cambodia, there was only one thing really that I wanted to do.  That was to learn how to cook again.

I write recent but I moved back mid October and now its mid March, so it’s been 5 months.  Still, it feels recent to me.  Committing to living back in the UK again has been hard.  It’s not because I don’t like being in the UK: I’ve written about how I welcomed its bracing winds when I’ve escaped hot season in Cambodia and how I missed my family.  Rather, it’s because I thoroughly loved living my life in ‘the Penh’, as we, expats, affectionately nicknamed Phnom Penh.  I miss my friends, my apartment, my teaching job, my baking business, my running group, my CrossFit gym…  Notice how I preface them all with ‘my’.  I owned it.  They were pieces of a bigger jigsaw that was ME in Cambodia.  Now in the midst of transition, walking on this unsteady bridge of one life left and the other yet to start, I miss the security of it.  However, I’ve gone off on a tangent and I won’t write about why I left just yet.  I’d rather share with you the reason why I’m back blogging again.

So back to burning onions and the only thing I really wanted to do when I came back was to learn to cook again.  A friend of mine, Caralyn, suggested that I start writing on my blog again.  I had been rewatching BBC’s Sherlock and in that first episode, John Watson is encouraged by his therapist to write a blog.  She promises that it will help.  I read elsewhere that it can indeed help for reflecting and thinking about what happened, and what lies ahead.  So the plan is that I’ll tell you about bits of life and recipes that I didn’t have time to share with you when I lived in Cambodia.  Because, as it turns out, teaching full-time, volunteering at a local Cambodian church and running a little baking business on the side clocks a lot of hours!  As I do so, I’m hoping that this exercise in remembering will help me to record snapshots of life in Cambodia, but also the transition to being back in the UK.   Besides, I know I enjoy this kind of writing – posts about food and poetry about everyday life, like mosquitoes!

Evidence of my burnt mushroom carbonara dinner offering

The second time I made the mushroom carbonara, I scrambled the eggs. I didn’t burn the mushrooms but I forgot to add the onions.


A Broken Violin


This happened today
Bernardo needs putting back
Together. Erm, glue?

I had seen a small separation between the fingerboard and the neck the other week. I wondered whether the humidity was playing havoc with it. So I had an inkling that my violin would break this morning. But still, when the fingerboard separated from the neck in my hands, my heart sank. Bless him, my friend Pov said, “Glue it back together, no problem.” 

Yes, hopefully. But that will done by a specialist. Bernardo needs some TLC. 

The Mosquito Bites

The Mosquito Bites 

If you join the dots,

There’s an equilateral triangle mapped out on my chest.

My skin, a canvas to the mosquitoes,

Like the night sky, and they are gods.


You made me think

that I had measles or shingles, all for a moment.

Then I found the final

Dot.  The Southern Cross.  On my chin.

(not really) Pumpkin risotto

IMG_8837

I have a confession to make.

When I first arrived, I couldn’t afford to buy arborio rice here.  So, in that first year, I didn’t make any risotto, one of my customary meals back in the UK.  Thereafter I got so desperate for the comfort of cooking and eating risotto, I managed to convince myself that it didn’t matter if I used jasmine or ginger flower rice (a Cambodian medium grain rice) instead of arborio, carnaroli or any different type of risotto rice.  I’ve merrily been making and feeding this pumpkin ‘risotto’ to many of my friends, using whatever rice I had at hand.  Believe me, there were no complaints.  Spicy, and gloriously ochre with the sweetness of fresh coriander.  Who would turn down this dish?IMG_8847

However, a few months ago it all changed.  My friend Robert gave me some of his delicious bacon, mushroom and spinach risotto (which I need to try cooking myself!) made with arborio rice.   And the realisation of the error of my ways overwhelmed me.  It just ain’t a risotto without risotto rice! How had I duped myself into thinking that this chewier, creamier textured rice could be replaceable?

IMG_8519

So, yes.  You can make this not-really-risotto, pumpkin risotto (what am I supposed to call it now?) with any grain of rice that you have.  But don’t call it risotto.

It’s really simple to make.  I make it a lot as pumpkins are pretty much available all year round in Cambodia, but not always strictly as a risotto.  I really appreciate the fact that here you can buy however much of the pumpkin that you’re planning on cooking with: you just ask the market seller to cut off however much you need.  In contrast, I don’t think that I would have made this in the UK because I didn’t really buy pumpkins.  I didn’t really know what to do with a whole big pumpkin and I didn’t shop in those places that sold different varieties of smaller ones.

I adapted the original recipe to add in a bit more spice, with extra cumin, chilli and coriander.  Lastly, there’s the grown-up version with the added white wine.

IMG_8733

Recipe for Pumpkin Risotto, adapted from BBC Good Food

Ingredients

  • 400g pumpkin, seedless and peeled
  • 2 tbsp vegetable oil
  • 5 garlic cloves (but garlic isn’t as strong here, so perhaps 2 if your garlic is strong)
  • 1 onion
  • 200g risotto rice
  • 2 tsp ground cumin
  • 1 litre of hot vegetable/chicken stock
  • 125-250ml (or more) dry white wine
  • 25g cold butter
  • 50g parmesan cheese, grated (for vegetarians, choose an alternative or omit altogether)
  • generous bunch of coriander, roughly chopped up
  • spring onion, chopped up (optional)
  • 2 red chilli peppers
  • salt and pepper
  • optional lime wedges to serve

Method

  1. Preheat the oven to 180C/gas mark 4/Cut the pumpkin into fairly even 1inch/2.5cm cubes.  As you can see from the photo, I don’t worry too much about being precise.  Coat it with 1tbsp of vegetable oil and season with salt and pepper.  Bake in the oven for about 30 mins.
  2. Meanwhile get started on the risotto.  Crush the garlic and chop up the onion.   If using spring onions, then finely chop up the whites of the spring onions, reserving the green part as a garnish for later.
  3. Heat the rest of the oil on a gentle heat in a medium sized pan and fry the onions, garlic and spring onion until the onions are soft.
  4. Now add the cumin and rice, being careful not to let it catch on the bottom of the pan.  Stir so that every grain of rice is coated in the spice.
  5. Add the wine and let it deglaze the pan, by stirring it around the bottom of the pan.
  6. Next, adding the stock about a ladleful at a time is the accepted wisdom but I’m pretty imprecise about this.  I think that add however much you need so that it just covers the rice and the rice won’t burn at the bottom of the pan.  Stir and stir until the stock has disappeared this helps release the starch from the rice).  Then add in a bit more stock.   *As you’re doing this, multi-task with step 7.*  Continue until the rice is cooked but still has a wee bit of bite – this is al dente.  Add another generous ladleful of stock, this helps to create a sauce,  and the butter.   Cover with the lid to help the butter melt.
  7. Check on the pumpkin and remove from the oven once they’ve been baked.  Grate the cheese, roughly chop up the coriander, finely slice the chilli peppers and the greens of the spring onions (if using).
  8. Once the rice has been cooked, add the pumpkin, cheese, coriander, spring onions and the chilli peppers. And stir through to mix well.  If you’d like a bit of zest, sprinkle some lime juice on top.  Et voila – enjoy.

The verdict?  A satisfying meat-free meal, which my friends, khmer and western, enjoy eating.  I especially like this paired with kimchi.

IMG_7555