I still have leftover chocolate from an Easter egg and for some unfathomable reason to anyone else, I don’t really eat them.
I wrote that sentence last May and one year on, I find myself in the same position. I looked for this draft blog post in the hope that past self had written down the rocky road recipe that was made last year with that leftover Easter egg chocolate, as current self would like to make the same. But alas, it was not to be! Current self has searched her notes, Evernote, Instagram posts and draft blog posts to no avail. She is annoyed with past self, “why, oh why did she not write it down?”
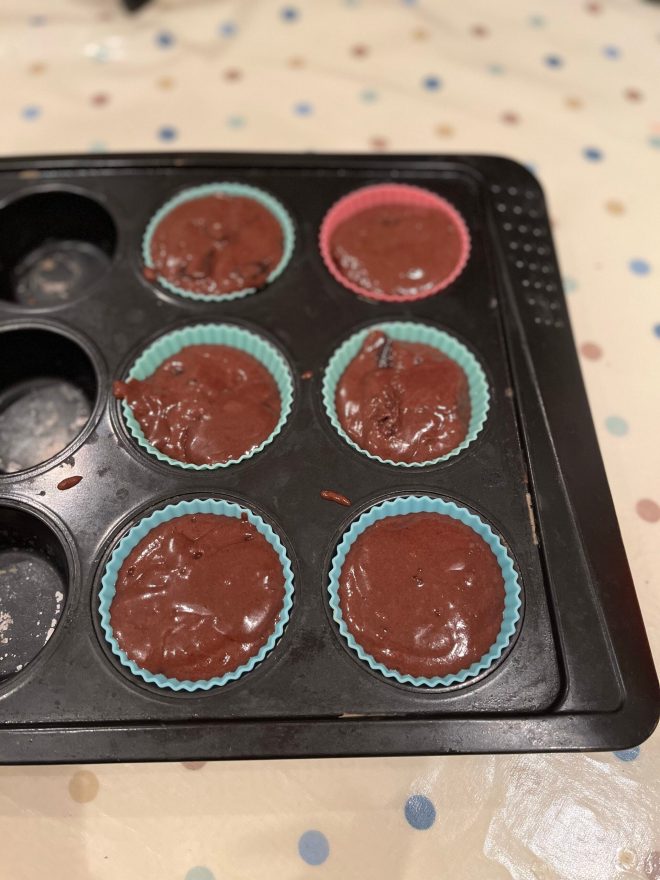
So, déjà vu and I’m back searching the internet for rocky road recipes. This year, I can report back that rocky road recipes are, on the whole, all pretty similar. Generally, they all contain about 200-250g of biscuit*, 100-150g butter (not margarine!), 3-6 tablespoons of golden syrup, 200-300g milk and dark chocolate and 80-200g of a mixture of marshmallow/dried fruits/nuts/other goodness. My main sticking point with a traditional rocky road is the marshmallows. I’m not a marshmallow fan and I think they can make it overly sweet. So, dear reader, the question I pose to you is – is it rocky road without the marshmallow?
*I just prefer using malted milk biscuits to the digestive biscuits that are traditionally used. They just make it taste better, in my opinion. I can’t explain it more than that.
Ingredients for my rocky road but remember it is flexible
Ingredients
150g butter
150g milk chocolate
150g dark chocolate
2 tbsp date molasses
2 tbsp golden syrup
200g malted milk biscuits
50g pretzels or cereal or other type of biscuit (I used a choco hoops)
150g mix of sultanas, dried cranberries, dried apricots, pecans or walnuts.
Method
Step 2.Step 3.Step 4.
Line a baking tin with baking paper or a reusable silicone baking liner. The tin should be deep(ish) and about 20x20cm or 27×20cm or 28×18cm.
In a medium to large saucepan, measure out the butter, milk chocolate and dark chocolate, date molasses and golden syrup. Melt them over a medium heat and stir to combine it all together. Take it off the heat.
As the chocolate slowly melts, roughly crush the biscuits, pretzels/cereal and nuts (if using) in a medium sized bowl. I use the back of a rolling pin for this. Then add in the dried fruit. Next, carefully pour the dry ingredients into the melted chocolatey, buttery goodness and mix so that the chocolate covers everything!
Put in the fridge for at least 2 hours to set. Cut it into 16-20 portions and enjoy.
The verdict?
I think that it is still rocky road without marshmallows. Naturally, I prefer them like this. However, I’d actually go one step further than saying ‘I prefer it’, because obviously a non-lover of marshmallows would say that, and declare that they are more-ish because they aren’t overwhelmingly sweet due to the absence of marshmallows.
As I write this post, there is another Easter egg cookie recipe that is currently trending on the socials. The Domino’s (yup famous for their pizzas) cookie stuffed with a Creme egg. Although I normally find Creme eggs too sweet, the cookies looked like they might be fun to bake. However, before I jumped on the bandwagon, a friend, who had made them recently for her kids, reported back that they were overwhelmingly sweet. So instead, I’ve decided to make these mini egg cookies. I’ve been thinking about making them for the past three years at Easter, but was side tracked by baking hot cross buns. As a quick aside, I’ve now baked five batches this year trying to perfect Ravneet Gill’s recipe.
I wanted to make a recipe that’s simple, not overwhelmingly sweet and delicious. One that would please children and that you could make with them. Therefore I played around with my trusted cookie recipes on the blog to create this one. And as I realised how expensive a small bag of mini eggs can be, I decided this recipe had to one that could be made with one small 80-90g bag. You can, of course, use Cadbury’s mini eggs, or, like me, choose a cheaper supermarket alternative. Additionally, I wanted each of the cookies to have a whole mini egg in them. In the five times that I’ve tested this recipe, I’ve counted out between 15-17 mini eggs and set them aside, thinking that I’d get that many cookies out of the dough mixture. What a surprise then, when the medium cookie scoop kept going and presented me with more (normally 16-18)! So, what is one to do? My compromise was to leave some without, but of course you could lightly smash the eggs in half.
This is where the boob cookie nickname came in. I took them into work one day in a container which had them stacked in two columns. As I looked at them, each cookie containing one mini egg, I realised that they just looked like boobs. If ever, you’re doing some baking to raise awareness of breast cancer, then please bake these! If there are no mini eggs around, then perhaps you could substitute them with Smarties or M&M’s?
Bake and share these please for a breast cancer awareness
Anyway, back to creating this recipe and feel free to skip this paragraph if you don’t want to know the details. For example, in the process of making this recipe, while I was choosing between my basic chocolate cookie recipe and my brown butter one, I consulted Ravneet Gill’s The Pastry Chef. As I calculated the ratio of flour to butter, I found that the basic chocolate cookie and Ravneet Gill’s recipes have an identical flour to butter ratio of 1.78… That must be significant, right? But could someone explain to me why? So I chose to begin with the basic chocolate cookie recipe as my base. Then, as it’s been a bit cold for butter to soften in our kitchen, I decided to melt half of the butter and why not make it into brown butter while I was at it? So, of course I did because brown butter makes everything better, in my mind.
Brown butter with the delicious brown bits
I’ve included two videos on browning butter below as I know that if this is a new thing, it can be off-putting. And I don’t want you to be put off because, remember, I set out for this recipe to be simple. I’ve always done this on a stove top, never in the microwave, so I don’t know if you can. All you are doing is evaporating the water off the butter and as the milk solids brown, it magically releases a nutty flavour. Its French name alludes to this. Beurre noisette, literally translates as hazelnut butter. You will find that I repeat a summary of this in step 1 of the method. First, you melt the butter in a saucepan on a medium heat. The butter will begin to cackle and froth as it melts (listen to Video 1). As the water continues to evaporate, it will make a gentler frothing sound (listen to Video 2). Use a spatula to stir and scrape the bottom so that it doesn’t burn. It is ready, when it is “silent as a ninja” (I quote Stella Parks) (also in Video 2). Then take it off the heat and let it cool. There are two ways really to do this. Option one is to carefully place the pan in some cold water taking care not to splash any water into the pan. This is what I do to save on washing up. Option two is the more orthodox method of pouring the butter into a heat proof bowl, taking care to scrape all the brown bits into the bowl and letting it cool.
Video 1. At the beginning, the butter will cackle and froth as the water begins to evaporateVideo 2. It then makes a gentler frothing sound. It is done when it is “silent as a ninja”.
A quick word on equipment. My happy discovery whilst making this recipe is that I can use a pestle and mortar to smash the chocolate and mini eggs. It’s much easier and less messy. The mini eggs don’t roll away as you’re trying to cut them. If you don’t have a pestle and mortar, you could place them in a bowl (that won’t break) and smash them gently with the end of a wooden rolling pin. I’m going to keep on using this. I’m also using my latest kitchen equipment purchase – Vollrath’s #30 cookie scoop, as I’ve chosen to make them medium sized. Each one weighs between 40g-43g. I share this with you because I searched the internet to find something good to replace my previous OXO #40 cookie scoop after it died. It appears that OXO UK don’t offer the #40 cookie scoop anymore, but the larger one instead. Finally, I’ve made them in a stand mixer but you could easily make them using a hand mixer or by beating the mixture by hand.
Smashing mini eggs with the pestle and mortarCookie dough scooped, side by side and ready to go in for their rest
Recipe for Smashing mini egg cookies with brown butter
140g butter, 70g cubed and 70g to melt into brown butter
110g white sugar – granulated or caster
120g soft dark brown sugar
1/4 tsp bicarbonate of soda
1 egg
1/2 tsp vanilla extract
230g plain flour
1/4 tsp salt
160g total of chocolate
I used a 80g bag of mini eggs – pick out 15-17 whole and lightly crush the rest – and 80g of 70% dark chocolate roughly chopped. Alternatively, you could use 80g of dark chocolate chips.
Method
First make the brown butter. Melt 70g butter in a small saucepan on a medium heat. It will froth and cackle as the water evaporates. This is normal. Scrape round the sides and the bottom of the pan so that it doesn’t burn. When it is silent, then it is ready. Take the saucepan off the heat and leave to cool slightly.
Meanwhile in a medium sized bowl, measure out both the sugars, the remainder of the butter and bicarbonate of soda and then pour in the brown butter. Remember to scrape all the brown bits into it too. Then mix it together until they’ve all combined.
Next, add the egg and vanilla extract and mix to combine.
In a small bowl, combine the flour, salt, crushed mini egg bits and the dark chocolate chunks. Add this to the butter/sugar/egg mixture and mix on slow so that the flour doesn’t all fly up.
Next the cookie dough needs a rest for at least 12 hours in the fridge/freezer. Get a medium sized baking tray and line it with baking paper/silicone baking mat. I like to use a medium sized cookie/ice cream scoop for this next bit to measure out and shape the cookies. If you don’t have a cookie scoop then measure out a golf ball sized ball of cookie dough and roll it into a ball. Place the balls side by side on the baking tray. Once you’ve done that, take the whole mini eggs that you’d reserved and firmly push one into each ball.
I like to cover them with an empty, used cereal packet that is large enough for the baking tray to go into, and then carefully place the tray in the fridge or freezer so that the cookie dough balls rest overnight. This is important for creating chewy cookies so don’t hurry this step! The magic happens here the sugar in the dough hydrates and allows it to caramelise when baked. If I freeze them, the next day I empty the frozen balls into the cereal packet to store.
When you come to bake them, preheat the oven to 160°C/320°F/Gas mark 3. Line a baking tray with baking paper and place the cookie balls on the tray, spacing them out by 2-3 cm as the cookie will spread out. Sprinkle the balls lightly with salt and then bake in the middle of the oven for 14 minutes if they’ve been in the fridge, 16 minutes if they’ve been in the freezer until they are puffed up and golden. I turn the baking tray round halfway because of hot spots in my oven. Allow them to cool for 5-10 minutes, in which time they will deflate and be crispy on the outside and still gooey inside. The 5-10 minutes cooling wait time before eating is also so that you don’t burn the roof of your mouth. I speak from experience. Enjoy.
The verdict? They are smashing! The sprinkling of salt and addition of dark rather than milk chocolate keeps them from being overly sweet. I have tested and tweaked this recipe 5 times before I hit publish. I’ve given them away at work, aerial, and to whoever walks in the door, young and old. The general consensus is that they are delicious, which is good as I’ve still got a stash in the freezer.
My scooped cookie dough going on a baking tray in a cereal liner about to go in for an overnight rest
It is not usual that you eat a dish on a plane and find it so tasty that it inspires you to make a version of it at home. However, that is exactly what happened on the Singapore Airlines flight involving a chicken pasta bake. It wasn’t the dish that we would have chosen, but it was the only option that was left. Wasn’t that fortuitous?
It also paired wonderfully with their red wine on offer, which was glorious. I’m telling you, this was an unexpectedly wonderful food memory.
Step 1 – the no cook pasta method
After 30 minutes of hydration
Step 1 – the no cook pasta method
When I tried recreating the dish at home, I used a mish mash of two recipes – this turkey bolognese recipe from Delicious and a chicken pasta bake from BBC Good Food. The timing of it chimed with my housemate’s training for the London Marathon and it turns out that it’s a great dish for carb loading or nourishing athletes. The day after the first time I made it, the kids commented again on how yummy it was. Noteworthy praise, indeed.
The second time, I wanted to try out something I’d seen on Instagram. A pasta bake without cooking the pasta first. This was partly as a cost-saving activity and because pasta can become too soft in a pasta bake at times, which had happened in my first attempt at this dish. I was a little bit apprehensive about it. I’d read that if you soak the dry pasta in cold water first, then it will hydrate the pasta but stop it from going overly soft when baked in the oven. Oh, ladies and gentlemen, I’m delighted to tell you that it worked!
You can prepare this a day or two beforehand. Make it until step 5, then cover it and pop it in the fridge until you want to bake it.
Step 2 and 3Step 4 – Bubble, bubble, simmer, simmer
Both times, I ended up using turkey, rather than chicken, mince. This was purely down to what was available at the shops at the time. My recommendation would be not to go for the lean version as turkey/chicken mince tends to be quite lean in comparison to red meat. This dish benefits from the extra juice from the non-lean mince. And if someone doesn’t like noticing that they are eating the vegetables, then I’d suggest once the vegetables have been cooked until soft (step 2), whizzing it down with a food blender until all evidence is mush.
I made an extra little one as an extra dinner as my housemate’s was carb loading pre-marathon
Recipe for Turkey or Chicken Pasta bake, inspired by Singapore Airlines. This will feed 6 people (2 of whom may have been small children with healthy appetites).
Ingredients
300g penne pasta
1-2 tbsp oil (olive or vegetable)
1 onion, finely chopped
2 celery sticks, chopped
2 carrots, chopped
3 garlic cloves, roughly chopped
500g turkey or chicken mince
2 x 400g tinned chopped tomatoes
1 tbsp tomato puree
1 tbsp dried oregano
1/2 tsp of each – dried rosemary, thyme, basil
1 tsp sugar
salt and pepper to season
150g mascarpone
small handful of fresh flatleaf parsley, finely chopped
grated cheddar cheese – enough to cover the dish
Method
In a large-medium sized bowl, submerge the uncooked penne pasta in cold water and let it soak while you cook the sauce.
Heat 1-2tbsp of oil in a deep frying pan or wok. Over a medium heat, fry the onions, celery and carrots for about 10 minutes until softened.
Add the garlic and the mince and cook for 5 minutes until browned.
Stir in the tomato puree and dried herbs, then add the tinned tomatoes, and sugar. Bring it to a boil and then turn it down to a simmer for 10-15 minutes. Then season with salt and pepper. Finally, stir in the mascarpone and the fresh parsley. If choosing to make this on the day, then preheat the oven now (see step 6).
Drain the pasta, which should have softened and changed colour slightly by then. Mix the penne pasta into the sauce. Pour it into a large ovenproof dish. Sprinkle over the grated cheese in an even layer.
Preheat the oven to 180°C / 350°F/ Gas Mark 6. Bake in the oven for 20 minutes until it bubbles. I normally serve it with some more vegetables and an optional glass of red wine.
Enjoy and thank you Singapore Airlines for feeding and inspiring me.
Playing around with portrait mode on my phone for this photo
For a blog titled Courgettes and Limes, I’d realised that there is a dearth of recipes using courgettes or limes. So, I started writing this post in the middle of courgette season in the UK, but have only gotten round to finishing it now when the season is pretty much over. Short story – I was working abroad, got ill and then went on holiday.
This is an easy courgette pasta recipe that I love to make because it is versatile and quick. Over the 10 years that I’ve been making it, there have been so many variations. I’ve listed a few of them at the bottom of the post. I like it because it is tasty and fresh from the herbs and lemon/lime juice, easily counts as one of your portions of vegetables per day and is naturally vegetarian and vegan. Over the summer, I experimented with it once more, substituting extra virgin oil with sesame seed oil, which added a rich nuttiness to the dish. Oh my – for me, it was a game changer.
One tip that I learned recently is for a dish like this is that to prevent burning the garlic when cooking, do not chop the garlic too finely, or crush it.
Simple herby courgette pasta for one. If you want to feed more people, then double, triple, quadruple… the ingredients list and allow a bit more time for cooking.
Ingredients
enough dried pasta for you (anything between 60-90g according to the internet) – fusilli, linguine, spaghetti, are some that I’ve used that work well
1 tbsp of vegetable oil
1 medium sized courgette – any colour (or half a large courgette)
1 garlic clove
1 red chilli or chilli flakes – as much or as little as you like
A large handful of a variety of fresh herbs (parsley, coriander, dill, mint)
1 spring onion (optional)
1 tbsp of sesame seed oil to garnish
1 tbsp of sesame seeds or pine nuts or flaked almonds (toasted)
salt and pepper
a squeeze of lemon/lime juice
Method
Before you boil the pasta, use the pan to toast the nuts or seeds. Put the nuts or seeds into the pan, heat them up on a medium heat until they turn a brown colour. Tada, they’re toasted. They will also smell glorious. Take out of the pan and set aside to cool.
While they’re toasting, prep the vegetables. Finely slice the courgette, roughly chop the garlic, deseed and finely slice the chilli (if using).
Boil water in the kettle to cook the pasta, and then add the pasta into the pan used to toast the nuts/seeds. Add the boiling water and salt to the pasta and cook according to the instructions on the packet. If you don’t have a kettle, bring enough water to cook the pasta to boil in a pan. Add salt and pasta and then cook.
In a medium sized frying pan, add a tablespoon of vegetable oil and a pinch of salt, fry the courgettes and garlic until the courgettes are translucent and browned.
While the courgettes cook, roughly chop the herbs that you’re using and finely slice the spring onion.
Once the pasta has cooked, reserve half a cup of the starchy pasta water, then drain it and add the pasta to the courgettes (I guess if you quadrupled the recipe, you might want to add the courgettes to the drained pasta).
Add as much or as little of the pasta water to loosen it, then mix in the herbs, spring onion, 1 tablespoon of sesame seed oil, the toasted nuts/seeds and a squeeze of lemon or lime juice. Season with salt and black pepper.
Enjoy!
Mise en place I really do chop my garlic roughly and it has kept them from cooking so quickly – leading to less charringReady for the sesame seed oil, juice and the nutsA selection of herbs
Variations
Use extra virgin olive oil instead of sesame seed oil for a more Mediterranean flavour.
Use a mint and basil herb combo.
Add a finely sliced shallot in with the courgettes
If I only have one herb at hand – I like to use parsley or coriander
Other nuts and seeds that I’ve used: hazelnuts, pumpkin seeds, sunflower seeds, mixed seed mix.
Instead of salt at the end, season with finely grated parmesan or grana padano, or even a strong cheddar.
The final recipe test for vegan double chocolate chip muffins
I decided to lean into vegan baking last month, it being Veganuary. I came across a recipe book at the library, The Naughtiest Vegan Cakes in Town by Mellissa Morgan, of Ms Cupcake (a London vegan bakery which sadly closed 2 years ago). First off, this is a fantastic recipe book if you are new to vegan baking. She includes a Quick Start guide with explanation on ingredients, which is useful if, like me, you’ve felt overwhelmed by them, and a guide to baking without eggs and dairy. There is an additional section on substitutions (e.g. if you want to go gluten-free and refined sugar free) and trouble shooting common vegan baking problems. However, as the best way to review a book is to test out the recipes, I duly borrowed the book and tried out the Victoria sponge cake, which turned out very well. Then when my vegan colleague mentioned that she craved muffins, I set out to make them.
Now, there is no double chocolate chip muffin recipe in the book. Therefore, I adapted her mint chocolate chip cupcakes. The first iteration were incredibly good. The texture and the flavour were spot on. I made the first batch with soya milk and another with almond milk. They both worked and the type of plant based milk didn’t make enough of a difference. However, I calculated the amount of sugar in each muffin and at the original 200g in the recipe (which makes 12) that was just over a tablespoon of sugar per muffin. That’s without the additional sugar from the chocolate chips/chunks. A little high perhaps? Thus began a series of experiments to reduce the amount the sugar in the recipe. I detailed it in a little table for you.
Amount of sugar in the recipe
Sugar per muffin (approx) without the addition of chocolate
Texture/Flavour
Additional flavouring
200g
16.67 (just over a tablespoon)
incredibly good
1.5 tsp instant coffee
180g
15g (1 tbsp)
incredibly good
1.5 tsp instant coffee
150g
12.5 (2.5tsp)
still yummy
2 tsp vanilla extract and 1 tsp instant coffee
120g
10g (2 tsp)
denser texture, slightly too bitter
1 tbsp vanilla extract
Results of sugar reductions in double chocolate muffins
I took it as low as 120g, which then changed the texture of the muffin so that it becomes denser, slightly stodgy and began to taste a bit soapy and bitter. The chocolate chunks in the muffin masked that unpleasantness. However, let’s be frank. When you bite into a double chocolate muffin, you want it to taste good, not healthy.
The bottom row made with 120g sugar have a distinctly different texture
Left has 1tbsp of sugar and the texture is airier and lighter. The muffin on the right has 2 tsp of sugar and has a closer, denser texture.
So, in the recipe below, I’m going to suggest that you could add anything between 150-180g of sugar. Consult the table above to decide how much sugar you’d like and how to adapt the additional flavourings. I think coffee always complements and enhances chocolate. The vanilla extract brings out sweetness without adding any sugar.
In the end, as I was testing out many variations of this recipe, I decided that I’d halve the recipe each time. That is one of the joys of this particular recipe. It’s pretty simple to scale up or down.
By the way, I like making this in a large measuring jug. It is easier for pouring the mixture into the muffin cases at the end, but a medium sized bowl also works. I alternated between using a whisk and a metal spoon/spatula to mix, but I prefer the whisk for the quantity below.
Top tips: mix until it has just combined and bake them immediately.
Step 1 and 2. Preparing the vegan buttermilk and the dry ingredients
Step 3. Added in the oil and the coffee powder
Step 4. Mix it up quickly – but don’t over mix
Fill the muffin cases and then tap to release the air bubbles
Ingredients for Double Chocolate Chip Muffins, adapted from Mellissa Morgan. It will make 12 muffins.
200ml unsweetened plant based milk – I tend to use soya milk
20ml cider/rice vinegar or lemon juice
150-180g caster sugar (my favourite is 180g*)
170g self raising flour (or 170g of plain flour and 2tsp of baking powder and omit the 1/4tsp of baking powder that follows)
30g cocoa powder
1/4 tsp baking powder (omit this if you’re using plain flour + 2tsp of baking powder)
1/4 tsp bicarbonate of soda
1/4 tsp salt
150g 70%+ dark chocolate roughly chopped up, alternatively use dark chocolate chips (check to see that they are dairy free)
80g vegetable oil
1 tsp instant coffee granules/powder*
2tsp of vanilla extract*
*When using 180g of sugar, add 1 tsp of instant coffee but no vanilla extract. Unless you really want to.
Method
Mix the soya milk and the vinegar together and set aside for 10 minutes. This makes a soya buttermilk. Then add 1tsp of instant coffee so that it has a chance to dissolve. Preheat the oven to 180°C/350°F/Gas mark 4 and line your muffin tray with muffin cases.
In a large measuring jug or a medium sized bowl, measure out the dry ingredients, that is the self raising flour, caster sugar, cocoa powder, baking powder, bicarb of soda, salt and the roughly chopped dark chocolate. Whisk it together so that they are all combined thoroughly.
Add the vegetable oil and the vanilla extract (if using) to the curdled soya milk mixture and whisk to combine. Then add this to the dry mixture and mix quickly until just combined. It’s important not to work quickly and not over mix it. If there are a few lumps, that is okay. If it is lumpy, on the other hand, I’d continue mixing it for a few more seconds.
Tap the jug onto the surface. This stops the raising agents from working too quickly. Then pour or measure out the batter evenly into each of the muffin cases. Tap the muffin tray hard on the work surface to pop the bubbles, then bake in the middle of the oven for 20 minutes. They’re ready when a skewer comes out without cake crumbs but may have a little bit of melted chocolate hanging onto it. Let them cool in the muffin tray for 5-10 minutes before taking them out to cool completely. They will store in an airtight container for 5 days, maybe more..? Honestly, they haven’t made it any further than that in my house.
The verdict? Incredibly good. The texture is airy and light, and the chocolate chunks in the muffin are so satisfying. I always think that almost every chocolate baked good will taste better the next day. So, make them at night and have one for breakfast the next day. 😉
On the note of vegan chocolate. I’ve observed a greater selection of vegan chocolate, which is great. However, they are often much pricier. A lot of dark chocolate, 64%+, is dairy free. I will always check the list of ingredients on the packet before using. I prefer to chop it up roughly and then add it. I haven’t ever checked to see if dark chocolate chips are dairy-free. If you do, then please let me know in the comments.
One Christmas back in 2010, my friend Andrew introduced me to a cranberry mincemeat recipe using very fresh ingredients that is quick to make and can be used on the same day. There is no suet or butter, nor gentle cooking or baking of the ingredients so the trade off is that it will not last as long as more traditional mincemeat recipes. It was a game changer for me in two ways. Firstly, I loved how the lime zestiness and cranberry tartness cut through what can be the overly rich sweetness of mincemeat. Quite a few people, who object to the richness of traditional mincemeat, like this one. Secondly was the fact that it could be made last minute and used immediately. At that point, I don’t think it registered with me that it was also vegan.
I realised that I hadn’t noted down exact quantities when I went to make it the following year and the internet helped me to find a Delia variation of it. Then I moved to Cambodia, where I couldn’t get cranberries so I created another version of it using local dried fruit. However, when I discovered frozen cranberries in Thai Huot, I happily reverted back to using what had now become my own version of Andrew’s original recipe. When I returned to the UK, I took a 2 year hiatus from making this to try out Delia’s more traditional versions because suet was available. However, this year, when my Christmas holiday plans got derailed by the Omicron variant and I suddenly had a week at home, I decided to cheer myself up and make mince pies with this last-minute mincemeat.
This recipe will make about 650-750g of mincemeat. I sterilised a 500g beetroot jar and 330g jam jar to store them in. When I want to bake a lot of mince pies, I double this recipe and prepare more space in the fridge.
Ingredients for Cranberry Mincemeat, adapted from Andrew.
225g fresh or frozen cranberries
1 large green apple – preferably Granny Smiths or Bramley, but any tart apple will do
100g currants – can be substituted with raisins
100g sultanas
100g mixed peel
zest and juice of 1 lime
half a fresh nutmeg, grated
65g dark brown sugar
Method – also in the photos below.
Cut the cranberries in half and put into a medium sized bowl*. If they are very large cranberries, then cut into thirds or quarters. If they are very small cranberries, then you can leave them whole. Very small cranberries are difficult to cut and are more commonly found, in my experience, in the frozen packets.
Add in the currants, sultanas, mixed peel, the zest and juice of 1 lime.
Grate the apple with the skin on, into the bowl. Then add in the sugar and grate in half a fresh nutmeg. Give it a good mix to combine it all and use straight away.
Top Tip: I halve cranberries this way because I think it’s slightly faster. Lay one hand down firmly on the cranberries so that they don’t move. With your other hand, use a sharp knife parallel to your palm and carefully cut the cranberries horizontally. I haven’t got a video of this – but if you search for how to halve cherry tomatoes, you should be able to see it.
From experience, you can store this in sterilised jars or tupperware for up to 4-6 weeks in the fridge. Sterilise jars by washing them and putting them in an oven (140°C and above) until they are dry. This normally takes less than 10 minutes.
As well as the usual mince pies (bottom photo), I’m planning to use it to make a stollen babka wreath using a challah dough that was far too chilled out to rise over the weekend, and now finally is ready to be used.
1. Cut the cranberries in half2. Add in the dried fruit3. Grate in apple, the zest and juice of a lime, sugar and grate in half a fresh nutmeg. Give it all a good mix.The first of this year’s mince pies
Tonight as I was wondering which recipe to share with you (it was between apple crumble and poached eggs), I remembered that I’d been baking a lot of cookies recently and posting photos of them on Instagram. It’s time, isn’t it. The time has finally come to share my crack cookie recipe that I’ve been promising for a while.
Top tip: Keeping cookie dough balls in the freezer are an investment in your future self’s happiness.
There are variations of that sentence around the internet and social media. That’s my paraphrase above. It is one of the reasons why I love making these cookies. This recipe will make enough so that you can store some away (like squirrels do with their nuts in preparation for winter) for a moment when you really want to eat a cookie, or bake something but have no energy for it. That was me two nights ago. I arrived home from work physically and emotionally exhausted, wanting to be fed and then to sit down with a home baked biscuit to watch episode 2 of the Great British Bake Off – Biscuit week. Fortunately I live with a family who will let me do all those things and I had frozen cookie dough balls stashed away in the freezer.
As the butter melts, it foams as the water evaporates.
I went through a phase when I was obsessively recipe testing chocolate chip cookies in Phnom Penh to perfect that American style cookie of soft and gooey on the inside, with crispy edges. This was a pretty happy time for those around me. Being around so many more internationals opened up a whole other world of baked goods, their expectations of them and their tastebuds. I enjoyed the challenge of trying to recreate those baked goods that they were nostalgically craving that I had never tasted before. And then of course selling them.
Photo credit to @pipcree who took this photo at one of my final pop-ups in PP.
I learned stuff as I researched which I’ll share with you because that’s what this blog is about:
THE MOST IMPORTANT part is to REST the dough so that the baking magic can happen. Firstly, it allows the flour to absorb the fats and the liquids and thus create that puffy, crispy texture. Secondly, the sugars get a chance to chill out and mellow out resulting in richer flavour. In some baking chemistry magic by resting them, they will taste sweet but not overly sugary. It’s a minimum 2 hour wait if you’re impatient, but preferably overnight.
I often use a stand mixer to make this but the joy of this recipe is that as all the butter is melted, it is easy to do in a large bowl and a spatula/large mixing spoon.
Allow the brown butter to cool down. Sometimes I don’t and it results in a more delicate, tender cookie.
Remember with a cookie recipe, you don’t want to cream the butter and sugar together. We just want to mix them sufficiently, not beat air into them.
Mix up different types of chocolate to create a more complex chocolate profile, that’s why I use dark and milk chocolate. I read somewhere (I’m sure it was on Serious Eats but I can’t find the link) that if you use one type of chocolate then your taste buds get used to and stop tasting it. However, if you vary different makes or types of chocolate, your tastebuds will continue to taste them.
My recipe testing pales in comparison to Serious Eats. I am still learning.
Brown butter creates a rich, nutty flavour which I really enjoy.
Why do I call them crack cookies? That’s the nickname that my friend Grace gave them and it caught on. These cookies are really more-ish, sweetly addictive, soft but slightly crispy and satisfyingly not overly sweet. The brown butter gives a slightly nutty flavour, without any nuts, and the two types of chocolate means that each mouthful is a flavour party. I made two batches of these cookies for the soft opening of her store, Ginger and Grace. For some reason, they didn’t make it onto the tables but her friends discovered them later that evening and ate through an entire batch of them. I guess that cemented their reputation as crack cookies.
Now I tell people that these brown butter, chocolate chunk cookies are my best work.
The cookie recipe comes from Ambitious Kitchen. I haven’t made any major changes to it, except I like to weigh everything so obviously here I’ve converted it into grams. There’s a very similar recipe on Joy the Baker. The differences are that Monique browns ALL the butter, uses dark brown sugar, uses two different types of chocolate, adds in a tablespoon of greek yoghurt and doesn’t use nuts. Joy uses light brown sugar but adds in 1 tsp molasses, adds pecans and uses dark chocolate only. I prefer the Ambitious Kitchen version.
Making a double batch of cookies
Ingredients for Brown Butter Chocolate Chunk Cookies very slightly adapted from Ambitious Kitchen
227g butter
100g white granulated sugar
200g dark brown sugar
1 large egg and 1 egg yolk
1 tbsp natural yoghurt or greek yoghurt
2 tsp vanilla extract
280g plain flour
1 tsp bicarbonate of soda
1/2 tsp table salt
140g dark chocolate cut into small chunks, or the chocolate chips, or round discs*
140g milk chocolate cut into small chunks, or the chocolate chips, or round discs
*for prettier looking cookies: if using round discs of chocolate, keep around 21 discs aside to firmly place on the cookies after they have baked. The chocolate will temper as they melt and thus have a nice shine making them prettier to eat.
Method
First brown the butter. Add all the butter to a medium-sized saucepan and place over medium heat. It will start to froth and cackle. That is the water evaporating. Continue and stir the sides and scrape the bottom a few times so that it doesn’t burn. When it is ‘as quiet as a ninja’ (quote from Stella Parks) it is ready. Take it off the heat and either pour the butter in a bowl to cool down, not forgetting to scrape the browned bits from the sides and bottom. Or as I often do, fill up the sink with cold water and carefully place the hot pan in there to cool down.
Add both the sugars into a large mixing bowl and the cooled brown butter and mix for a minute or two until they are combined. I use the paddle beater (K-beater on the Kenwood). Don’t discard the egg white. Store it in the freezer for a cocktail or macaron/meringue baking on a later date.
Now add in the vanilla extract, yoghurt and the large egg and egg yolk and mix again for a minute. It will look and smell like toffee.
In a separate bowl, measure out the flour, bicarbonate of soda and salt and whisk to mix. Then add this to the butter/sugar/egg mixture and mix slowly so that the flour doesn’t fly up.
When it looks like the flour has just about combined then add in the chocolate chunks and mix again.
At this stage, I prefer to measure out into 2 tablespoons of cookie dough (I like to use a medium ice cream scoop) and roll them into balls and place them on a lined baking tray so that the cookie dough can chill out in the fridge for at least 2 hours before baking them. Sometimes, I will cover them and leave them overnight in the fridge to bake the following morning. More often, I will cover them and put them in the freezer overnight and then store the frozen cookie dough balls in a bag.
When you’re ready to bake them, pre-heat the oven to 170°C/350°F/Gas mark 4 and line a baking sheet/tray with baking paper. Space them out so that there are 5 cms between each dough ball as they will spread. Sprinkle the cookies with a bit of table salt. If baking from chilled, bake for 11-13 minutes. If baking from frozen, bake for 14-16 minutes. The dough will spread out and go a golden brown colour. The middle will be gooey so when you take it out, it is important to leave them to cool and harden for 15 minutes on the baking sheet. Otherwise it will split into many pieces and chocolate goo will cover your fingers. That doesn’t sound too bad, does it. Haha.
You’re welcome and enjoy.
My favourite way of portioning out the cookie dough is with a medium sized icecream scoop.In the absence of a scoop, weighing scales works. Preparing them for their overnight stay in the fridge hotel.
You can vary the flavour and texture. I added 140g dark chocolate and 140g chopped pecans to the cookies at the top of the post. You could substitute the pecans for walnuts or hazelnuts if you like. Play around with it and let me know how you get on.
Salted caramel and cheesecake brownies side by side
You may have picked up already that I really enjoy playing around with the different flavour combinations in a brownie. When I ran a home baking business, as my side hustle, in Phnom Penh, I’d sometimes put a poll out on social media. What brownie flavour would you like next? Cheesecake was a popular request. Cambodians generally really like cheesecake but I made very few to sell because the ingredients were pricey. Thus when this hybrid worked out, it turned out to be a happy compromise. As I am me, I found ways to play around with more flavours and ingredients. I’ve listed them at the end of the cheesecake ingredients.
Cheesecake Brownies were a popular order
Last month, I wrote about how I’d picked up a painful thumb injury which I was trying to let heal. It is mostly better now so I made cheesecake brownies and a giant cookie this weekend.
When I posted a picture of this cheesecake version on the post about the infinitely variable fudgy brownies, I said that I’d give you the recipe later as it involves a few more steps. Since then, my brownie recipe and story have featured on TheBrightApp (which is a new social networking site that someone I know is involved in – go check it out). There was a comment that the variations could feature as a different recipe post each time, which is kind. I’m not sure if that will be possible, but here’s the cheesecake brownie version in the meantime.
Cheesecake Brownie ingredients all lined up readyAll the swirls
I adapted this from Smitten Kitchen’s Cheesecake-Marbled Brownie recipe. I wanted to use my more recent whisking to ribbon stage brownie method, so I took note of the cheesecake ingredients and the marbling instructions but combined it with my chosen brownie method. However, you could use my simpler, no frills or ribbons, brownie recipe too. There are more detailed instructions in the previous posts on how to make brownies in general. I’ve added photos below the recipe to expand on the addition of cheesecake.
Ingredients for Cheesecake Brownies, adapted from Smitten Kitchen
Brownie ingredients
150g unsalted butter, cut into small cubes
150g dark chocolate (at least 60%), broken up, roughly chopped
2 large eggs plus 1 egg white*
200g caster sugar
100g plain flour
20g cocoa powder
1/2 tsp of salt
1 tsp of vanilla extract
Cheesecake ingredients
150g full-fat cream cheese
1 egg yolk from the egg in the brownie ingredients*
50g caster sugar
1tsp vanilla extract, or replace with
Optional flavour ideas – zest of an orange, 1 tbsp of dark rum or plum wine.
Preheat the oven to 180°C/355°F/Gas Mark 4. Line a deep tin. For this quantity a 20cm square tin or a rectangular 27×20 or 28×18 will work.
Start preparing the brownie mixture. Melt the chocolate and butter together and just after it has melted, add in the salt, vanilla extract and leave it on the side to cool down. Ways of doing this are on a previous post.
As you keep an eye on the chocolate and butter melting, prepare the cheesecake mixture. Put all the cheesecake ingredients into a small bowl. Save the egg white for the brownie mixture. Mix to combine until smooth. I often use a hand mixer, but you could beat with a spatula. See photos below.
Turn your attention to readying the rest of the brownie mixture. In a stand mixer bowl (if using) otherwise a medium bowl, crack the two eggs and add the saved egg white into the bowl and add the sugar. Use a stand mixer or an electric hand mixer on high speed to start whisking the eggs and sugar until they are at a ribbon stage. Ribbon stage is when the egg and sugar mixture are a pale yellow colour, doubled or even tripled in volume and when you lift the whisk over the mixture, the batter will fall slowly and leave a trail like a ribbon that will hold its shape for a few seconds. It will take about 10 minutes. I still use a timer to make sure I beat them for long enough. Don’t start beating the eggs/sugar until the chocolate/butter has melted because the chocolate/butter mixture needs this time to cool down.
As the eggs and sugar are whisking, measure out the flour and cocoa powder into another bowl. Sieve it if there are lots of lumps in the flour and cocoa. Otherwise, use a whisk to loosen and mix them together.
When the eggs and sugar have reached a ribbon stage, reduce the speed to low and add the melted chocolate and butter mixture to the eggs and sugar. Whisk until it all appears to have mixed together. If you are using an electric hand mixer, you may need to turn off the mixer, add the chocolate/butter and then switch it back on again to avoid a mess. I speak from experience.
Now fold in the flour and cocoa powder using a spatula, or a spoon until it is well combined.
Pour all the mixture into the baking tin. Debs says that if you want to create an even more marbled effect, then reserve some brownie batter to dollop on top of the cheesecake before swirling them together. I’ll let you experiment.
Use a tablespoon to dollop the cheesecake mixture evenly into the brownie mixture. Use the back of the spoon to swirl the brownie and cheesecake together. I like to go up and down vertically and then again horizontally. See photo below.
If you want to add in any texture (such as crushed biscuits) or fruit (such as raspberries or blackberries), do it now and push them into the marbled mixture.
Bake in the oven for 20-25 minutes. They should be firm to touch at the top but still wobble when you shake it. Leave to cool completely in the tin and if you can bear it, cover them and leave them overnight in the fridge. They will be easier to cut and the flavours will have deepened.
The ingredients for the cheesecake mixture – see step 3Beat the cheesecake mixture until smooth – see step 3Cheesecake mixture being dolloped – Step 9Begin to swirl – step 9
I added some frozen raspberries to half of the tin because I fancied some raspberry cheesecake brownies. I didn’t measure it out, but I’m guessing 45g for half a tin?Tada – two variations from one tin. At the forefront there is raspberry cheesecake brownies and at the back, vanilla cheesecake brownies
Rarely will I just make something up and immediately conclude that it is amazing. Those who know me will testify to how I critique what I make, and recipes go through several iterations before I am happy with them. As I write, I’ve suddenly realised that this recipe also had several predecessors as a cookie re-enacted as a blondie. Wow – I had dismissed that because I hadn’t been trying to tweak that recipe. Nonetheless, this blondie came about with happy accidental happenstance.
Basically, a couple of Mondays ago, I decided that I wanted to bake brownies or blondies. On the Tuesday I ate a rich peanut brownie from Chocnroll, which satisfied my craving for brownies and so I turned my mind to blondies. When Wednesday evening happened, I had finished disseminating the findings of the first round of testing we had done on a major project I’m working on at work, written a lot of action points and very much needing to bake as therapy. Does anybody else do this? I know that I’m not alone in this.
I mentioned before that I have been working on another – yet unfinished – blondie recipe and I set out to make that. However this time, I added in another egg for extra hoped for fudginess, so that it mimicked my fudgy brownie recipe. As I browned some butter, I realised that I had no pecans nor white chocolate. So the substitutions began and a new blondie was birthed.
Once roasted, rub the hazelnut skins off with a tea towel – Step 2
I’ve since seen on the internet other recipes that call their version of a hazelnut and chocolate blondie a gianduja one. I’ve since thought about grinding up hazelnuts to make a chocolate hazelnut butter that I add in as a layer in the middle or on top. Then in consultations with friends, I decided that this added layer of complication takes away from the simple joy of baking blondies. Admittedly the browning of the butter may be a step too far for some, but it is so essential for the flavour! I promise you that it will be worth learning a new technique that you can use over and over again.
Ribbon stage – Step 4
Ingredients for Brown Butter, Hazelnut and Chocolate Blondies
200g butter which I then browned
200g dark brown sugar
3 eggs
1/2 tsp salt
200g plain flour
100g hazelnuts
150g chocolate. I used 100g of milk and 50g dark chocolate.
Method
Preheat the oven to 350F/180C or 170C fan.
Roast the hazelnuts first for 10 mins using the baking tin for the blondies, until the skins come off them. Use a dry tea towel to rub the skins off the hazelnuts, then chop just over half of them. Don’t miss out this step.
Brown the butter: melt the butter in a medium saucepan on a medium heat and it will start to froth and cackle. That is the water evaporating. Continue and stir the sides and scrape the bottom a few times so that it doesn’t burn. When it is ‘as quiet as a ninja’ (quote from Stella Parks) it is ready. Take it off the heat and either pour the butter in a bowl to cool down, not forgetting to scrape the browned bits from the sides and bottom. Or as I often do, fill up the sink with cold water and carefully place the hot pan in there to cool down.
Now whisk the eggs and sugar together until it is at a ribbon stage. I used a stand mixer on a medium setting (3 on a Kenwood) for about 8 mins. I have instructions on whisking to a ribbon stage in my fudgy brownie recipe
As the eggs and sugar are whisking, line the tin. I used a 20cm square tin.
Now on the lowest setting, continue whisking but pour in the butter and add the salt. Whisk again on a medium setting until combined. I’m always amazed by the reaction and how it goes to almost like a buttercream consistency.
Fold in the flour, chopped hazelnuts and chopped chocolate.
Pour half the mixture into the tin, sprinkle over the unchopped hazelnuts and pour the rest of the mixture into the tin.
Bake in the middle of the oven for 17-20 mins until cooked on top. If it looks a bit jiggly, that is ok. It’ll harden up as it cools.
Allow to cool completely. I like to leave mine overnight. And then cut into 12-16 pieces.
Hazelnuts added as a middle layer – Step 8The baked brown butter, hazelnut and chocolate blondies
And the verdict? Suitably more-ish, dense and fudgy. Surprisingly not overly sweet with the milk chocolate because of the dark chocolate. Lastly, it is always worth roasting the hazelnuts because it improves the texture and flavour.
I wanted to make hot cross buns. Every year, for the past 9 years, I have made my version of Paul Hollywood’s Hot Cross Buns. However, mixed citrus peel hadn’t been available in the Asda online shop for almost a month and we had, actually still have, a surplus of green apples in the house. So I decided to think of it as an opportunity to try out a new hot cross bun recipe without mixed peel but using green apples and a new method. One that I’ve been hearing about and seeing on my social media feeds for a while: the tangzhong method.
I’ve been really intrigued by this method, which originated in Japan and was popularised by Taiwanese cookbook author Yvonne Chen, and how it helps to create a soft fluffy texture that lasts longer than a couple of days. This is useful for something like this as this recipe makes between 17-18 buns. I don’t think anyone or any family could consume them all in one day. I researched a few other posts and found these really useful by way of introduction to using it:
The chemistry of it is quite precise. When flour is cooked with a hot liquid, it can absorb more water. You mix it together and cook it until a roux or slurry forms (pictures below), which is when the temperature of the slurry reaches 65°C/149°F. It pre-gelatinises the the starches in the flour meaning that it can absorb more liquid more, thus creating a dough that has a higher percentage of water.
Mix the flour and liquidHeat until a thick slurry forms
To make a tangzhong, it suggests that you use 5-10% of your flour. Thus in the recipe below 560g x 0.05 = 28g
1 part flour to 5 parts cold liquid. e.g. 28g flour to 140g liquid.
Whisk to combine until no lumps remain.
Heat, whilst stirring, until a roux/slurry forms to 65°C/149°F
Allow it to cool before adding to the dough
As it holds a higher percentage of water, the hydration level is important too. When you’re not a natural mathematician, like me, then you may spend a fair chunk of time adding the wet ingredients out loud and dividing it by the flour in order to figure out the hydration ratio. King Arthur Baking says that you’re looking for a hydration ratio of 75%. When I calculated it for this recipe, the result was 67%. Hmmm… my next question was whether eggs add hydration to a dough. The internet answer is yes. I learnt that eggs are 75% water. Therefore, an unshelled UK large egg weighs about 60g, so 60g x 0.75 = 45g. This recipe uses 2 eggs, thus adding 90g of water to the recipe. When I did the maths again, with the addition of the water from the eggs:
(375+90)/560 = 0.83 = 83% hydration level.
Does it matter that the hydration is far above 75% and is 83%? By this stage I’m hoping not and just wanting to get on to baking the hot cross buns. On a related tangent, in my research I also learned that the weight of a large egg differs depending on the country. A large egg is bigger in the UK than the US or Australia. Did you know that? I did not.
I’ve heavily adapted this recipe from Not Quite Nigella’s Apple and Cinnamon hot cross buns, who is an Australian food blogger. Do you remember that in my previous blog post, I highlighted that US cup measures differ from Australian ones? This was a useful titbit of information to remember whilst converting her recipe into grams. I decided to add raisins because I wasn’t ready to move on from not having dried fruit in my hot cross bun. Sultanas or currants would work too. The first time, I added in 100g and I felt like they could do with more. If you don’t like dried fruit then you could omit them completely.
I adapted her method too by simplifying some of the steps and adding in an extra rise. I almost forgot to add in the salt the first time I made the recipe. I realised just as the dough was finishing proving a second time (I’d decided to prove the dough three times) and so I sprinkled it in hoping that it would be absorbed. Sadly not. I had a mouthful of salt in the first hot cross bun that I ate. Thus, I decided to add the salt in at the beginning when I made these a second time. I don’t think that it made a noticeable difference but it improved the flavour of the bun, as one didn’t randomly get a mouthful of salt, and there’s less chance of forgetting the salt at a later step. I also added all the wet ingredients and the butter into the roux and whisked it together before adding it all into the flour. I gave the dough three rises, rather than two, so that the dough would be less sticky and easier to work with when shaping them. One rise before adding the fruit, another afterwards and one more time after I shaped them into buns.
1 medium sized, tart, green apple, chopped (I used a Granny Smith). I don’t peel it. I rather like the look of the bright green skin in the buns
200g raisins
Ingredients for the crosses
40g plain flour (about 3 tbsp)
4-5tbsp of water
Ingredients for the sticky glaze
2tbsp water
2tbsp of granulated sugar
Method
1. In a big bowl (I use the standmixer bowl), measure out the bread flour. Then, take 2 level tbsp of the flour and put it into a small saucepan to make the tangzhong. If you want to be more precise than this, then measure out 28g of flour. Next add the water to the saucepan.
2. Use a whisk to mix the flour and the water together for the roux. Heat on a low-medium heat until the roux reaches 65°C/149°F. If you don’t have a thermometer handy then on a low-medium heat, this will take between 1.5-2 mins. Leave to cool while measuring out the dry ingredients. I’ve used both a whisk and a spatula for this. The whisk works much better to mix the water and flour together. (See the photos above for the consistency of the slurry.)
3. Add the yeast, salt and cinnamon to the bowl that has the bread flour. Mix it together with the dough hook. *If kneading by hand, rub in the butter to the flour at this stage. It will make the kneading of the dough much easier.
4. To the tangzhong, whisk in the butter, milk, honey, vanilla extract and eggs. The butter won’t melt and that is okay. It will be incorporated into the dough in the kneading process.
Don’t be perturbed the unmelted butter cubes. They will be kneaded in.Knead until you get a very elastic dough
5. Use the dough hook to mix the liquid and the flour together so that it roughly combines. Then knead until it is soft and very elastic. At a medium setting (3 on a Kenwood), I let it knead for 7 minutes. Keep an eye on your stand mixer so that it doesn’t walk off the counter. I have let that happen before – a big ooopsadaisy!
6. Then cover and leave to rise until doubled in size for about 45mins – 1 hour. In the meantime, chop up the green apple and weigh out the raisins. Add them into the dough after the first rise. I just add them into the bowl with the dough and use the dough hook to knead it again so that it combines. By doing so, it knocks back the air in the dough and as it rises a second time, will create a more even crumb. Shape into a ball, place in an oiled bowl and cover to rise again until doubled in size, about 45 mins – 1 hour.
7. Whilst the yeast is doing its magic, this is a good time to decide how many buns you’d like. I wanted 18 but did I tell you already that maths isn’t my strongest point? I ended up with 17. If you’re my brother-in-law, this fact may make you laugh. I want the buns to bake evenly, so I will weigh out the dough then divide by the number of buns that I want.
8. Once the dough has doubled in size, lightly flour the surface and turn the dough out of the bowl. Strengthen the dough by shaping into a vague rectangle. Take hold of a longer side, fold one third towards the centre and press down with your thumbs or the heel of your hand. Fold the other third towards the centre and press down. Finally fold it in half lengthways, press down and roll it out a bit with your hands into a long sausage shape. The dough should feel stronger.
9. Divide the dough into the number of buns. If you want 15, then divide it into 3 equal parts, then into 5. If you want 18… well I think that you should tell me what I should do .
10. Lightly flour the surface in order to roll each piece a smooth ball. To roll the buns, turn the sides into the middle, then turn over so that the seam side is on the bottom. Make your hand into a claw shape and roll the ball inside your claw and move your hands quickly in circles. Arrange the buns on a baking tray lined with baking paper, leaving just enough space so that buns touch when they expand. Lightly cover with oiled clingfilm or a damp tea towel. Leave to rise for a 45mins to an hour.
11. Preheat the oven to 200°C and make the paste for the crosses. Measure out the flour. Add in the water, 1 tablespoon at a time, until it forms a smooth, thick paste. It needs to be pipe-able, not too thin so that it disappears when it bakes and not too thick that it’s impossible to pipe. Put the paste into a piping bag.
12. Once the buns have risen, pipe crosses onto the buns, by piping a line along each row of buns and then repeat in the other direction. The crosses want to hug the sides of the buns.
13. Bake on the middle shelf of the oven for 10 mins and then lower the temperature to 180°C. Bake for another 15-20 minutes, until golden brown. My oven has hot spots, so I turn the tray around after the first 20 mins.
14. Measure out the sugar and water into a small saucepan and melt the sugar over a gentle heat. Brush the sugar syrup over the warm buns and leave them to cool.
15. Gently break apart the sticky buns and enjoy.
Verdict? They are fast becoming a favourite and I was surprised that I didn’t miss the citrus flavour of my usual hot cross buns. 3 teaspoons of cinnamon may seem like a lot, but it disperses in this amount of flour producing a flavoured but not heavily spiced bun. If you wanted to experiment and adapt the spicing then please comment below and share.
3 days later, and they are still soft and springy.