Oh so yummy, festive, orange, cranberry and chocolate bread

oh so yummy, festive orange, cranberry and chocolate bread

Merry (belated) Christmas everyone!

It’s funny the foods that you crave.  I keep surprising myself with what my tastebuds hanker after.  My latest three cravings are mature cheddar cheese and milk chocolate digestives.  Those two cravings kicked in a year after I moved and as I didn’t buy or eat a lot of cheese in the UK, can you see why I surprised myself?!

My friend Hannah came to spend Christmas in Cambodia this year.  I asked whether she’d like to bring out a selection of cheeses out with her so that we could have a cheese and wine evening.  And she did!  She had an unexpected 24 hour delay in Doha, and amazingly the cheese survived!  I don’t think that I’ve ever relished the flavours of each of those cheeses, as much as I did that evening!  Thank you, Hannah.

A selection of beautiful english cheeses, trying to disguise themselves as pac men. Thank you Hannah!
A selection of beautiful english cheeses, trying to disguise themselves as pac men.  The camembert is baking in the oven. Thank you Hannah!
Hannah and Esther waiting patiently for me to take this photo and finding it very funny!

I said three, right.  Well, there’s this bread…

I’m pretty sure that Sainsburys does an AMAZING chocolate, cranberry and orange bread at Christmas time.  I’ve eaten it pretty much every year since discovering it.  Except last year.  Last year, was my first Christmas in Cambodia and I couldn’t find any cranberries, frozen, fresh or dried in the whole of Phnom Penh.  Not that I could search very far and wide because of my poorly left knee.

orange, cranberry, chocolate bread

I’ve been thinking about this eating this bread for a couple of months now.  So in November, I bought a bag of dried cranberries whilst I was in Australia to bake it as my festive loaf.

dark chocolate chunks dried cranberries

I couldn’t find a recipe for this bread online.  So, I modified Richard Bertinet’s cranberry and pecan bread recipe from Dough to recreate one of Sainsbury’s festive bread creations.  I loved it.  Hannah loved it.  (She’d never heard of or eaten it before – WHAT?!?!? and she lives in the UK!)  It smells intoxicating and the flavours balance and complement each other perfectly.  We were happy to eat it, just as it was.  No spread, it doesn’t need one.  If you want to, you could try eating it with cheese, like we did.   Surprisingly it works.

Three things:

  1. Make sure that you use chocolate chunks and not chocolate chips.  Chocolate chunks are bigger and taste more satisfying than chocolate chips.
  2. Make it a white loaf.  It’s meant to be a festive treat.  Don’t spoil it by adding more fiber to it.
  3. The chocolate makes it a messy bread to cut and eat.   That could be because it’s just a wee bit warmer in Cambodia than the UK at this time of year… But I dare you to resist eating it when it’s fresh out of the oven!

Finally, finally (and this isn’t late!).  Hope that you have a wonderful New Year’s Day celebration and wishing you all the best for 2015.

orange zest

orange, cranberry and chocolate dough

Ingredients for my oh so yummy, festive Orange, Cranberry and Chocolate Bread.

  • 500g strong white flour
  • 7g fast action yeast
  • 10g salt
  • 350g water – you can do 350ml but weighing it is always more accurate I think.
  • zest of 1 orange
  • 100g dark chocolate cut roughly into chunks
  • 100g dried cranberries

Method

1. Put the dark chocolate, cranberries and orange zest in a small bowl and give it a good mix.  I discovered that the orange zest actually starts plumping up the cranberries while you’re making the dough – cool!

2. In another medium sized bowl, weigh out the flour, add in the yeast and give it a quick stir to mix it into the flour.  By mixing the yeast with flour first, I don’t worry about the salt touching the yeast and thus deactivating the yeast.

3. Now add in the salt, give it a stir.  Then add in the water.   Use a dough scraper, or your hands to combine the water and flour together as much as possible before turning the mixture out onto your work surface.  It is quite a wet dough to begin with, so don’t worry.

4.  Knead until the dough is springy and smooth.  This probably takes about 10 minutes but it depends on what method you use and how wet the dough was to begin with.  I use Richard Bertinet’s slap and fold method.

5.  Now transfer the orange zest, cranberries and chocolate into the medium sized bowl you used for the dough mixture.  Then, lay the dough on top and spread it out so that it envelops the entire surface.  What you’re going to attempt to do next is wrap the dough around the chocolate and the cranberries and mix it so that you can combine them with the dough.  Doing it this way in the bowl makes it a much neater, efficient process, than if you were to do it on a work surface.

6. Once the chocolate and cranberries are combined with the dough, turn it out from the bowl briefly.  Add a little bit (about a tablespoon) of vegetable oil to the bowl to prevent the dough from stick to it as the dough rises.  Cover with cling film or a wet tea towel and leave it rise.  I leave mine to rise in the fridge for a couple of hours so that the flavours have longer to mature.  You could leave it at this stage, in the fridge, for a couple of hours to 2 days.

7.  Prepare a baking tray by lining it with baking paper, or covering it with a layer of semolina so that it doesn’t stick to the tray.  Once the dough has doubled in size, turn it out onto your work surface.  Push your fingers firmly into the dough to leave dents.  This is a much gentler way of knocking the air out.  While you’re doing that try to shape it roughly into a rectangle.

8. Next, strengthen the dough.  Mentally divide the dough into three sections.  Take a third of the dough to the centre and push it down firmly in the middle with the heel of your hand.  Then take the other third of the dough to the centre and push it down firmly with the heel of your hand.  Finally fold the mixture in half and again push it down firmly with the heel of your hand.

9.  This next bit is up to you.  I cut my dough into two halves and shaped one into a circle and the other into a square-ish loaf.  You can shape it into one or as many loaves as you wish.    Cover with damp tea towel or oiled cling film.  Let them rest until they have doubled in size again.  In the meantime, preheat the oven to 250°C/480°F/Gas Mark 9.

10.  When the dough is ready, cut deep, clean incisions in it to help create shape and release gas.  I made a hash (#) sign on one loaf and cut three slices on the other.  I then sprayed the tops of them with water to create a bit of steam as they bake.  (My new electric oven doesn’t like it when you spray the inside of the oven with water.)

11. Whack them in the oven.  After 10 minutes turn the oven down to 220°C/425°F/Gas Mark 7 and bake for 40-50 minutes.  Check that the bread is ready – it should sound hollow when you tap it’s bottom.  If not, set the timer for another 5 minutes and check again.  Let them rest for at least 5 minutes before you enjoy and devour it.

orange, cranberry, chocolate bread


Lemon Polenta Cake and the Last Time that I will…

cake for breakfast
Continuing the tradition of cake for breakfast

Each time, someone comes to visit me from the UK, I ask them to bring me over some lemons.  At 75 cents each here, they’re a much dearer ingredient than their equally delicious greener counterpart, the lime.  This time, I think that my sister brought me over a kilo of them; a much better suited present than the kilo of homegrown beetroot she once left in my fridge.  So now, I have a treasure trove of lots of lemony lemons living in the bottom of my fridge.

lemons, lemons
And so, I’ve begun to work through my favourite lemon recipes.  Last weekend, I came across this one, from 2013.  Don’t be put off by the name.  It’s actually a really simple cake to make and makes an elegant dessert.  When I mentioned it to Caroline, my housemate, she decided that lemon polenta cake was her preferred dessert over Kampot Pepper Brownies.  Actually, that Saturday evening, she declared that it to be her favourite of all my cakes that she’s ever eaten.

I wasn’t so sure.  I wanted rather a lot more tartness, than the original recipe was giving me.  So, I changed the syrup to a drizzle, reducing the amount of sugar and replacing the icing sugar with caster sugar.  The second time round, the lemony tartness complemented the sweetness of the cake beautifully.lemon polenta cake 1

So, let me set the scene, if you are reading this blog for the first time.  It’s June 2013. I’m preparing to leave one life behind and begin a new one in Cambodia.  I’ve just finished working my last week as a Skills Programme Coordinator at the University of Warwick and in the midst of packing up my Redfern flat.  I’m too busy to notice the misery and grief that will soon engulf me.  Thus, I have a much more pragmatic and much less miserable outlook to goodbyes than in this later post.

The last time that I will:

  • Have a tutor meeting
  • Wash my mug at work
  • Walk out the doors in University House as a Student Careers and Skills employee
  • Teach a Warwick Skills Workshop
  • Bake in my redfern kitchen

These last two weeks have been full of ‘last times’. I’ve been trying to acknowledge each one as they come round. It’s not a fully indulgent, let’s sit down and have a cry over them. I don’t really go for that kind of sentimentality. More of a passing nod to say – I saw you and I noticed.ingredients for lemon polenta cake

I realised that you know the last thing I’ve baked in each of my kitchens every time that I’ve moved. I think that I’ve chronicled each move with a recipe.  The countless hours of mundane wrapping and packing into boxes, only made bearable by thoughts of food.  Haha…  Reminisce with me. There was the lemon and ginger cheesecake when I left Cryfield. Then I was up til the wee hours making pots of bramble jelly when I moved out of Heronbank. I made a valiant attempt at using up my bananas and created whiskey, chocolate and banana cake when I moved out of the Subwarden flat in Cryfield 3, which I affectionately refer to as my rabbit warren years. Finally, I have to to move out of Redfern and I baked lemon polenta cake.

lemon zest for lemon polenta cakeprepare the dry ingredients

I’ve done better with each move. David worries less and less about whether I’ll get everything packed up in time for the removal men.

This time I packed away my baking equipment and books the Sunday I finished work; a week before the moving deadline and the day before my CELTA course is due to start.

Which leaves me sitting forlornly at my kitchen table, reminiscing about the huge amounts of baking I’ve done in this kitchen. I don’t know when I’ll be baking again in the next 4 weeks during my CELTA course and I feel bereft.

unbaked lemon polenta cake
baked lemon polenta cake
 

Lemon Polenta cake, adapted from Nigella

Ingredients

  • 200g unsalted butter
  • 200g golden caster sugar
  • 200g ground almonds
  • 100g polenta (try to find the finest)
  • 1½tsp baking powder – if you want it to be gluten free then use the gluten free variety.
  • 3 eggs
  • a pinch of salt
  • zest of 2 lemons

Lemon Drizzle:

  • Juice of 2 lemons
  • 75g golden caster sugar

Method

1. Preheat the oven to 180°C, 350 °F, Gas Mark 4. Grease and line a 23cm springform round cake tin.

2. In one bowl, measure out the ground almonds, polenta and baking powder and give them a stir.

3. In another bowl, add the butter, sugar, salt and lemon zest.  Cream them together, preferably with an electric mixer or a stand mixer, for a couple of minutes until the mixture changes colour and becomes light.

4. Add in an egg and mix.  Then add a third of the dry ingredients from step no.2  All the time, keep on mixing.  Alternate between adding an egg and dry ingredients.  Nigella notes that you can make this cake entirely gluten-free if you don’t have gluten-free baking powder by beating all the ingredients really hard at that this point.

5. Splodge the mixture into the prepared cake tin and smooth it out with a spatula or a knife.

6. Bake in the oven for 40 minutes.

7. Meanwhile, make the lemon drizzle.  Measure out the sugar in a bowl and then add the juice of two lemons.  Stir together until the sugar dissolves in the lemon juice.

8. The cake is baked when it’s coming away from the edges, firm on top but still rather pale colour on top.  Prick holes to allow the drizzle to seep through.  As you can see, a toothpick can look rather unsightly.  But who cares, when it’s this delicious.  Pour the prepared lemon drizzle over the top of the cake.  Leave to cool as long as you can bear in the cake tin before eating it.

squeeze lemons for lemon drizzle

And I have to say – it’s even more delicious the morning after, when the lemons and almonds have had a bit more time to get to know each other and the flavours have melded together.

lemon polenta cake 2

Wholemeal Sea Salt Chocolate Thins

wholemeal sea salt chocolate thins

My colleagues keep asking me when I’m next bringing in some home-baking.  I told one of my colleagues today that I’d made some INCREDIBLE biscuits.  Nope, I hadn’t brought them into work.  Cue – sulky face.  Admittedly, these chocolate thins are so good that I’m not sure that they’re going to make it out the front door.

preparing to cream together the butter, sugar and salt

I took in my coconut, lime and malibu drizzle cake into work one Friday to lift morale.  This is the kind of thing that people do, wherever I’ve worked.  However, apparently not here.  Ever since that Friday, (and I am exaggerating slightly) my colleagues seem to have turned into cake hungry toddlers: I’ve seen some sulky pouting faces when a Friday goes by without cake and I’ve not heard the end of:

“Friday is cake day *hint* *hint*” – to which I answer, “Oh, what are you bringing in?”

“When are going to bring in some more cake?” — “When you buy me some butter/eggs/flour.”

“I haven’t seen biscuits for a while.” — “There is a supermarket down the road…”

What is this?  A simple act of voluntary cake sharing kindness erupting a longing for home-baked sugar filled delights.  They even complained that I didn’t bring in a mushy, underbaked banana cake because they’d have appreciated it in any form.

soft dough for wholemeal chocolate thins

Anyway, I do find my colleagues’ reaction hilarious and affirmative.  And … well, as they opened the door to trying out my baking experiments, successes and disasters, I brought in some spiced chocolate banana cake that had gone wrong.  It looked like a brownie but it tasted medicinal, like cloves and nutmeg.  Not all of them were impressed with that offering.  Not that that was a deliberate move at all.  But they had requested the disasters… So, *teehee* I wonder how long their enthusiasm for my baking will last?

take a spoonful of chocolate wholemeal dough

As there are rather a lot of us english teachers at the school, not everyone gets a piece of whatever’s been baked.  One day, one of my colleagues realised that she’d missed out on all of my cakes.  Fortunately for her, she feeds me cakes and biscuits from her ‘ot loi’ (khmer for no money) shop.  So, when she asked me to bake something for the end of term and I’d run out of eggs to bake a cake, I came up with idea of baking these gorgeous chocolate wholemeal thins, that I’d seen on the back of Allinsons Plain Wholemeal Flour.

roll it lightly into a ball

Once I’d baked one batch, I realised that I very quickly needed to make another.  They’re so wholesomely, deliciously more-ish and have that glorious nutty flavour imparted from the wholemeal flour.  So, I did.   Then later that day, I had this flash of brilliance that by adding sea salt would lift them to the realms of epic and add even more nutritional value.  That’s how my brain works late at night.  So, into the mixture went a conservative quarter teaspoon of fine sea salt.  That’s all the recipe needed for the sea salt to bring out the chocolate flavour and add a touch of sophistication.press down lightly with a fork

A cautionary note if you want to try this recipe but don’t have any sea salt.  Table salt has a much stronger flavour than sea salt.  I haven’t tried it with table salt, but from previous experience, I’d add half the amount when using table salt.

Jonathan and Emily in Cambodia
Jonathan and Emily, who travelled many, many miles to adventure in SE Asia, were taste-testers for this bake.

You can bake these without the sea salt.  Just omit the salt.  They’re really good.  But just so that you know.  I trialled both recipes on my resident taste-testers last weekend, Emily and Jonathan who were visiting!   There were barely enough biscuits left to test out on a family of 6 later on, who I watch the GBBO together with.  They unanimously preferred the sea salt chocolate thins.

Wholemeal Sea Salt Chocolate Thins

Wholemeal Sea Salt Chocolate Thins, adapted from the back of the Allinsons Plain Wholemeal Flour Packet.  Thankfully can also be found on Baking Mad.

Makes between 24-26 chocolate thins

Ingredients

  • 125g unsalted butter
  • 50g golden caster sugar
  • 1/4 tsp fine sea salt and a bit more to sprinkle on top later
  • 125g plain wholemeal flour
  • 25g cocoa powder

Method

1. Preheat the oven to 170ºC/ 340ºF/Gas Mark 5

2. Cream together the butter, sugar and the sea salt until light and fluffy.  This normally takes between 3-5 minutes.

3. Add the cocoa powder and wholemeal flour and mix until it comes together in a soft dough.

4. Cover and let it rest in the fridge for at least 15 minutes.

5. Prepare a baking tray with baking paper.  Take a teaspoon of the mixture (roughly between 12-16g) and lightly roll it into a ball between the palms of your hands.  I say lightly to avoid overworked dough, resulting in tough wee biscuits.  And hey, they don’t have to be perfect balls.  You’re going to be pressing them down with a fork anyway.

6. Use a fork to press each ball down.  If the mixture starts to stick to the back of the fork, lightly flour the back of the fork and that will prevent it.  Sprinkle a wee bit of salt over each biscuit.

7. Bake in the oven for 15 minutes.  Check at 10 minutes, in case you’re oven bakes things super fast.
8. Leave to cool on the baking tray until the biscuits are cool.  Then gently transfer onto a wire rack to cool completely.  They’ll keep in an airtight container for at least 3 days.  They’ve never lasted past the 3 day mark with me and in my experience, they get a bit crumblier as each day passes.

Did my colleague who pushed for an eggless bake get one?  Oh yes.  She got a biscuit when I handed them out on the last day of term.  Then she cheekily reached out and took another.

The alternative bake: wholemeal chocolate thins without sea salt

Linda Bareham’s Portuguese Pork and a new abode!

Linda Bareham's Portuguese Pork

First of all, sorry that I haven’t posted in a long time.  Three very important things have happened.

  1. I moved into my very own apartment for the first time since moving to Cambodia.
  2. After my holiday in the UK, I’ve been injected with a new dose of enthusiasm to embrace life in Cambodia with all it’s ingredients and flavours.
  3. I started a new job.  I’m now an English Language Teacher at a Language School in Phnom Penh.

The third point is very important.  It goes a long way in explaining why I haven’t posted anything on the blog in recent months.  I’m really enjoying the work but adjusting to a new job is taking up a lot of my energy.  Even more so, as I’m teaching every evening during the week.

Portuguese pork ingredients

But, excitingly it’s the first and second points that motivated me to make more use of local ingredients and cook this dish.  Finally having my very own space for the first time in 10 months was so exciting.  I even baked Orange and Cardamon shortbread to herald in this new space that I could call home (which I’ll post once I’ve perfected the recipe).  Admittedly, I probably should have been putting my energy into packing boxes when I made them.

IMG_5352

what actually happens in my kitchen

My new kitchen comes equipped with a two burner gas cooker, typical of many Phnom Penh kitchens.  So, recently, I’ve delved back into Linda Bareham’s One Pot cook book and discovered recipes that I can make easily here.  I realise that I’ve written about the adjustment to sourcing various ingredients for baking or learning various processes because I can’t find the ingredients in the form that I want.  Well, it’s been a similar thing for cooking with local ingredients here, or perhaps it’s been an even greater learning curve.  I like cooking with local, seasonal produce.  Back in the UK, I would quite often ask market stall holders how I could with new ingredients.  But, to do that in a foreign language with unfamiliar ingredients is quite a challenge.  It took me 6 months to brave buying fresh meat from the market.  That may sound silly to you.  However, imagine a market place, where there are various meat stalls.  Some have live chickens, plucked chickens or various slabs of pork meat, hanging from meat hooks.   Then, add the smell because, of course, it’s all unrefridgerated and unpackaged.  Now, can you picture the flies lazily circling round before resting on one piece of meat and then moving onto another.  I’m just not used to it, coming from the UK.

Spinach wrapped in a banana leaf

So, I asked a lot of questions to khmers and seasoned expats before plucking up the courage to venture out on my first solo meat shopping trip.  Here, the recommended wisdom is to go fairly early in the day, before 10.30-11am.  Prod and smell the meat to know whether the meat is fresh or a day old.  I’m still learning how you do that without insulting the seller.  But then, there’s the added complication of language.  How an earth do I say chicken breast in khmer?  How do you ask for it without the bone?  How do I make sure that I don’t get ripped off by a market seller out to make a lucrative deal from an unsuspecting foreigner.  That first time when I bought fresh chicken breasts from the market, I spent an hour deboning the chicken breasts, when I got home.  That didn’t stop me from celebrating it as a major achievement.

chop pork into 1inch chunks

In fact, the first time I made this dish was the first time I’d ever bought pork from the market.  I couldn’t tell you what cut of pork I ended up bringing home, but I think that it was pork fillet.  I made it for my Simon and Becci when they had just moved house.  We all declared the dish a success.  Then I made it again with the addition of spinach because I was craving more greens in my diet.  This time, I served it to some of my khmer friends and they liked it too.  Hurrah!

pork in a cumin and lime bath

I adapted the recipe slightly.  I substituted limes for lemons and added a wee bit more heat by adding in more chilies.  I try not to cook with MSG and the khmer ‘knorr’ chicken stock powder is full of it.  So, I substituted sea salt for chicken stock, or make your own stock, if you want.  Linda specifies red onions, but I can only buy shallots here.  I’ve used shallots and white onions, depending on what I had in the fridge.  I’ve specified how much garlic to use, if it’s a normal-strong garlic bulb.  I find that the local khmer garlic is a much milder variety, so I’ve also taken to doubling the quantities of garlic specified in recipes.  And apparently it helps to ward off the mosquitoes.

IMG_5746

Linda Bareham’s Portuguese Pork to serve 4 people, as adapted by me.

Ingredients

  • 400g pork fillet
  • 1tsp ground cumin
  • Juice of 3 limes
  • 3 small red chilli peppers
  • 2 onions
  • 2 tbsp olive oil
  • 6 cloves of garlic
  • 500ml boiling water with 1tsp sea salt or 500ml chicken stock
  • 2x 400g tin of chickpeas, drained
  • 150g fresh coriander
  • 300g spinach, washed
  • salt and pepper to season

Method

1.  Chop the pork into 1 inch chunks and place them in a bowl.   Add the cumin and the lime juice.  Mix thoroughly.  The lime juice will help soften the meat.  Set aside in the fridge while you prepare the other ingredients.

2. Finely chop the onions.  Add the oil and a wee bit of salt to a medium sized pot.  Gently fry the onions for 10 minutes so that they’re softened with a little colour.

3.  Meanwhile, finely chop the garlic.  Slice the chillies fairly small chunks.  I didn’t bother deseeding them because I wanted to add a bit of heat to the dish.  Add them to the onions and cook for 4-5 minutes.  Stirring occasionally and watching that they don’t burn. Add a bit more oil if needed.

4.  Take the pork out of it’s lime bath and add it to the pot.  Don’t throw away the lime/cumin juice!  You’ll use it again in 5 minutes.  Stir the pork so that it colours evenly.

5.  Add the boiling water (or stock if you’re using), lime/cumin juice and chickpeas to the pot.  Turn up the heat and bring it to a boil.  Then turn down the heat and let it simmer.

6.  Season with salt and pepper to taste.  Linda assures you that there’s a lot of seasoning required.  In the end, I found it easier to crush and finely chop some whole black peppercorns and add them in, rather than grind, twist, shake with a pepper mill.  I agree with Linda.   You’ll need a lot of pepper.

7.  As I can’t buy a bag of spinach leaves easily, I chopped and discarded the bottom bit off my spinach stalks, gave them a thorough wash and added the spinach leaves and stalks to the pot.  Finally, add roughly chopped coriander leaves and stalks.  Et, voila.  Serve with a wholesome crusty loaf or baguette.

Portuguese Pork with spinach

Multi-seeded Wholemeal Bread

Multi-seed wholemeal bread

Multi-seeded wholemeal bread is by far the best thing that I bake here in Cambodia.  It’s better than any cake, biscuit or pie that I’ve made and any macaron that I’ll attempt to make in this humid heat.  I’ll give you three reasons why.

  1. It tastes nuttily wholesome and super-yummy.
  2. I love wholemeal bread and I’ve yet to be able to buy wholemeal bread that tastes like proper British wholemeal bread, anywhere in Phnom Penh.
  3. You can’t go wrong with it.  When your oven has no temperature gauge (like mine), you know that you’ll be safe whacking the oven on the highest heat and leaving the dough to bake in the oven without fear of sinking, like you’d get in a cake.

Ingredients for Multi-seed wholemeal bread

It took me a few months to find wholemeal flour, mind.  I came across farine du blé noir and wholewheat flour on the shelves in Lucky Supermarket and stood scratching my head as to whether either of them was wholemeal flour.  I was pretty sure that wholewheat flour was the american name for wholemeal, but farine du blé noir?  As I discovered later with the help of google search – that’s french for buckwheat flour.  Not exactly what I was looking for.

Then it took another few weeks before I could bake the bread.   My left knee twisted one November evening as I was lying in bed and I was in excruciating pain.  I couldn’t walk, straighten my knee or put any pressure on it.  Visits to multiple doctors, an X-ray and  MRI scan later revealed severe inflammation and fluid caused by a fall off a motorbike several months beforehand.  Walking on Phnom Penh’s uneven surfaces, hopping on and off tuk tuks and motos had served to aggravate the injury.  My mum advised me not to do any baking that required standing up, and have you tried to hand knead dough sitting down?  Not worth the effort if you’re as short as me.  So, I was pretty much laid up on a sofa with an ice-pack on my knee for the best part of a month and a half.

ingredients for wholemeal breadrough looking dough

2 weeks in, I was pretty bored.  So I hobbled out on my moto to buy some wholewheat flour from Lucky and made my first wholemeal loaf.  It was overproved and underbaked.  But when I tore off that first piece of bread and bit into it, I was the happiest little baker in the whole of Cambodia.  I’m pretty sure no-one rivalled my happiness.

Then my tastebuds started hankering after a multi-seeded loaf, like Warburtons Seeded Batch.  I was reading Richard Bertinet’s Dough and realised that I could just experiment by putting some seeds into my bread recipe.  And that’s how I came up with my multi-seeded wholemeal bread recipe, which as you know, is the BEST thing that I bake in Cambodia.

combine the ingredientsadd the dough to the seeds

I think that part of the reason for why the bread tastes so good is that I’ve always allowed this bread to have a slow rise in the fridge to give the flavours a longer time to mature.  However, I don’t think that it’ll ruin the flavour of the bread too much if you a) don’t have enough room in your fridge or b) want to biting into it within 3 hours from start to finish.  

dough ready to pop into the fridge

I find that I can’t eat a whole loaf in time before the humidity causes the mould to break out on my bread 🙁 !  Thus, I’ve taken to making two smaller loaves and freezing one loaf once I’ve baked it.

So, here’s the scrumptious, nuttily, wholesome Multi-seeded Wholemeal Bread recipe, with it’s foundations in Richard Bertinet’s Dough.

Ingredients

  • 250g wholemeal flour – use strong bread flour if you can.
  • 250g strong white bread flour
  • 7g fast action yeast
  • 10g salt
  • 350g tepid water
  • 30g extra-virgin olive oil – but normal olive oil will also work too
  • 100g various seeds – I used equal measures of pumpkin, sunflower, chia and sesame seeds

Method

1. Measure out both flours and yeast in a medium-large bowl and mix.  Then mix in the salt.  I’m in the habit of adding the salt at this point so that it won’t touch the yeast.

2. Add the water and oil and stir to combine.  I use a scraper at this point to combine the ingredients, but you can use just your hands. It’ll make a wet dough but don’t be scared by it. The wetness of the dough should ensure that it’s a soft texture. Turn it out onto your work surface and knead. If you’re like me and a bit slow at kneading, it’ll take about 15-20 minutes. Of course, you could use a machine fitted with a dough hook. In which case, put all ingredients for the dough into a large bowl, ensuring that the yeast and salt are added to opposite sides of the bowl. Mix on a slow speed until it all combines and then move it onto a medium-high speed for about 10-15 minutes until the dough is smooth and elastic.

3. Measure out the seeds into the same mixing bowl that you used for the bread dough.  Add the kneaded bread dough to the same bowl and work the seeds into the dough in the bowl.  Sometimes, for the last few minutes, I’ll finish combining the seeds into the dough out of the bowl .

Top Tip: Work the seeds into the dough in the mixing bowl to prevent the seeds from escaping everywhere.

4. Pour a little bit of vegetable oil into the bowl and lightly cover the dough with oil. This helps the dough not to stick as it rises. Cover the bowl with cling film and leave it for an overnight prove in the refrigerator.  Alternatively you could leave in a warm place for at least 1 hour and doubled in size.

5. Prepare your baking tray or loaf tine.  Once the dough has doubled in size, gently place it on the work surface and gently press down on the dough with your fingers to release the gas.  Do this into a rectangular shape.  I find this works just as well as punching the dough – a tip I learned from Richard Bertinet.  Strengthen the dough by folding the dough a third of the way down into the middle, press down with the heel of your hand.  Repeat with the other side, then fold over the middle and press firmly with the heel of your hand.  The dough should feel firmer and stronger.

6. Lightly flour the surface to shape the dough.  For a round loaf, like in the photos, I tuck the ends into the middle of the bread, turn it over so that the tucks are on the bottom, keep one hand as still as I can partly under the cob and then use my other hand to turn and shape the dough into a tight, round shape.  Here’s a link to The Fresh Loaf on shaping dough, as a visual aid.

7.  Transfer onto a baking tray/loaf tine (depending on the shape of your loaf), cover loosely with cling film or a tea towel, until doubled in size.  This might take 40 mins – 1.5 hour.

8. Meanwhile, preheat the oven to 250°C/480°F/Gas Mark 9.

9.  When the dough is ready.  Cut deep, clean incisions to help create shape and to help release gas.  On this loaf, I made a big hash sign (#) but made the mistake of not flouring my knife beforehand, so the dough stuck to the blade.  Lightly flour the top of the bread.

10.  Spray the inside of the oven with water to create steam and put the dough into the oven.  Bake for 10-15 minutes at 250°C/480°F/Gas Mark 9 then reduce it to 220°C/425°F/Gas Mark 7 for another 40 minutes.  Check whether the bread is ready – it should make a hollow sound when you tap it’s bottom.  If not, set the timer for another 10 minutes and check again.

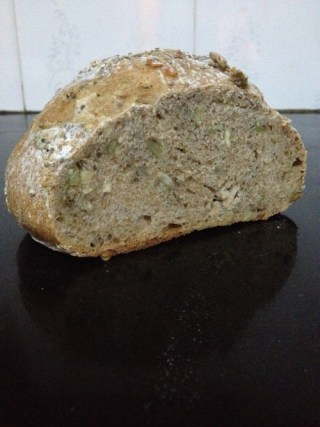
multi-seed wholemeal bread

p.s. Oh and what happened to my left knee?

I’m delighted to report that it’s on the mend.  Have I told you that Claire (of the white chocolate, oat and raspberry cookie fame) is also a physiotherapist?  She gave me some physio advice and taped up my knee while I was in New Zealand. I’ve faithfully been doing my exercises twice a day and resting it up lots.  However, I reacted to the tape so progress has been slower than I’d have liked.  I’ve not been able to dance or jump or walk for 10 minutes without regretting it the next day.  Last week, I went to a conference in Singapore called Kingdom Invasion, where they prayed for healing for my knee.  Whilst I was in Singapore, my knee got a lot better.  Good enough that I can jump, dance and swim breast-stroke without pain.  I’m still doing my physio and not overdoing physical activity – but the knee is definitely on course for a complete healing.  I can’t wait for the day when I start running again.  Praise God!

Pip and me leaping off the ledge for my photo of the day
Pip and me leaping off the ledge for my photo of the day at Adventure Cove, Sentosa

Chinese Peanut Cookies

Chinese Peanut Cookies

I’ve discovered that peanuts lose weight.  No kidding.  I’ve been roasting and peeling kilos of peanuts for this recipe and this is my unintended learning outcome.  Seriously, somehow in the process of them getting hot in the oven and unzipping their jackets, followed by a gentle coax to peel it off them a bit later, they are lighter than when I first had them.

I know.  When I describe it thus, it’s SO obvious.  Of course, those papery skins weigh something.  But who would have thought that peanut skins weigh so much!  300g of raw shelled peanuts = 254g skinned and roasted peanuts.

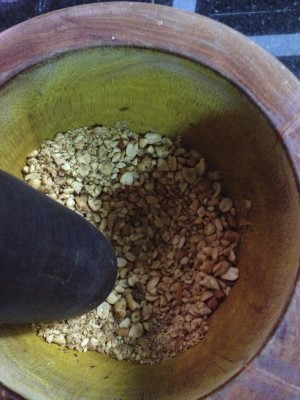
grinding up the peanuts

Given the plentitude of peanuts in Cambodia, and that I fell in love with these small morsels of rich, peanutty, salty, sweetness the moment I bit into my first one, I’ve been testing one chinese peanut cookie recipe after another, ever since I arrived here.  That was 5 months ago.  In fact, I’ve begun to wonder whether my friends are sick of me testing it out on them, but too polite to tell me.  ‘Try this cookie and this one.  Can you tell me if you can taste the difference between them?’  But, truth be told, every recipe I tried was either a tad too sweet or just didn’t recreate that cookie-crumbling-then-melting-in-your-mouth sensation.

So, I experimented with sugars and flours and ended up with this recipe.  I replaced the icing sugar with caster sugar to remove the rather cloying sweetness of the cookie and introduced cornflour to the mix.  (I use cornflour in my shortbread recipe to create a crumbly texture.)  Then I discovered that if you don’t eat the cookies for at least 2 days, the cookies soften and thus melt in your mouth regardless of whether you added cornflour to it.  Unfortunately, they don’t tend to hang around long enough for that to happen.

more peanut cookies

They’re coming with me to my friend Amy’s last-of-the-15-days-of-Chinese-New-Year party on Friday.  At first, I thought that this was a solely Chinese celebration, until I asked my mum. Nope, apparently in Korea they also have a special meal to mark the 15th day, the day of the full moon.

In Amy’s invite she asked:

‘The festive food Chinese people eat during this time all have symbolic meaning… so please bring a dish (fish / chicken / peanuts / cake / oranges / noodles / pineapple).”

Well, I googled ‘peanut chinese meaning’ and found this interesting site Food Symbolism during Chinese New Year. Peanuts symbolise health, long life, multiplication in wealth and good fortune etc etc.  So, it’s clear.  This Friday will be an auspicious occasion to debut my version of Chinese Peanut Cookies.

Peanut cookies lining up for the oven

I’ve adapted this Peanut Cookie recipe from Kitchen Tigress

Ingredients for 40 cookies

  • 200g peanuts, roasted and peeled & a handful (50g or so) to decorate the cookies
  • 150g plain flour
  • 50g cornflour
  • 150g caster sugar
  • 1/2 tsp salt
  • 130ml groundnut oil (also known as peanut oil in some countries).  If you don’t have this then vegetable or sunflower oil also works
  • 1 egg, beaten

Method

1. Preheat the oven to 180°C/350°F/Gas Mark 4.   Line 2 baking trays with baking paper.

2. Roast and skin the peanuts.  If you already have roasted peanuts, rinse off any salt on them and dry them.

3. Grind the peanuts into a fine-ish powder in a food processor*.  They’ll clump together towards the end as the oil is released.  Don’t worry about it.  When you’re done just break up the clumps with your fingers and when you add in the sugar.  *Initially, I didn’t have a food processor (now I use my Bamix) so I pounded them into a powder with a pestle and mortar.

4. In a separate measure out the cornflour, flour and salt.  Sieve it before adding it to the peanut and sugar mix to ensure a lighter texture.

5. Pour in the oil and mix together with your hands until it comes together away from the edges of the bowl.

6. Take a tablespoonful of the mixture, roll it into a ball and flatten it lightly on the baking tray.  If it helps, each ball weighed between 15-20g when I weighed mine out.  Carefully position a peanut half on the top of the peanut balls and brush the tops generously with beaten egg.  The beaten egg gives them a beautiful shine and colour.

7. Bake in the oven for 12-15 minutes until golden brown.

8. Allow them to cool for 2 minutes on the baking tray and then transfer them to a cooling rack to cool completely.

It is seriously tempting to eat these while they are still hot, so watch that you don’t burn your mouth when you do.  Enjoy and Happy Chinese/Korean New Year!

Claire’s cookie: Raspberry, White Chocolate and Oat Cookies

Raspberry, White Chocolate, Oat Cookies

Over Christmas and New Year, I visited my friend Claire in New Zealand.  It was my first trip to a first-world country, since I’d moved to Cambodia.  And boy, could you tell!  If you know the story of country mouse (moi) visiting town mouse (Claire).  Well, that says it all really…  The first night that I got there and I was snuggling into my bed under my duvet after a hot shower, I was beaming.

I also enjoyed:

1. Larking about with Jen and Claire.

Fish and Chips at the famous Mangonui Fish Shop with Claire and Jen

2. Drinking in the greenery, mountains and sheep!!!

Reminds me of Scotland. Mount Maunganui - 10 minute cycle from Claire's house.
Reminding me of Scotland. Mount Maunganui – 10 minute cycle from Claire’s house.

3. Claire’s hospitality.

Claire baking the cookies in NZ
Claire baking the cookies

One evening we were having quite a frank discussion together with her housemates about what can hold us back from doing things or giving it a go.  I’m not referring to procrastinating doing the ironing or filing away the bank statements.  You know what I mean: shying away from ‘that’ conversation, not putting your hand up to ask the conference speaker a question, refusing to speak a foreign language.  So, what is it for you?  Is it the fear of losing, the dislike of being in the limelight, the discomfort of your brain cells having to work so hard, the embarrassment of looking like a fool?   We all owned up to at least one of those things.

Ingredients for raspberry, white chocolate and oat cookies

Then Claire very matter-of-factly put out there, that one of the things that helps her to just give things a go, is that she gets a kick from doing something but not doing it well.  She gave her own example that she’ll never be a pro-surfer but nevertheless, she keeps surfing and enjoys it a lot.   Is she slightly kooky for owning such an attitude?  Or is that one of the secrets of relishing life and taking hold of opportunities when they present themselves?  I leave that to you to mull over.

Frozen raspberries

Undoubtedly, her philosophy contributes partly to her willingly trying new ingredients, techniques and recipes.  But let me just say – there is nothing not good about her food.  In fact, her chocolate cookie recipe got me published in a magazine.  She inspired me with how she’s embraced the Kiwi food culture whilst she’s been there.  The Paleo diet, the almond milk…

And Jo Seagar.  I’d never heard about Jo before but she’s a big star in the Kiwi culinary world.  Claire and her housemates love her recipes, and I’ve taken note of her name now.  Claire adapted this cookie recipe from one of Jo’s recipes and now it’s known as ‘Claire’s cookies’ by her friends.  Perhaps because she makes them a lot, and they are incredibly deliciously and more-ish.

white chocolate shards

I know because she made them when we got back from our camping trip in Russell. Her housemates and I pretty much gobbled up the whole batch in one sitting. (I hasten to add that she did halve the recipe.)  Even so, she was amazed that they went so quickly.  Seriously?  They go down so well with a cup of tea.

Claire’s genius was replacing the glacé cherries in the original recipe with raspberries.  White chocolate can be sickly-sweet sometimes.  The sharp, sweetness of the raspberry cuts through this and complements the white chocolate beautifully.  The oats provide texture and bite.

Stir in the dry ingredients

When I made these cookies back home, I made the mistake of stirring in the raspberries too vigorously, breaking up the raspberries so that the mixture turned pink.  Pretty, but not tasty.  The flavour of the raspberries dissipated and they weren’t nearly as nice as I’d remembered them to be.  The two photos below illustrate the difference.  The photo on the left was my first batch of cookies and I broke up the raspberries too much.  The second batch (photo on the right) was much better.  Take note, gently mixing in the raspberries is the secret to the having bursts of raspberry in your mouth.

Raspberry, White Chocolate and Oat cookies attempt 1Raspberry, White Chocolate, Oat Cookies attempt no. 2

I also found out that in Phnom Penh a) frozen raspberries are difficult to source and b) cost $22 per kilo from Thai Huot!  So, when you make these in a temperate climate where raspberries grow naturally, remember $22 and just how lucky you are.

Raspberry, White Chocolate and Oat Cookies adapted from It’s easier than you Think by Jo Seagar

Makes 30 large cookies or 40 slightly smaller-medium sized cookies

Ingredients

  • 250g butter
  • 175g sugar – Claire uses ordinary white granulated sugar and they turn out amazing. I used a combination of white and light brown sugar and they were also good. Moral of the story – use whatever sugar combination that tickles your tastebuds.
  • 3 tbsp sweetened condensed milk
  • 1/2 tsp vanilla extract
  • 140g oats (jumbo oats are even better, but I only had normal rolled oats)
  • 225g plain flour
  • 1 tsp baking powder
  • 250g white chocolate chopped
  • 150g raspberries, fresh or frozen

Method

1. Preheat the oven to 170°c/325°F/Gas Mark 3. Line baking trays.

2. Beat the butter, sugar and condensed milk together until the mixture is pale and smooth.

3. Stir in the vanilla, rolled oats, flour and baking powder until the dry mixture has just combined with the wet mixture above.

4. Gently mix in the white chocolate and the raspberries.  Be careful not to break up the raspberries too much.

5. Place a tablespoonful of mixture on the baking trays and press flat with a wet fork.  They will spread out slightly so leave a couple of fingers width between each tablespoonful of mixture.

6. Bake in the oven for 20-25 mins until golden brown. Allow to cool for 2-3 mins on the trays and then transfer to a wire rack to cool completely.  Apparently they will keep in an airtight container for 10 days to 2 weeks.  They lasted less than 5 days in mine.

 Mmmm... bringing back memories of kiwiland

Making mincemeat of khmer (and two suet free mincemeat recipes)

Ha! If only.  It’s more like I’m butchering the language, particularly since I’ve been away from Cambodia for almost 3 weeks.  But, indulge me in my choice of slightly obscure title.  When I came up with it before Christmas, it seemed like the perfect lead into giving you an update on my language learning and include a Christmas mincemeat recipe, or two, at the same time.  Then my NZ holiday scuppered the timings, ever so slightly…

Mincemeat v.1

Well, 3 months into learning khmer and my efforts have been paying off to varying degrees of success.  It’s nice to get comments from people who kindly tell me that I speak khmer well, or that I know a lot. I realise that we are generally our worst critics when we are learning language, but honestly, their feedback couldn’t feel further from the truth.  I make a lot of Khmers laugh at how I trip over words, mix up words that sound similar (think bye and bike), struggle with the pronunciation of peculiar sounds that are foreign to the english and korean tongue.  To illustrate the kinds of mistakes that I’ve made, look below:

mürl (10 000) and mürn (to watch)
toe’it (small) and doe’it (similar/like)
ban cha’oo (Vietnamese pancake) and ban ???? I still don’t know what it is that I say.  But when I say it, it’s a swear word apparently. Can you imagine how nervous I am about asking for one from a seller?

It’s not just the laughs that make language learning so enjoyable. I think that I’ve said before how I’m really enjoying learning this very literal language. The other day, I learnt that the khmer for the colour burgundy is poah chreuk chee’um. The literal translation is ‘the colour of pig’s blood’; not quite as majestic sounding as burgundy, the word we use to describe a regal red colour!

IMG_3713

More recently, my improved language skills has meant that more and more Khmers feel able to have a ‘proper’ conversation with me.  Unfortunately, I only understand 50% of what they are saying!  So, I have to make up the rest of what they have said because I don’t want to break the flow of the conversation.  As you can imagine, this could lead to all sorts of misunderstandings.   I think that the real problem is with me not wanting to lose face.  I’ve been doing this in korean for such a long time that it’s become some sort of default setting in me.  In korean, we call this pretending, 아는척 – ah-neun-chug.  

Some people are much braver than me and stop to clarify meaning.  I’m going to have to adopt some of their bravery to force myself out of this habit.  You’ll have to imagine my big sigh, just now, in this realisation and resolution.

tart, tart, granny apples in the absence of cooking apples

Nevertheless, even with all my bad behaviour and language, the Friday before Christmas, I sat an exam, passed and graduated from the Survival Khmer language course. Hurrah! So, I celebrated by getting on a plane and going on holiday to New Zealand for a few weeks! Yeah 🙂 because that’ll really consolidate my language learning!

The all important lime zest and lime juice!

But my time here isn’t all about language learning is it?  I bake a lot too.  Simon had asked me to make some Christmas refreshments and baking for the church’s Christmas service.  So, I made two versions of mincemeat based on the availability of ingredients I found, or lack thereof!  Andrew gave me this recipe and normally I make this recipe with sultanas, currants, citrus peel and most importantly fresh cranberries. But my efforts to locate any cranberries, fresh, dried or frozen, in Phnom Penh have yet to bear fruit. Pun unintended. 😛  Even with the deviation from the original recipe, these mincemeat recipes were a hit and I was asked for the recipe – particularly for version 2.

Throw all the ingredients into the bowl

And that was my astonishing discovery whilst recipe testing.  The vast majority of Khmers like mincemeat, even amongst children.  Of my Khmer taste testers,  I found that only 1 in 20 didn’t like how it tasted.  Is that the same in the UK too?  Have I been long under the wrong impression that 50% of UK population don’t like mincemeat?

Or is it, just that this is just one of the tastiest mincemeat recipes out there?  Lol.  I’ll let you decide in due course.

Mix it all together

I don’t use suet in these recipes.  Instead, I use grated apple to give moisture and bulk.  The advantages of this approach are that you don’t have to cook it and you can use it immediately.  Taste-wise, I think that it’s superb.  It’s fresh from the apples (it’s even better with the cranberries) and zingy from the limes.  The only spice I added was nutmeg.  The nutmeg I used was ground already and thus, I used more than I expected.  Using freshly, grated nutmeg will have a much stronger flavour so add to taste.  You could always add cinnamon, cloves or a hint of ginger.  In future versions, I would like to add some alcohol of a sort, like rum or brandy.  This time, however, I had a budget to stick to.

Jar of mincemeat

Ingredients for Mincemeat v.1
Makes about 650-700g

2 green apples, grated (preferably cooking apples, but any tart green apple will do)
150g seedless raisins
250g mixed dried fruit – the pack I found had glacé cherries, raisins and citrus peel
75g roughly chopped blanched almonds
60g dark brown sugar or muscovado sugar also works.  I used light brown sugar because that’s what I had then added 2 tbsp of dark brown sugar later for flavour.  If I made this again, I’d only use dark brown sugar.
Zest and juice of 1 or 2 limes, depending on their size
2 tbsp orange marmalade or 50g of chopped candied citrus peel
Ground nutmeg to taste – I added 1tbsp in the end but do add it 1 tsp at a time

Ingredients for Mincemeat v.2
Makes about 650-700g

2 green apples, grated (preferably cooking apples, but any tart green apple will do)
150g seedless raisins
150g mixed dried cambodian fruit – pineapple, papaya and mango
75g roughly chopped blanched almonds
50g sunflower seeds
60g dark brown sugar or muscovado sugar also works
Zest and juice of 1 or 2 limes, depending on size
2 tbsp orange marmalade
Ground nutmeg to taste – I added 1tbsp in the end but do add it 1 tsp at a time

Method
Mix all the ingredients together in a large bowl.  You can use it straightaway or store in sterilised jars in the fridge for up to 2 weeks.

Happy helpers learning how to make mince pies

Making Mulled Apple Juice for 100

Mulled Apple Juice

How have I ended up posting about how to make a mulled Christmas drinks for the masses again, this year?  When I left the residential life team in July this year, I thought that I’d also left my mass mulling days behind.  But apparently not.   I’m trying to remember the last time that I made a mulled concoction for like 4 (drinks with friends) or 10 (a gathering) or even 30 (a wee party)… I think that it was maybe 3 years ago for Cryfield Subwarden housewarming?

IMG_3751
Having peeled the first orange the traditional way and spent 10 minutes removing the pith from the peel, I decided to attack the next one with a knife.

 This time it was for our church’s annual Christmas Celebration.  Simon had asked me whether I wouldn’t mind being in charge of the catering side for the event.  He wanted to try out a different way of serving food at big events, so did I think that I could do a drink and some traditional english christmas goodies for 100 people within a $100 budget?  Well, it’s definitely a different scale from what I was used to at Warwick, but I took up the challenge.

Top tip: stick the cloves in the orange peel and then you won't have problems fishing them out later
Top tip: stick the cloves in the orange peel and then you won’t have problems fishing them out later

A bit of online research, excel spreadsheets and visits to various shops ensued and this is  the menu, that I came up with:

  • Mulled Apple Juice
  • Mince pies
  • Iced Christmas biscuits
  • Snow topped Spiced Cake.

The day before the big event, I hailed a tuk tuk and carted to the church:

  • 20 litres of apple juice
  • 12 oranges and some lime peel
  • 140 cloves
  • 80 pieces of cinnamon bark (my mum’s friend had kindly sent me cinnamon bark
  • 600g sugar
  • 1 very large sieve ladle

Unfortunately my pre-arranged mulling helper got the dates mixed up and forgot to turn up.  Just when I was wondering how I was going to make 20 litres of mulled apple juice with my poorly knee, help came in the form of various others who tasted, carried vast quantities of liquids, peeled oranges and decanted many cartons of apple juice.  What a Godsend! 2.5 hours later we were all done.

Mesa, can you see what's going in?
Mesa, can you see what’s going in?

 So, say you fancy mulling a non-alcoholic drink this christmas time.  Then, this one is a definite winner.  It went down really well at our Christmas Celebration tonight.  In fact, I had quite a few people asking me what the ingredients were but unfortunately I still have holes in my khmer vocabulary for words like cloves, cinnamon and peel.

I adapted the mulled apple juice recipe from BBC Good Food because it was the simplest and still garnered good reviews.  Most reviewers said that they didn’t bother adding in the sugar because it was already sweet enough.  It was sweet enough but slightly tart (which I like) for me when I tried it.  But my Khmer tasters said it was ‘jjoo’ (sour).  So, in went the sugar.

Here’s the recipe for mulled apple juice for 8 people, adapted from BBC Good Food.

Ingredients

  • 1 litre apple juice
  • peel of 1 orange
  • peel of 1 lime/lemon
  • 7 cloves
  • 2 cinnamon sticks
  • golden or white sugar to taste – for the khmer tastebuds, I added 2 tablespoons.

Top Tip: Stick the cloves into orange and lime peel.  That way, it’s really easy to fish out the cloves later and you won’t get unwelcome ones ending up in your drink.

Method

1. Stick the cloves into the orange and lime peel.  I used a knife to peel the fruit so that I could get as little of the bitter pith as possible.

2. Decant the apple juice into a pan, add in the orange and lime peels with the cloves, the cinnamon sticks and bring to a simmer on a medium to low heat.  Leave to simmer for 10 minutes.

3.  Sweeten, or not, according to taste.

Chakriya - one of my happy helpers
Chakriya – one of my happy helpers

Water Orange Cat, aka Lime Juice

Curious?

Before I left the UK, I was asked what I was most looking forward to eating in Cambodia.  The first thing that popped into my mind was a drink, lime juice.  I developed a liking for it on my first visit to Cambodia over 3 years ago and now I’m sort of addicted to it.

lime juice

That being the case, I guess it is quite fortuitous that my favourite Khmer word is the one for lime juice, which I learned on my second day here. Ttuk kreu’ik ch’mmaa.  Let me break it up for you:

Ttuk is the word that they use to describe water/liquid.

Lime is called kreu’ik ch’mmaa – orange cat. I think that most citrus produce is a type of ‘kreu’ik‘ – orange and they add a descriptive word after it in order to specify it. Limes get the description cat because the face you pull when you eat a lime, is like a cat. Apparently!  I’m only explaining the language.

Ttuk kreu’ik ch’mmaa.  Water orange cat.

Ingredients for making lime juice

It made me laugh – a lot!  I do love learning languages and there were two reasons why I was so keen to get stuck into learning the language when I arrived.  Of course, my main reason was simply to be able to communicate with people and get around.  Secondly, don’t you think that you learn so much about the culture from the language?  For example, one thing I’ve found out about Khmer is that they love to put words together to make up new words, like they do in German.   Then today, I learned that onions are, ‘k’tum barang‘ which translates literally as garlic french. It led me to ask my teacher whether onions were brought over by the French, and thus not native to Cambodia. He’s a 21 year old who isn’t as interested in food as I am. “Yes” he says slowly, not entirely sure why I am so interested in finding out about the history of onions.

the laborious part of making lime juice

Anyhow, back to ttuk kreu’ik ch’mmaa.  I especially loved Tuesdays and Fridays, when I was living with Simon and Becci because their househelper came round and made a big container of fresh lime juice and yummy food.  Not that Simon and Becci don’t make yummy food – it’s just… ugh… I’m digging myself into a hole.  So, anyways, Simon and Becci had taught her how to make the lime juice and I asked them to tell me.  Then on one bank holiday, I spent an hour making sugar syrup and squeezing the juice of 13 limes.  Perhaps I don’t work out enough, but I really felt it in my hands and arms the next day.

You can vary the amounts of the sugar and the limes, according to how you like your lime juice to taste.  I like it a bit on the tart side and not overly sweet.

cup of lime juice

Ingredients for homemade lime juice – this makes 2.4 litres

  • 200ml of freshly squeezed lime juice – about 8-11 limes, depending on the size of your limes
  • 225g white sugar – caster or granulated
  • 250ml water
  • more water – I make it in 2.4litre bottles (see step 2)

Method

Top tip: make the sugar syrup first so that it has a chance to cool down while you are squeezing the limes.

1. Add the sugar to the water in a saucepan.  Put the saucepan on a low heat and stir until the sugar has dissolved completely.

2. Once the sugar syrup has completely cooled, add the lime juice and pour into an empty container and dilute with water by filling the container to the top with water.

3. Serve poured over ice.

lime juice - ttuk kreuik chm'maa

%d bloggers like this: